
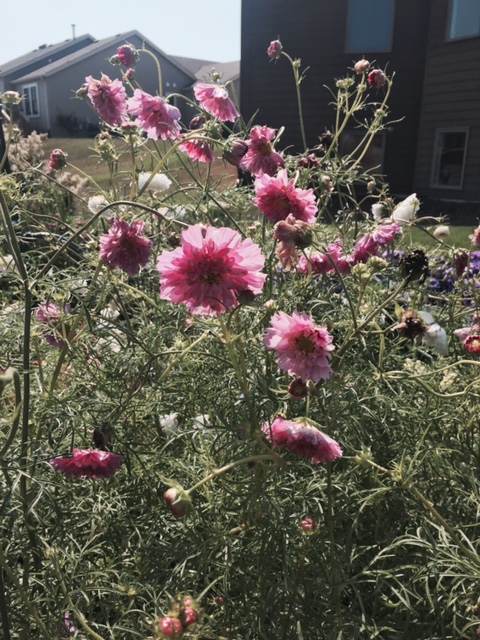
 This past summer I had the opportunity to visit the cut-flower garden of Cheri Carlson. Located on a suburban lot in Kansasville, WI, I was impressed with the number of flowers she is able to grow in a relatively small space. A large swath of perennial and annual flowers greet visitors at the entrance to the property and extend to the back.  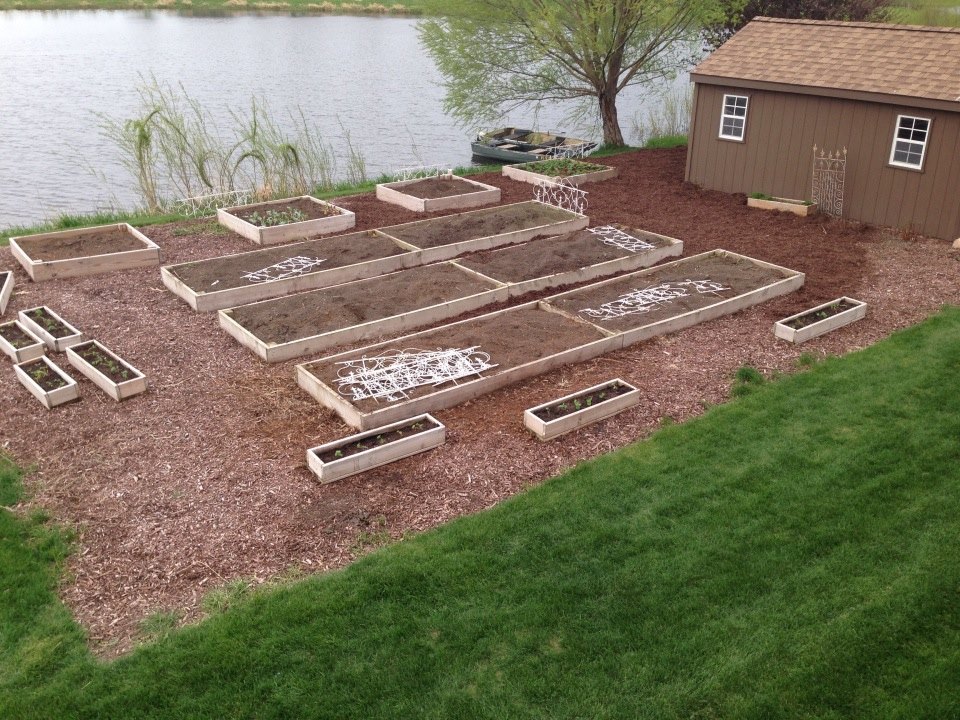 She grows most of her annuals in raised beds. This photo was taken at installation a few years ago. 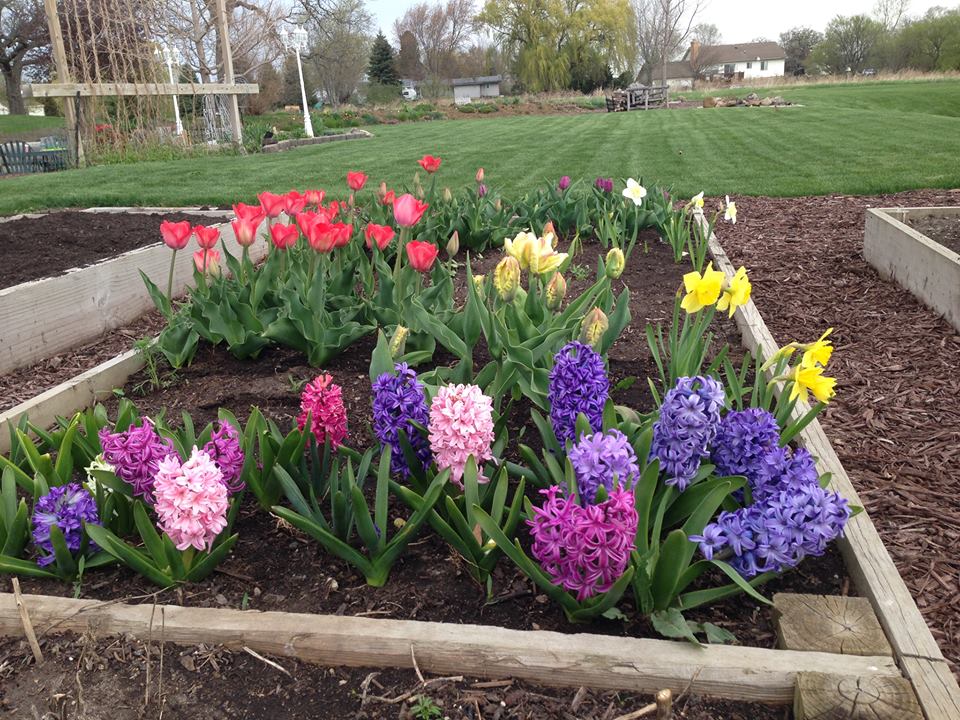 She extends the cutflower-season with bulbs that bloom in the spring. 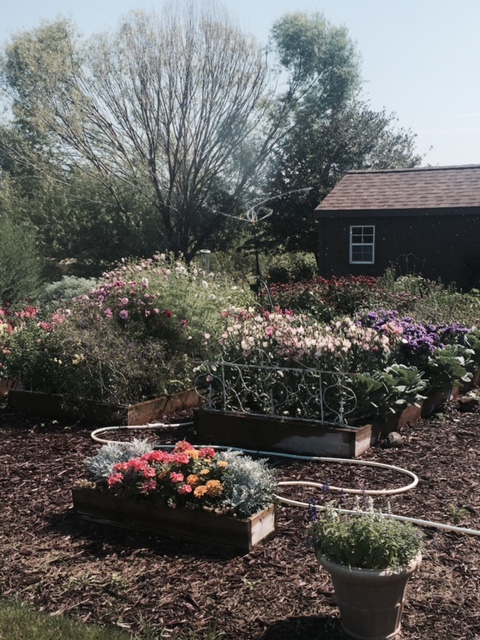 By August, the raised beds look like this (above) . Notice how even the sprinkler adds it's own artful touch to the garden. 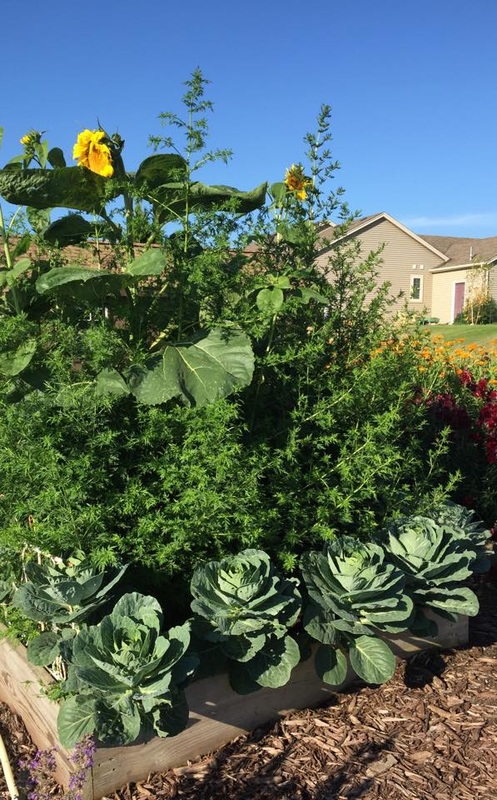 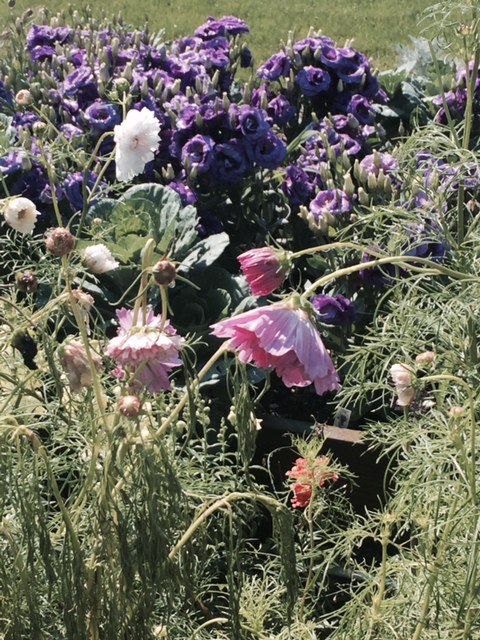 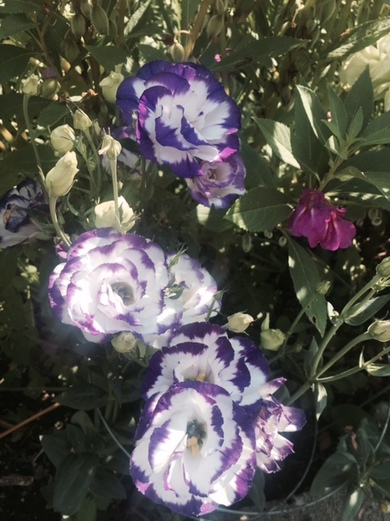 I was smitten with the Lisianthus. 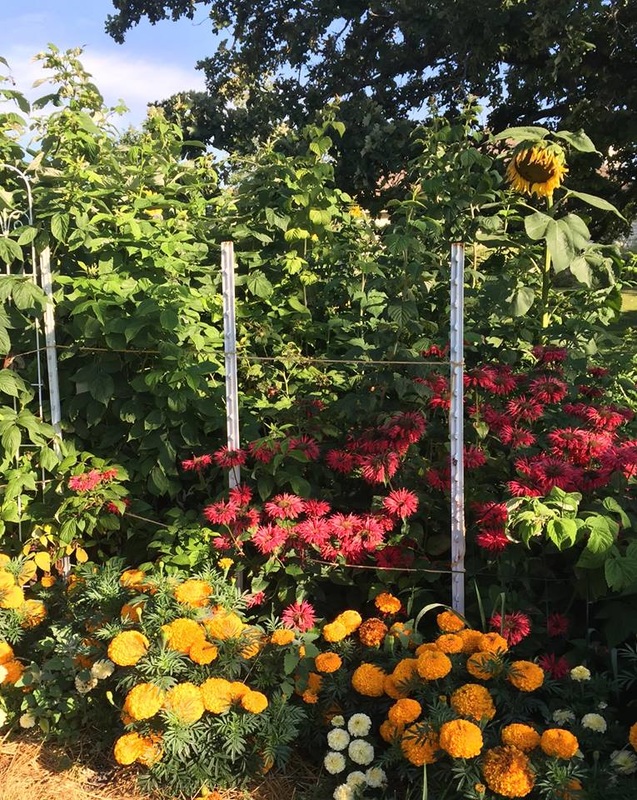 Cheri mulches with straw to help with moisture and weeds. Marigolds detour pests while the red bee balm attracts pollinators. She plants sunflowers to keep the birds busy and away from the nearby raspberry patch. 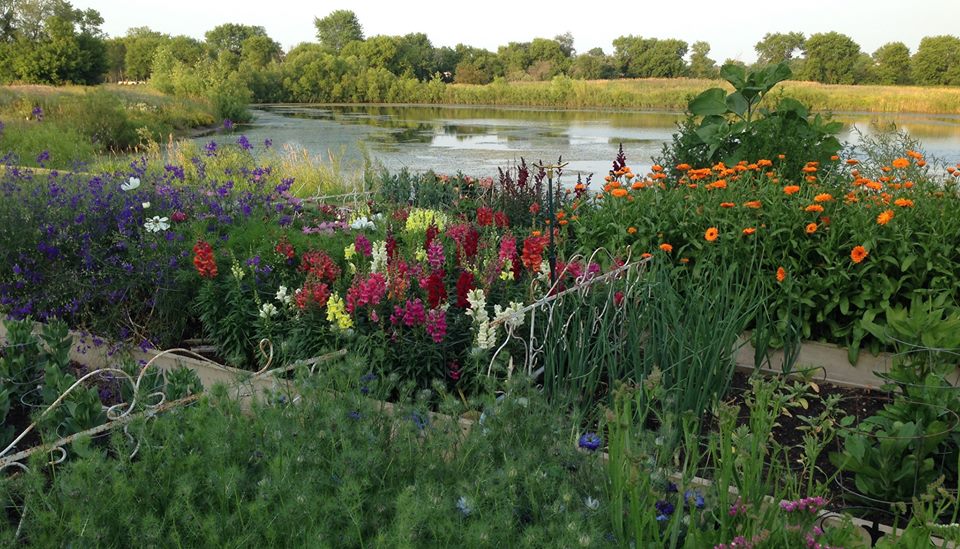  Most of Cheri's flowers end up in beautiful bouquets. 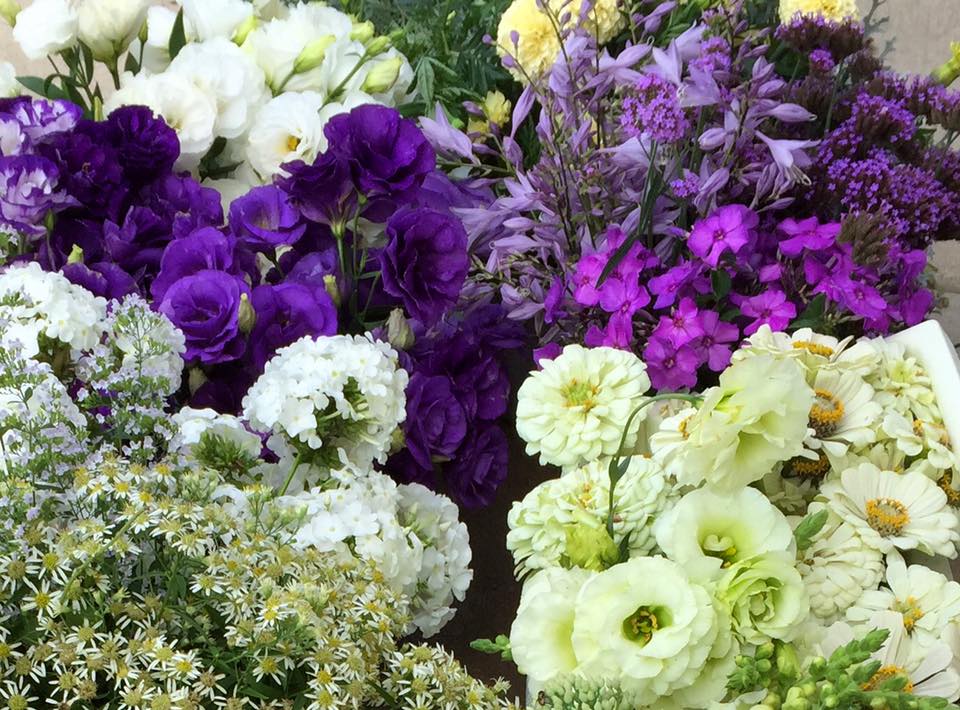 These lisianthus, phlox, zinnias, snapdragons, hosta, and verbena ended up in bouquets for my neice's September wedding. Just breathtaking! I'm inspired to grow my our cut flowers this year. Thanks, Cheri!
- Tracy Hankwitz Horticulturist & BGC Store Manager * some photos compliments of Cheri Carlson
3 Comments
2/12/2016 1 Comment How to Plant Woodies I know it's February and you would rather see pretty, inspiring photos of flowers and ornamental trees than a how-to-plant-a-tree post filled with boring brown, but spring is not far off and soon we'll be out there planting. There is a wrong way and a right way to plant, and when you do it right, you'll have many years of beauty like I have had with this Shasta Doublefile Viburnum pictured above. Sadly, there's always that one tree or shrub (woodies) that slowly looses it's vigor over a period of time. Leaves become more sparse every spring, unfurling to half their size. One might think fertilizer must be the answer, so we feed it and hope that we'll see some improvement. Sometimes that helps, but when it doesn't, we wonder if we should wait one more year, or just declare defeat and plant something new. My guess it that the tree/shrub is slowly strangling itself.  Here is the root ball from a Japanese Maple I dug up last year. It had been planted about three years ago, thrived the first year, showed signs of struggle the second year, then hardly leafed out the third. Look at that thick root and how its wrapping around the root ball - it looks like the hand of death! It most likely began to do this when it was growing in it's pot in the nursery. Actually, it looks like the roots haven't stretched out at all from the original pot shape! That's not good! 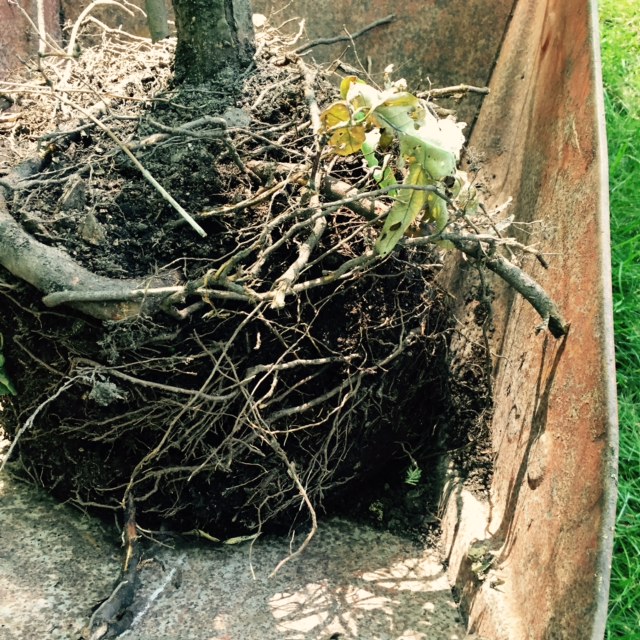 Even the smaller white roots are growing circular rather than stretching out to gather water and nutrients and to help stabilize the tree as it matures. Unfortunately, this tree didn't have much of a chance to flourish. The Right Way to Plant a Tree 1. Dig your hole the same depth as the root ball, but twice as wide. Most roots of trees and shrubs are shallow, within the top 12 inches. By digging the hole wider and loosening the soil, you are helping the roots by creating channels for air and water. And what about amending the soil? It depends on the existing soil. It's best to plant woodies in the native soil that already there. However, if your soil is extremely rocky or heavy clay, amend the soil with compost - I like to use a product called 'Nature's Blend' made with alfalfa, humates,and compost. 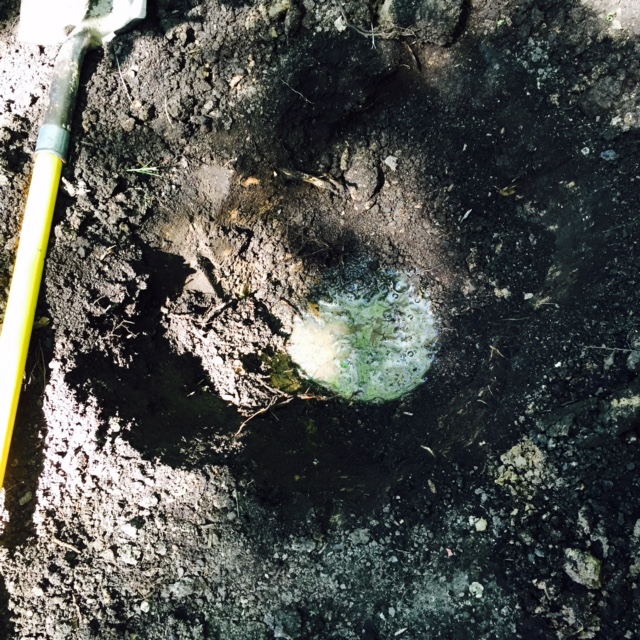 2. Before placing the root ball in the hole, I add water that has been mixed with a root stimulator so that it's available to the roots immediately. THIS IS SO IMPORTANT and the most neglected step. Root stimulator is NOT a fertilizer, it is actually a plant hormone that gets those feeder roots growing quickly. I like Fertilome's Root Stimulator - it's inexpensive, and I need only 3 tablespoons/gallon of water. Buy a big bottle because you'll need it all season.  This is what most root balls look like when removed from the nursery pot. And this is where things can go wrong if planted just as is, without doing anything to those roots. 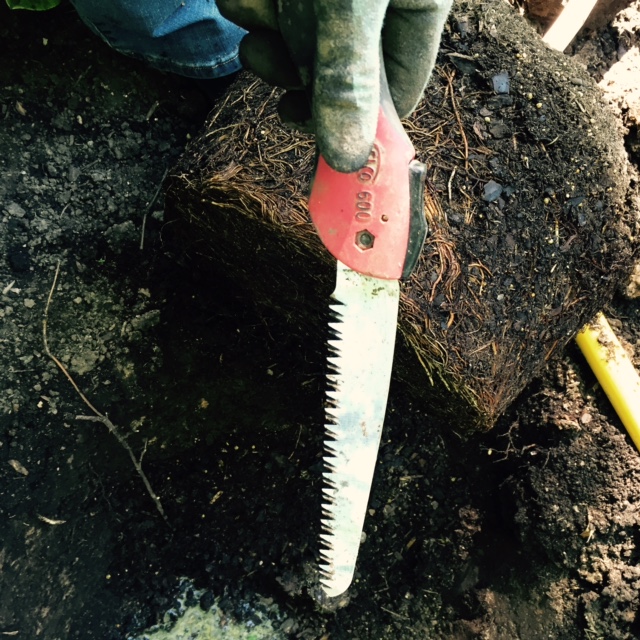 3. Don't be afraid! Really! Don't be afraid to loosen the roots. I use a small pruning saw to score them. 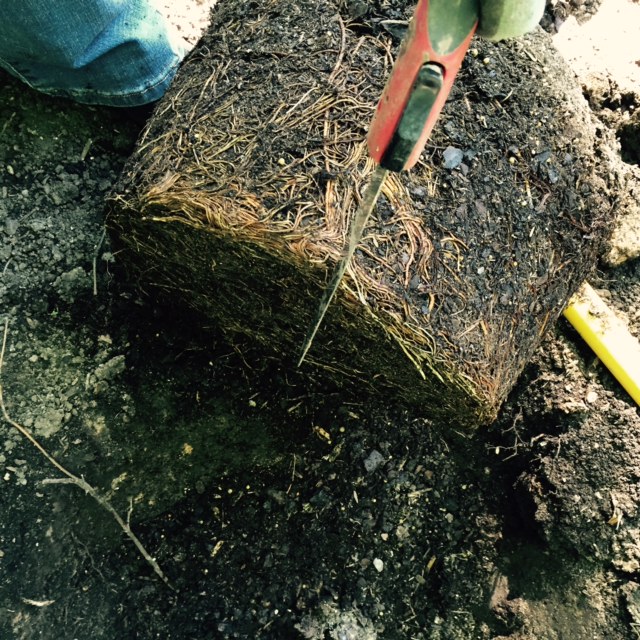 Make several cuts with the saw, then loosen the roots with your fingers. 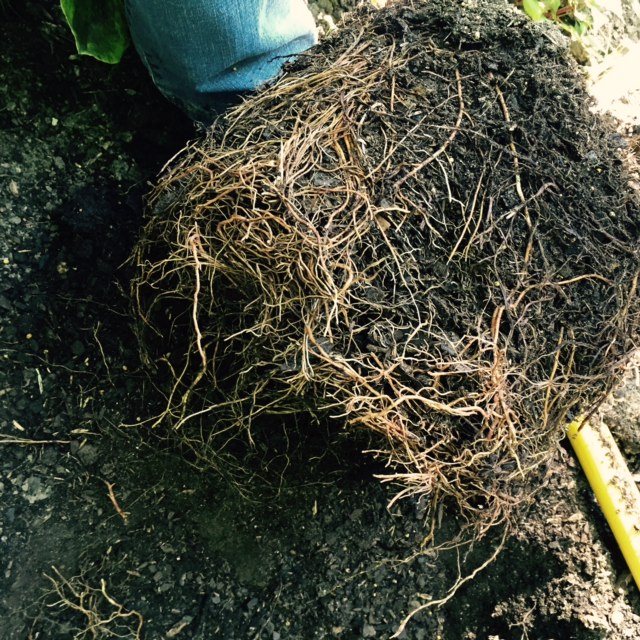 Now it's ready! 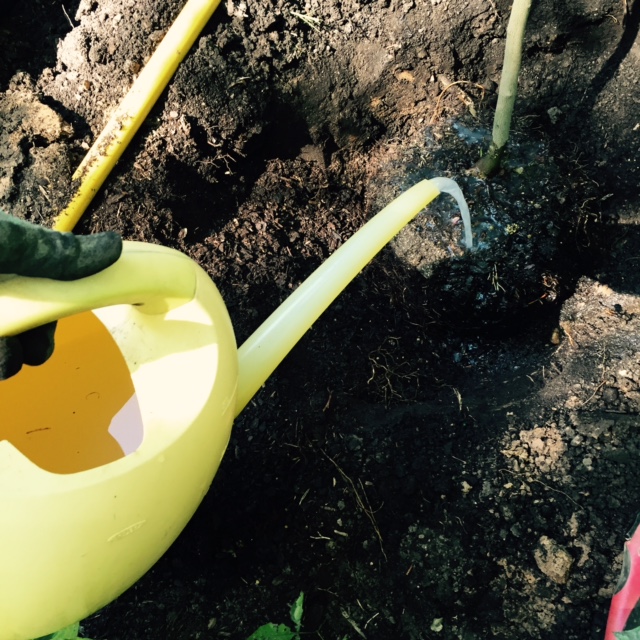 4. Place the root ball in the hole; water again with the root stimulator solution. Back fill with soil and tamp it down to remove air pockets. The other key step when planting a tree is to plant the root flare (where the root gets wider at the base) above ground. Water regularly through the first growing season - up until the ground freezes. The first 2-3 weeks after planting, water every other day, then back off to at least once a week, possibly more frequent when temps are over 90 degrees. I use the root stimulator solution every two weeks the first year. Mulch the roots of the tree/shrub, keeping the mulch away from the trunk - think bagel, not volcano. 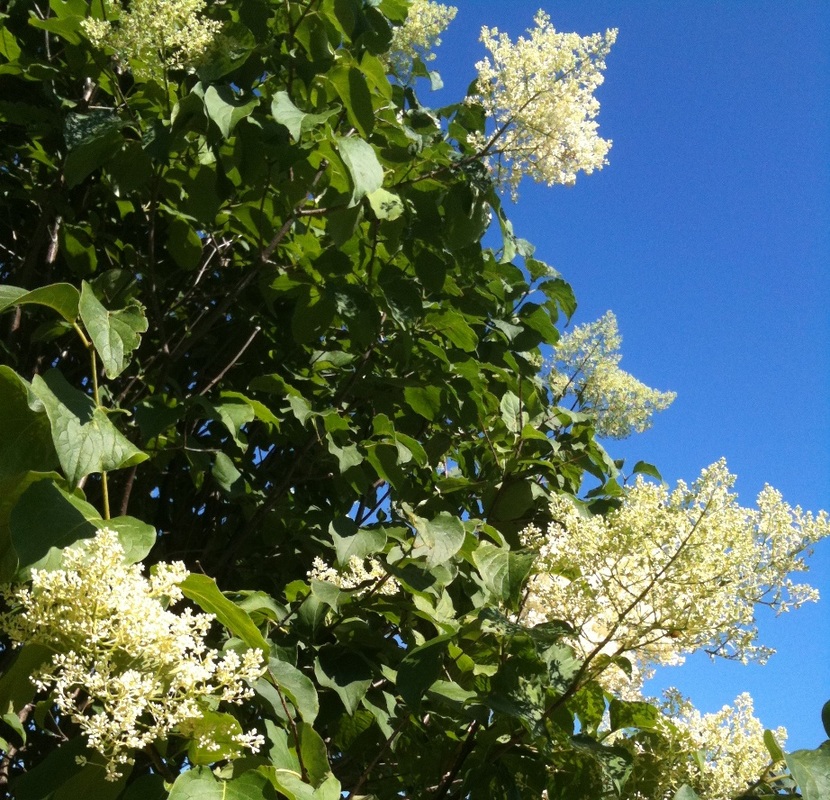 Enjoy many years of beauty knowing you gave it a good start. - Tracy Hankwitz Horticulturist & BGC Store Manager 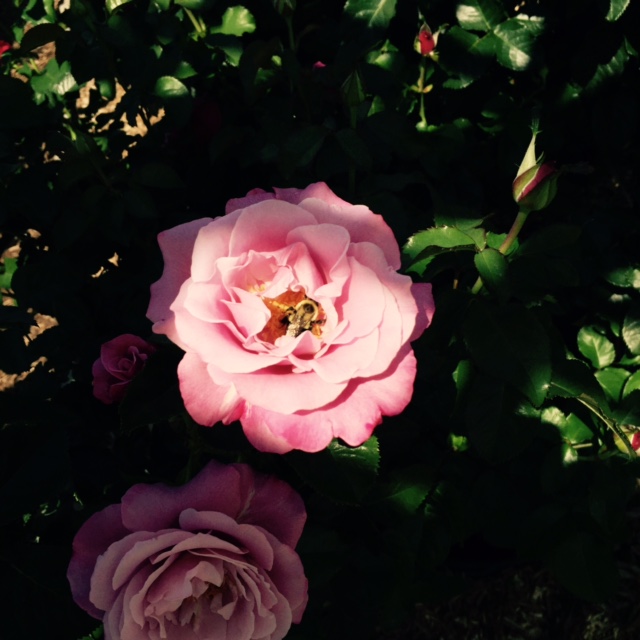 'Come. Come with me to see the roses! ' It was late July when a friend coaxed me away from my work at the garden center to visit an area rose farm called 'Stop and Smell the Roses' in Delevan. I wouldn't mind seeing a few roses, I thought to myself. I had no idea what was in store . . . 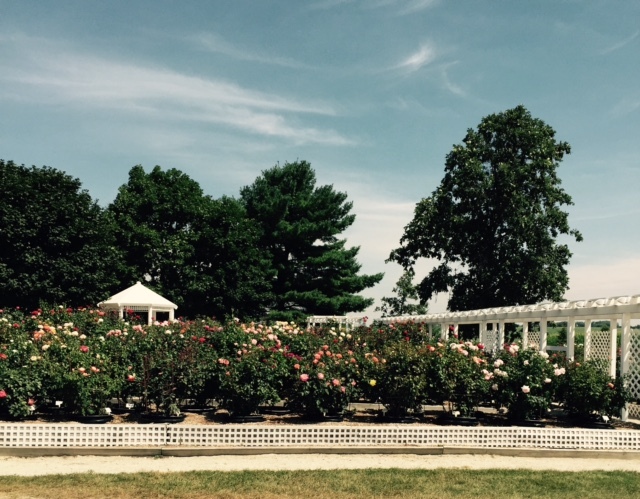 This is the view that greeted us. 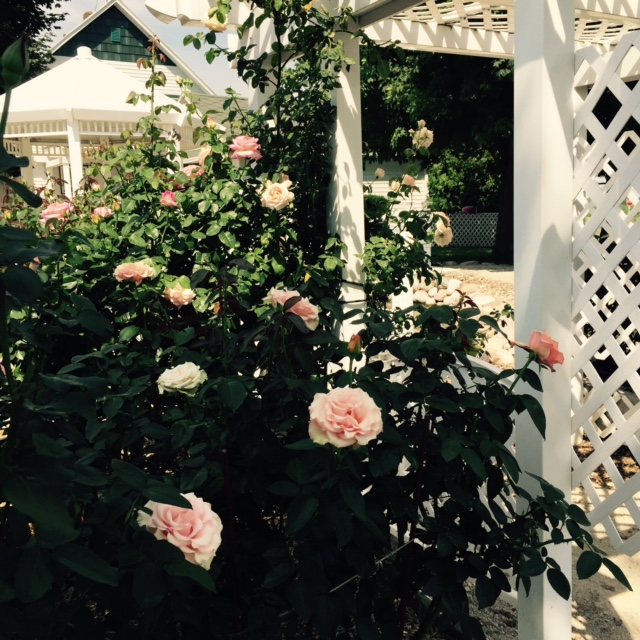 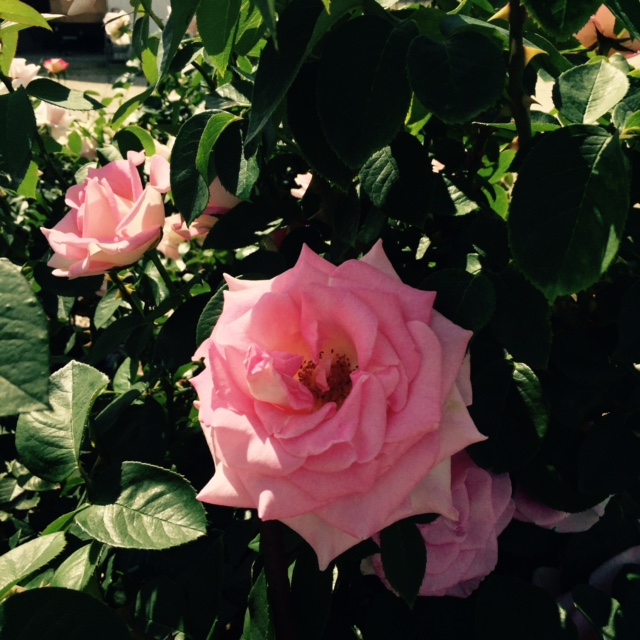 The owner, Doug Amon, gave us a friendly welcome. He tends this collection of hybrid tea roses on his farm in memory of his late wife. His collection has grown since he started 10 years ago. Now he welcomes hundreds of visitors every summer to walk among the 400 varieties. 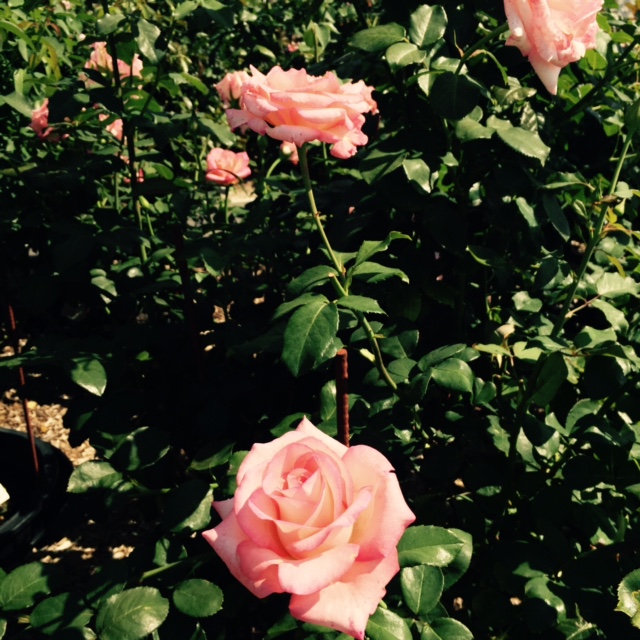 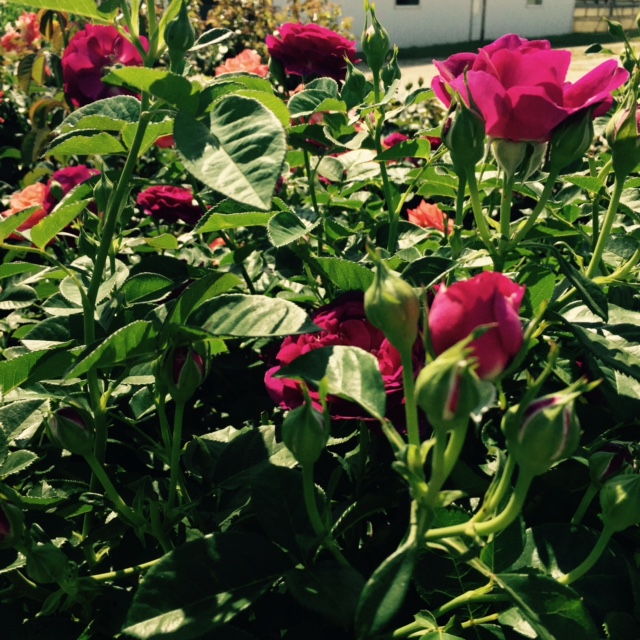 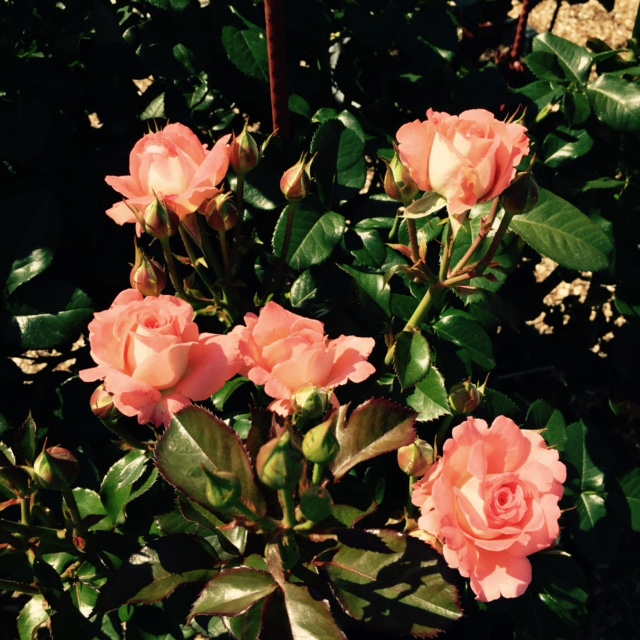 Each rose has it's own fragrance, some stronger than others. Doug told us he deadheads daily to keep the roses blooming all summer. And look at those leaves - no sign of insect damage anywhere. 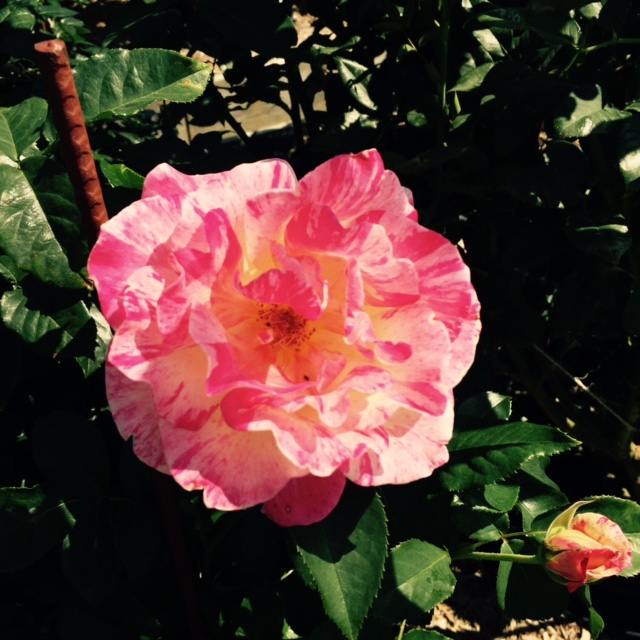 'A single rose can be my garden . . . ' - E.B. White 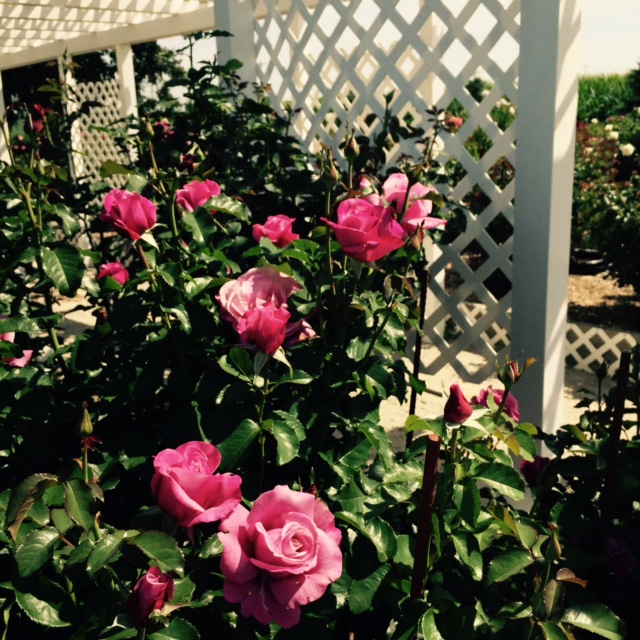 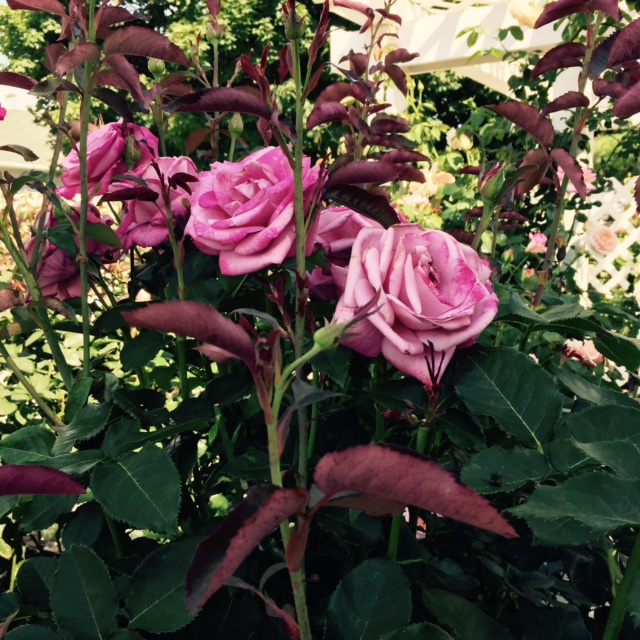 This lavender rose shown above was one of my favorites. If the beautiful color of the blossoms wasn't enough, the undersides of the leaves added to its appeal. 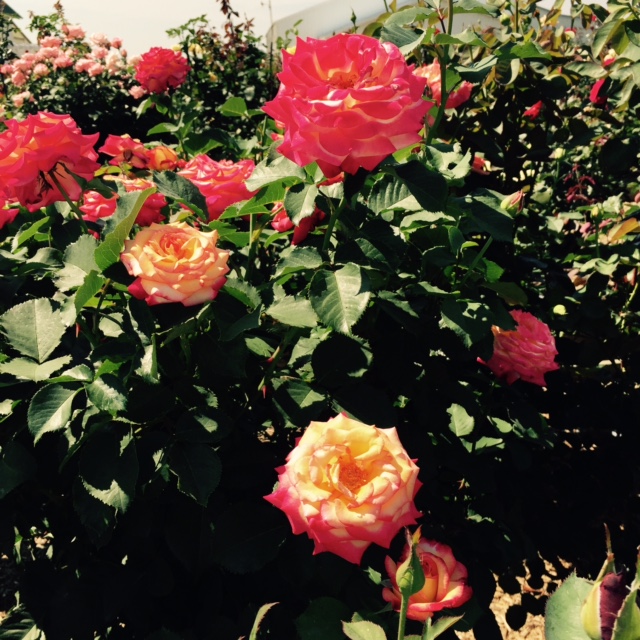 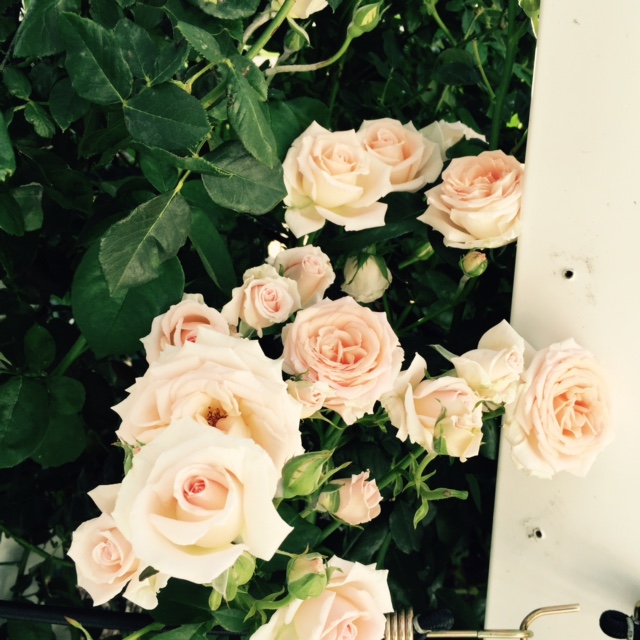 'Pearly Gates' (shown above) is appropriately located next to the entrance of the white lattice walkway. 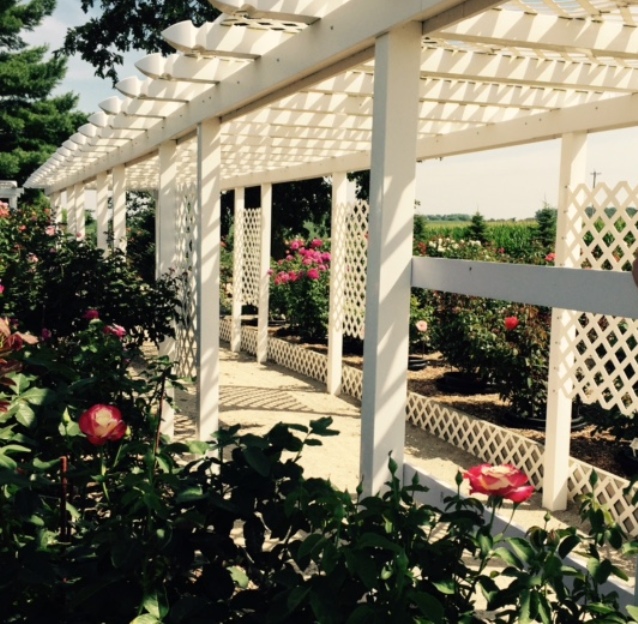 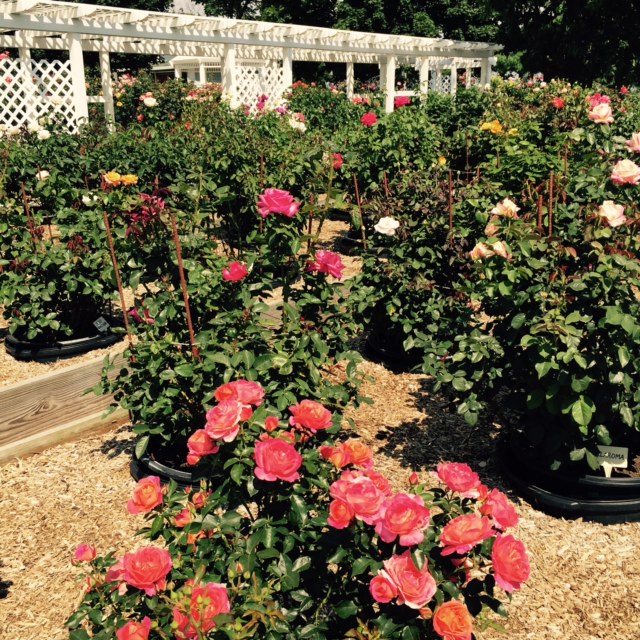 After losing 25 roses that first winter in 2006, Doug came up with this system. Each rose is grown in a large plastic pot placed inside another pot buried in the raised beds. Every fall, he hauls them inside the barn for the winter. 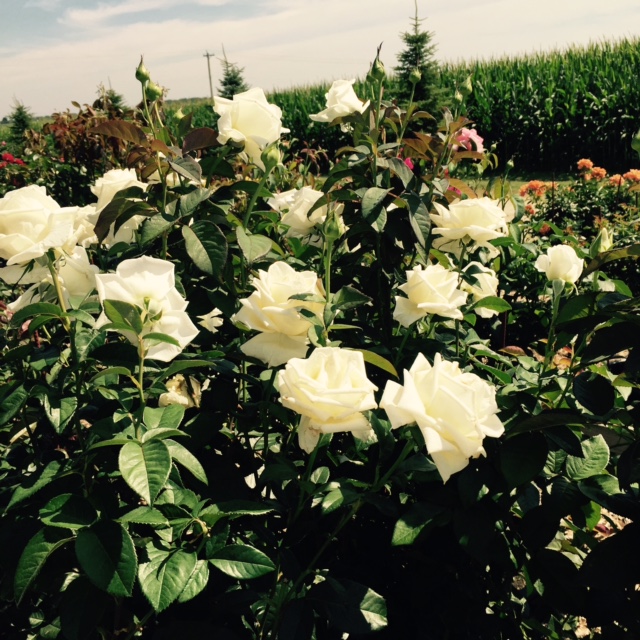 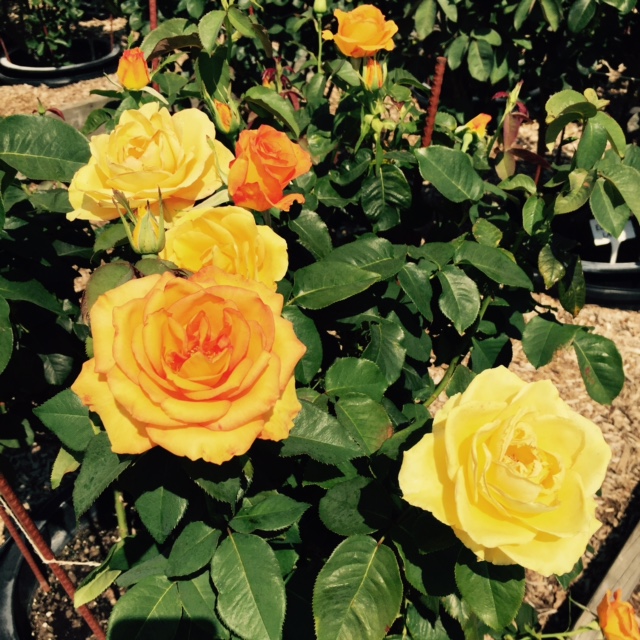 So many pretty shades of yellow and orange on 'Sundance' (above). 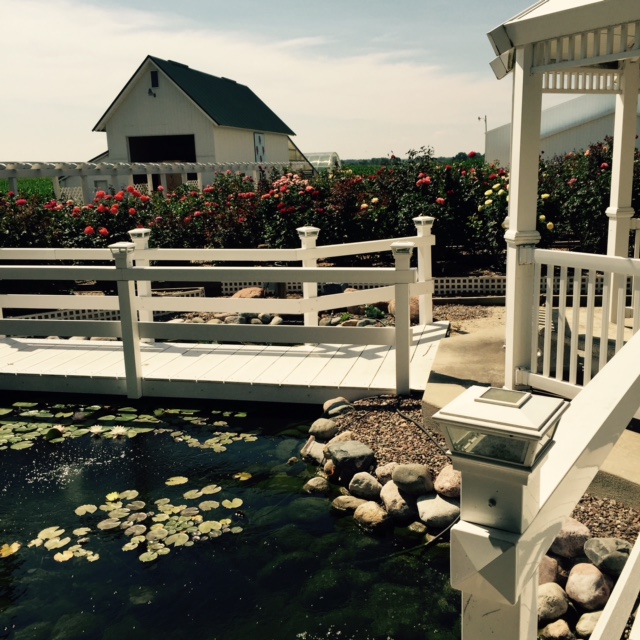   'Crescendo' (above left) begins as a white bud and opens to a light, blushing pink and smells like honeysuckle. 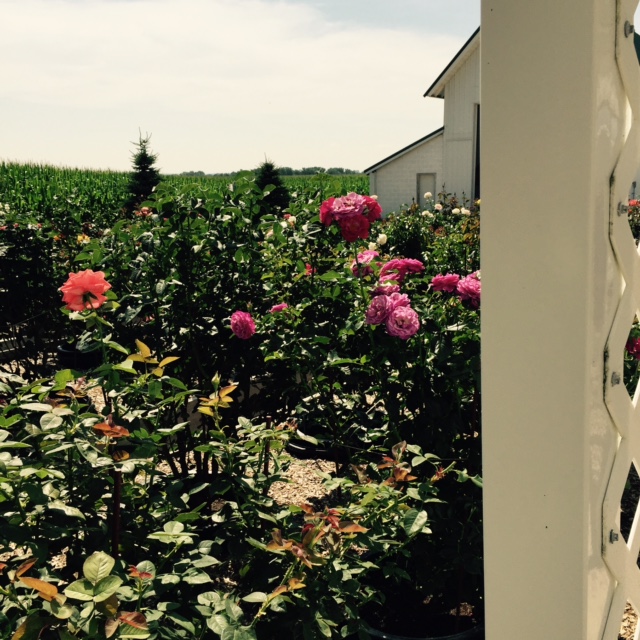 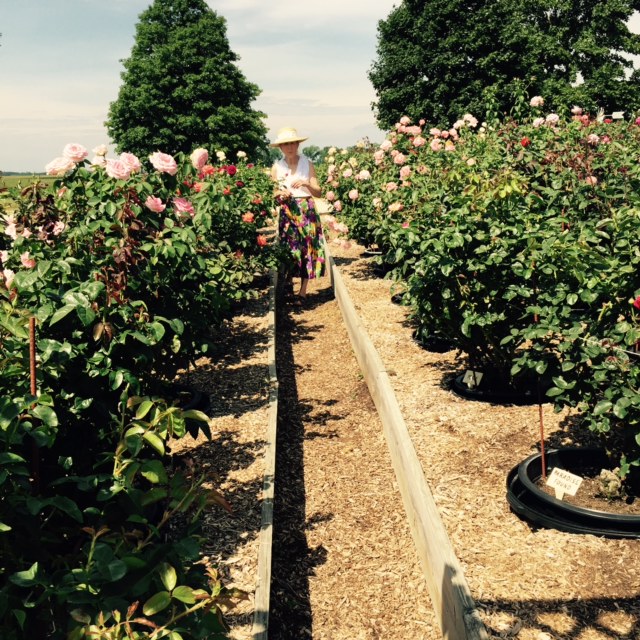 This is my friend and fellow gardener, Sandra, who probably wouldn't want me to include her picture, but it demonstrates how tall the roses are. Somehow she knew how much I needed this - to take time to stop and smell the intoxicating fragrance of each lovely rose. Thanks, Sandra. 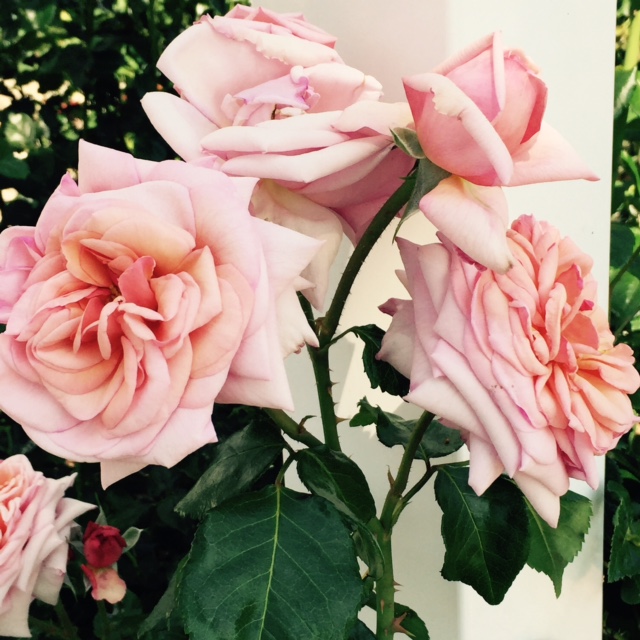 Another personal favorite, 'Lady Ashe' is so gorgeous I can hardly stand it!
If you decide to go, and I hope you do, check out the website www.stopnsmelltheroses.org. And be sure to take a friend along who needs to step away from the busyness for a while and walk among the roses. - Tracy Hankwitz BGC Store manager |
Search by typing & pressing enter