
|
2/20/2024 0 Comments Using Natural Fertilizers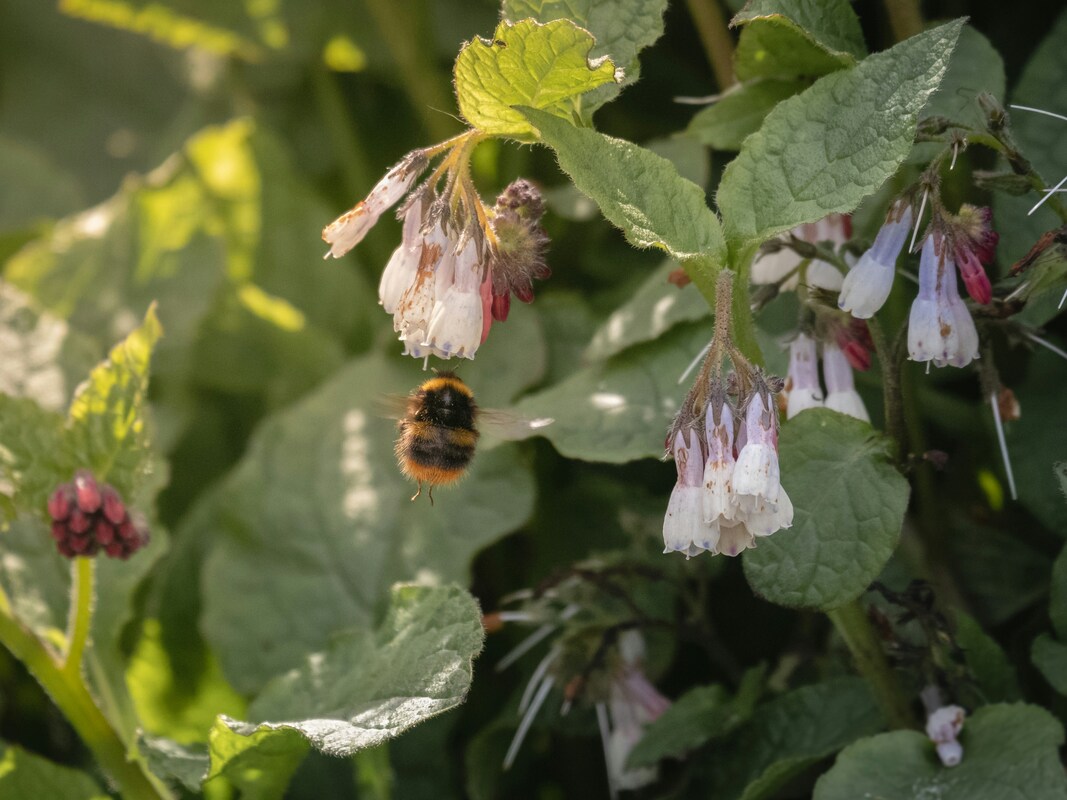 Ecological Gardening Practices
Part 5 Using Natural Fertilizers ‘Adopt the pace of nature’ - Ralph Waldo Emerson Over the past month, we have covered several eco-gardening topics: discover your ecoregion, growing the right plants, keeping your soil covered, and attracting beneficial insects. But if you implement all these practices but are still using synthetic fertilizers, weed killers, and pest controls on your lawn and in your landscape, you are basically shooting yourself in the foot, negating all your positive efforts. Most synthetic products can damage the beneficial microorganisms in the soil. If your soil is healthy, its teaming with beneficials that are doing all the work that a fertilizer would do. They help convert nitrogen from the air into the soil making it a usable form of food to the plants. They help decompose dead plant matter into what the plants need. By continually using synthetic fertilizers on our lawns, edible gardens, and landscapes, we lose this important natural ecosystem, and the plants come to depend on us. This makes more work for us! Here are alternatives that mimic a natural ecosystem . . .
Other options:
As we make the switch from synthetic to natural, we must realize that we can’t rush Mother Nature. Natural pest solutions and fertilizers take time. They work, but they work on their own time table because they are establishing a healthy ecosystem. In a culture that wants to see results quickly (think same-day Amazon delivery), we need to ‘adopt the pace of nature’, slow down, and let nature do the work for us. If the thought of giving up a green, perfect lawn is something you just can't do cold turkey, then consider easing your way into a more natural approach. Here are three tips: 1. Switch to a natural lawn fertilizer like Milorganite. Apply it in the spring or ideally in the fall. 2. Fertilizer less frequently. 3. Reduce the size of your lawn and add native plants. This will reduce the amount of fertilizer and water inputs right away! That wraps up our eco-gardening series. If you want to learn more, mark your calendars for Saturday, March 23. Naturalist, Beth Goeppinger will be here presenting ‘Planning Your Native Landscape’. You can also check out the links below. LINKS: Homegrown National Parks Native Plant Finder Natural Fertilizers to Improve Garden Soil
0 Comments
 It's "the little things that run the world”. - EO Wilson
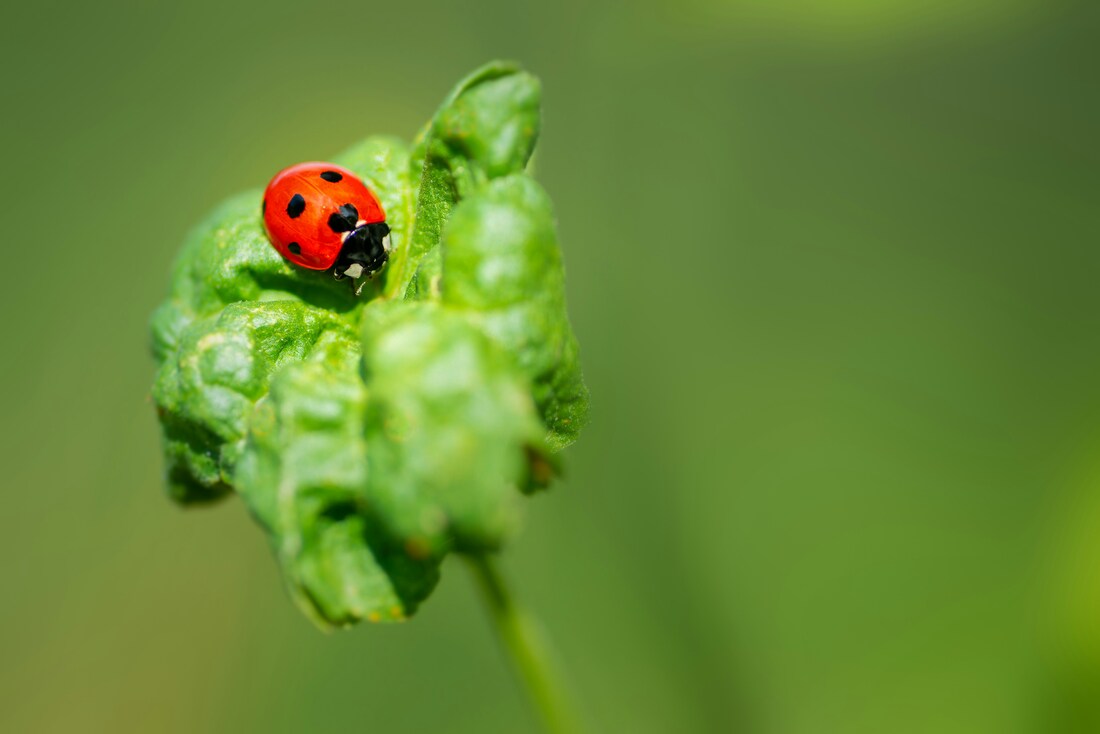
Life as we know it depends on insects. They are the foundation of the food web in our ecosystems, particularly in our gardens. Insects pollinate flowers and maintain soil structure, but they also munch on our cabbage and attack other desirable plants in the garden and landscape. When we see damage done to our plants, our first instinct may be to apply whatever product will kill the insect quickly in order to save the plant. But nature already has a remedy. In a healthy ecosystem, damaging insects or “pests” are controlled by insect-eating birds, frogs, and other animals. There are also insects that eat other insects. We call these beneficial insects. Beneficials (the good bugs) help us in two ways: either they prey on other insects (the bad bugs) or they parasitize them by laying their eggs in or on them so their larvae can feed on and kill the pest. Ladybugs, lacewings, and predatory wasps are commonly-known beneficials. Instead of ordering them from a gardening catalog, we can attract these and other good bugs to our yards. Here are six ways:
Here’s one final thought. If a plant is struggling and continually susceptible to pests, perhaps it is the wrong plant for in that spot. It may not be suitable for that location or even your ecoregion. Maybe the best thing to do is remove it and replace it with a plant that is better suited to the site - like natives! Next week we will focus on using natural fertilizers. Also, mark your calendars for Saturday, March 23. Naturalist, Beth Goeppinger will be here at BGC presenting ‘Planning Your Native Landscape’. Until then, check out the links below to learn more. LINKS: What is Ecological Gardening? Homegrown National Parks Native Plant Finder  Soil is the foundation of all the plants you grow. If your soil is healthy, your plants are healthy. Why is that? Soil is alive with thousands of microorganisms that are working to keep nutrients available for your plants at the root level. If soil is left uncovered, those microorganisms can be exposed to sunlight, the top layer of soil can erode away, leaving plants at a disadvantage without a layer of insulation.
So we mulch. We have yards of hardwood mulch applied every year, and while this is a widely-accepted practice, there are better options that benefit the plants, the pollinators, and you. In ecological gardening, we are trying to mimic what nature does and restore wildlife habitats. In a natural ecosystem, you will rarely find exposed soil. Typically there is a layer of leaf litter that naturally falls, and within that layer are beneficial insects and their eggs that overwinter. ‘Leave the leaves’ has been a recent campaign by conservationists, and it makes sense. Not only do leaves help suppress weed seeds, but they nourish the soil as they break down and provide habitat for wildlife. Another option is a living mulch. Using plants as a mulch has many benefits - one of them is less weeding. When the right perennials are planted closely together, they will cover exposed soil and crowd out weeds. There are wonderful grouncovers that can be used as mulch as they weave in and around perennials and shrubs. In keeping with the last article ‘Grow the Right Plants’, we want to make thoughtful choices taking into consideration not only aesthetics, but also benefits to pollinators and plant communities. Introducing matrix plantings. A matrix is a design concept that originated in Germany following WWII. In it’s simplest form, a low-growing perennial is used as a groundcover, then taller perennials with similar cultural needs are planted among the groundcover to offer seasonal interest. Plants are carefully chosen based on their plant growth so they will knit together and form a cooperative ecosystem. Sedges (Carex) are commonly used as the matrix base layer. Other options include low-growing hardy geraniums (Geranium sanguineum), and lambs’ ear (Stachys byzantina) for sun, wild ginger (Asaram canadense) for shade. If you want to learn more about matrix planting design, click here. Learn more about sedges here. Living mulches can also be edible whether in an ornamental landscape or the vegetable garden. Wild strawberries (Fragaria virginiana) and herbs are good examples commonly used in permaculture. Learn more about permaculture here. The possibilities of living mulches are many and fun to explore. Next week we will focus on attracting beneficial insects. Also, watch for an opportunity to continue the conversation in person here at Burlington Garden Center coming soon. Until then, check out the links below to learn more. LINKS: What is Ecological Gardening Homegrown National Parks Native Plant Finder 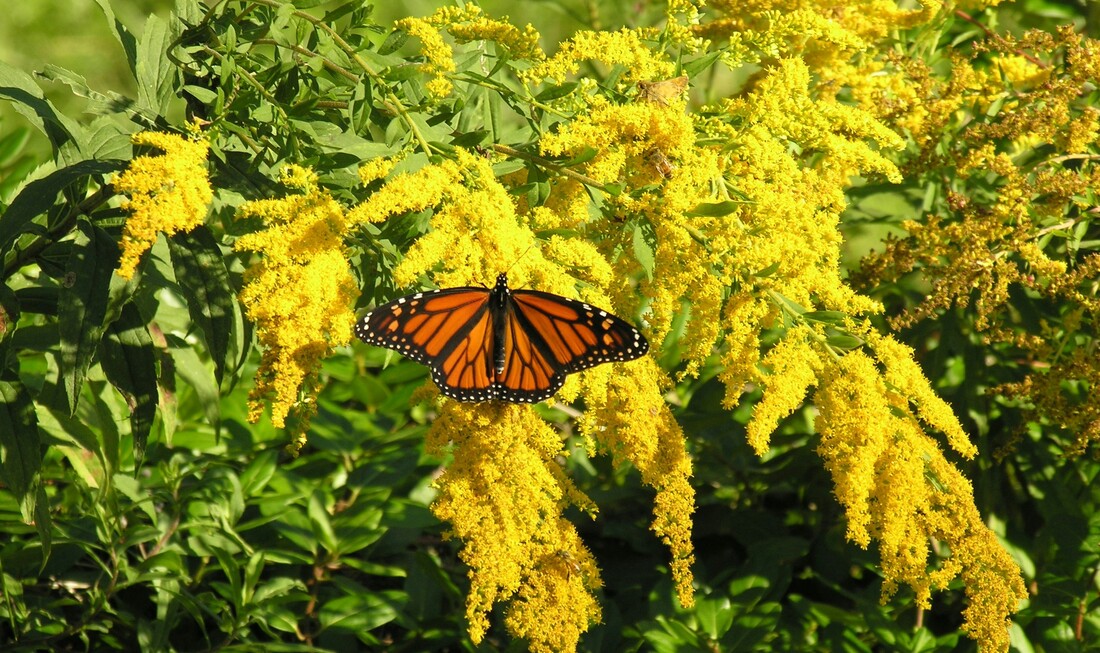 The goal in gardening ecologically is to garden with plants best adapted to our locale and the wildlife that is here. So an ecological gardener will intentionally select plants that will support that wildlife. Natives are the best choice. They have grown and thrived in their ecoregion for centuries.
Right plant, right place. This is a long-held horticulture practice, and it is at the root of gardening ecologically successfully. The question we should ask is, what would thrive in the natural conditions of this place. Whether it’s wet or dry, sunny or shady, placing plants where they will thrive and require minimal care once established is what we are striving for. Why plant native? The National Wildlife Federation says it best: “Native plants help the environment the most when planted in places that match their growing requirements. They will thrive in the soils, moisture and weather of your region. That means less supplemental watering, which can be wasteful, and pest problems that require toxic chemicals. Native plants also assist in managing rain water runoff and maintain healthy soil as their root systems are deep and keep soil from being compacted.” You may already be growing some native perennials like coneflower, black-eyed susans, yarrow, or milkweed. But don’t limit your palette! There is a vast array of native plants that do well here in SE Wisconsin including trees and shrubs. Here is a list to get you started - just click on Native Plants and enter your zipcode. What if you don’t have a big yard? For small gardening spaces, including decks, patios, and balconies, there are herbaceous native plants that you can grow in container gardens. Check them out here. Keystone Plants There are native plants, and then there are really good native plants called keystone plants. Much research has been done studying which native plants support the most native pollinators in each ecoregion. These keystone plants are essential to our ecosystems. There are two types of keystone plants. Host plants support up to 90% of caterpillar species that in turn support our terrestrial birds enabling them to reproduce. The other group of keystone plants feed both general and specialist native bee populations. For example, the white oak and the black oak trees are the best native trees you could plant because they support the most diverse insect species - 436 different caterpillar species to be exact! Goldenrod (Solidago rigida) is one of the best keystone native perennials we can include in our landscapes because it supports 104 different caterpillar species as well as 43 specialist native bee species. Sunflowers also are at the top of the list supporting 50 specialist bee species! Even growing just one keystone plant can make a huge difference. Here’s a list to get you started. But remember that our ecoregion (Eastern Temperate Forest) covers many zones, so also refer to those specific to your zipcode. If you want to learn more about keystone native plants, listen to this podcast with Doug Tallamy. Next week we will focus on living mulches, and our series will continue each week addressing the following ecological practices: 3. Keep your soil covered 4. Attract beneficial insects 5. Use natural fertilizers Watch for an opportunity to continue the conversation in person here at Burlington Garden Center coming soon. Until then, check out the links below to learn more. LINKS: Eco Regions Map Homegrown National Parks Native Plant Finder 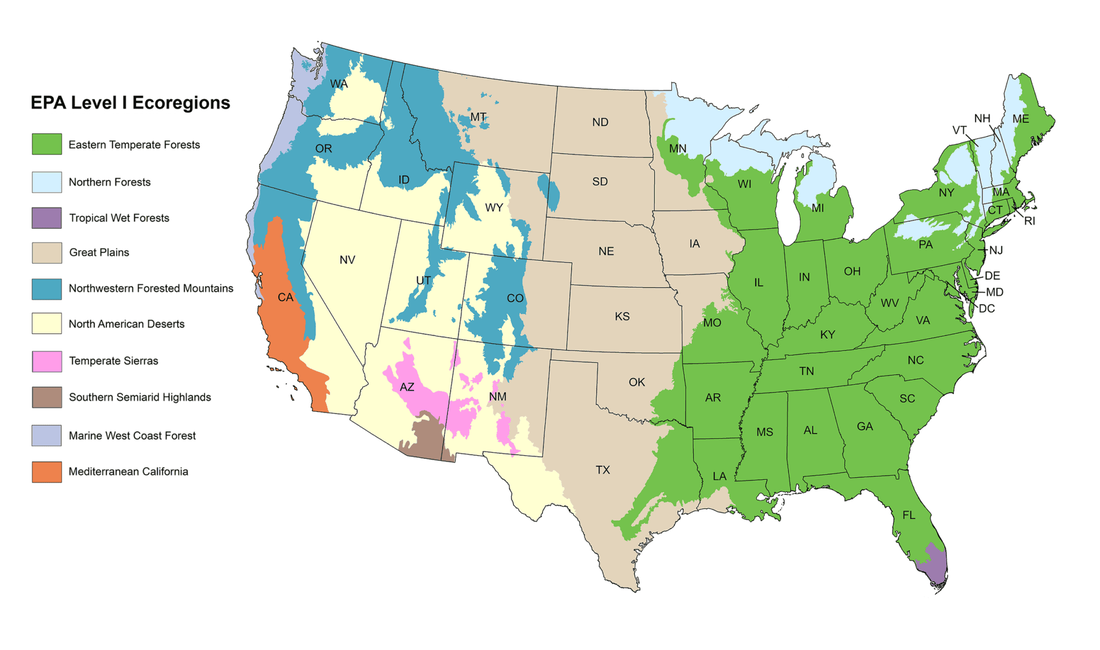 Ecological gardening is a new way to think about gardening. At its core, it strives to mimic and restore our local ecosystems. It’s the art of growing gardens that are suited to our area. It’s also a different way to choose plants that we grow. Instead of selecting plants that only please us, it’s intentionally seeking plants that will support wildlife that already lives in our ecosystem, sustaining it through the four seasons.
So what is an ecoregion? Simply put, an ecoregion is a large area of land containing distinct characteristics allowing natural communities and species to grow. According to the map above, we are in the Eastern Temperate Forest ecoregion which covers quite a large area of the country. Because this ecoregion covers so many states and different hardiness zones, it is broken down into smaller eco regions. Click here to see this map. We are in Level III ecoregion 53, and to be more specific, Level IV 53b. Totally confused? Keep reading. Why garden by ecoregion? Plants are not bound by state lines when it comes to their natural habitats. Using ecoregions as a guide, we can make smarter plant choices. Not only will these native plants have a better success rate, better plant health, and better performance, they will support our local wildlife. The goal in gardening ecologically is to garden with plants best adapted to our locale and the wildlife that is here. If you’d like to read more on this topic, here is an interesting blog post by Doug Tallamy. Next week we will focus on growing the right plants for our spaces, and our series will continue each week addressing the following ecological practices:
Watch for an opportunity to continue the conversation in person here at Burlington Garden Center coming soon. 1/22/2024 0 Comments Intro to Ecological Gardening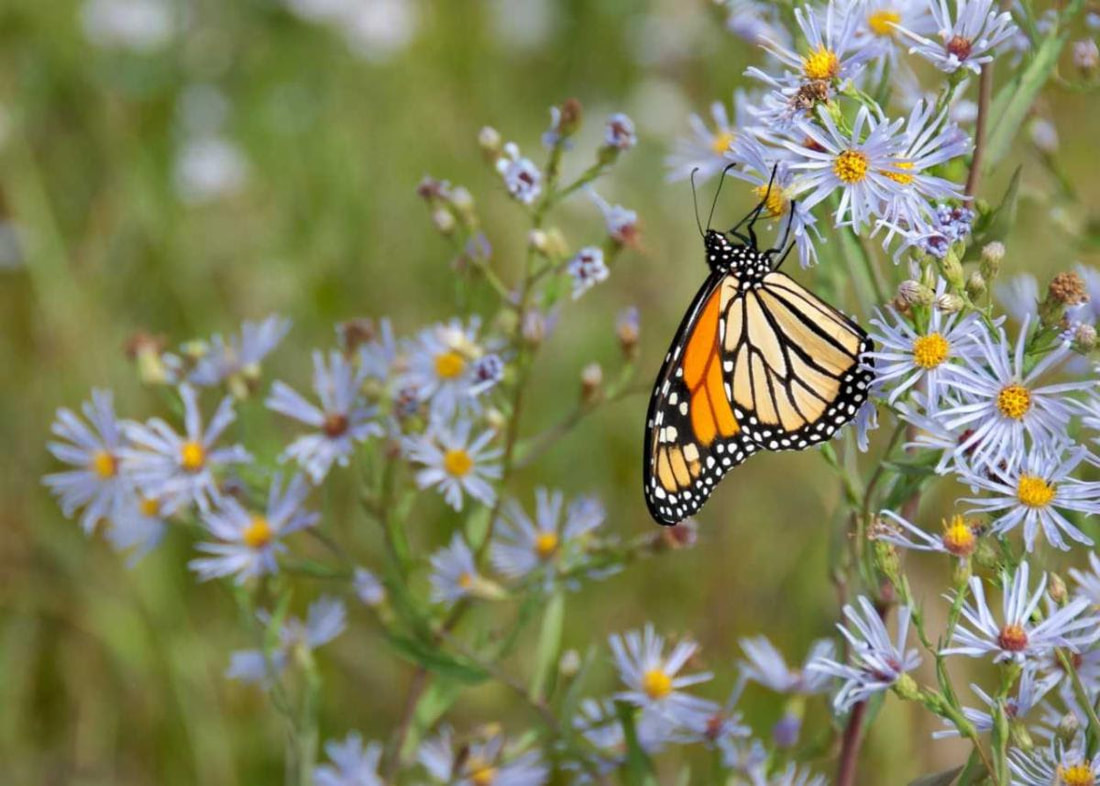 Do you long for a garden that requires less maintenance, less water, and no chemicals? Do you also want a garden that supports pollinators, wildflowers, more biodiversity and healthier soil?
Ecological gardening may be the answer. It’s been the buzz word as the latest trend, but ecological gardening is not just a trend. It is a way to garden responsibly and intentionally that is becoming a way of life. What exactly is it? Ecological gardening strives to mimic and restore our local ecosystems. It’s the art of growing gardens that are suited to our area. It’s also a different way of thinking. Instead of choosing plants that only please you, it’s intentionally selecting plants that will support wildlife that already lives in our ecosystem, sustaining it through the four seasons. If you’ve read any books by Doug Tallamy, you already know some of the principles and practices of this type of gardening. If you haven’t read them, it’s worth your time to read “Bringing Nature Home” and “Nature’s Best Hope”. Copies will be available for purchase this weekend. We’ll be digging into the five practices of ecological gardening over the next few weeks here in the newsletter.
Watch for an opportunity to continue the conversation in person here at Burlington Garden Center coming soon. 2/11/2021 0 Comments Making Healthy Houseplant Choices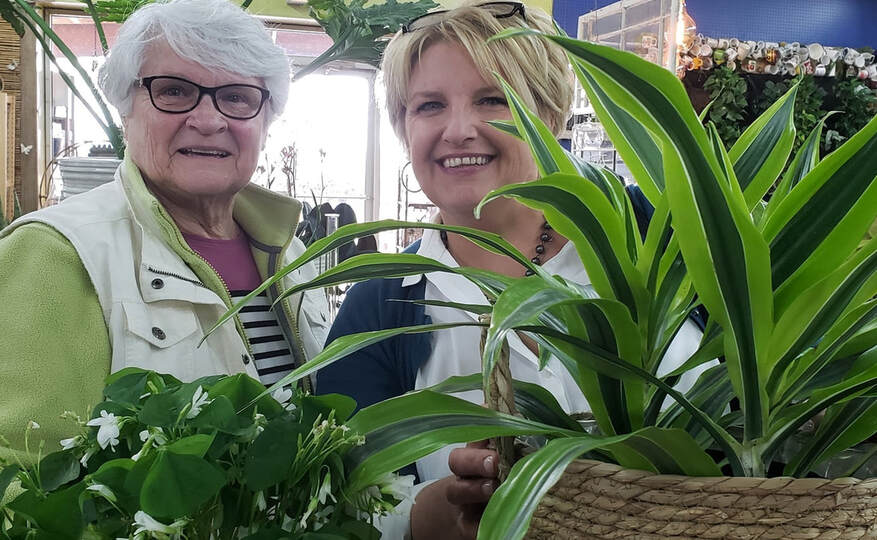 Happy Houseplant Happy Hour Customers The past few years have seen a resurgence in the popularity of houseplants. With more people quarantining and working from home, adding houseplants (especially those with air purification qualities) has become not only a popular design option, but a new health trend. New plant parents are also more concerned about selecting plants that are safe for their pets and children. As the demand for houseplants has grown, so has the number of retailers wanting in on the action. In addition to your local garden centers, many large box stores and grocery retailers are putting out displays of tropical plants. These retailers and their staff generally lack the proper care knowledge for the plants they sell and more importantly, how to detect and treat the many insects and/or diseases they may bring with them. They also probably do not have information on which plants specifically improve indoor air quality or are safe around your dogs, cats and kids. 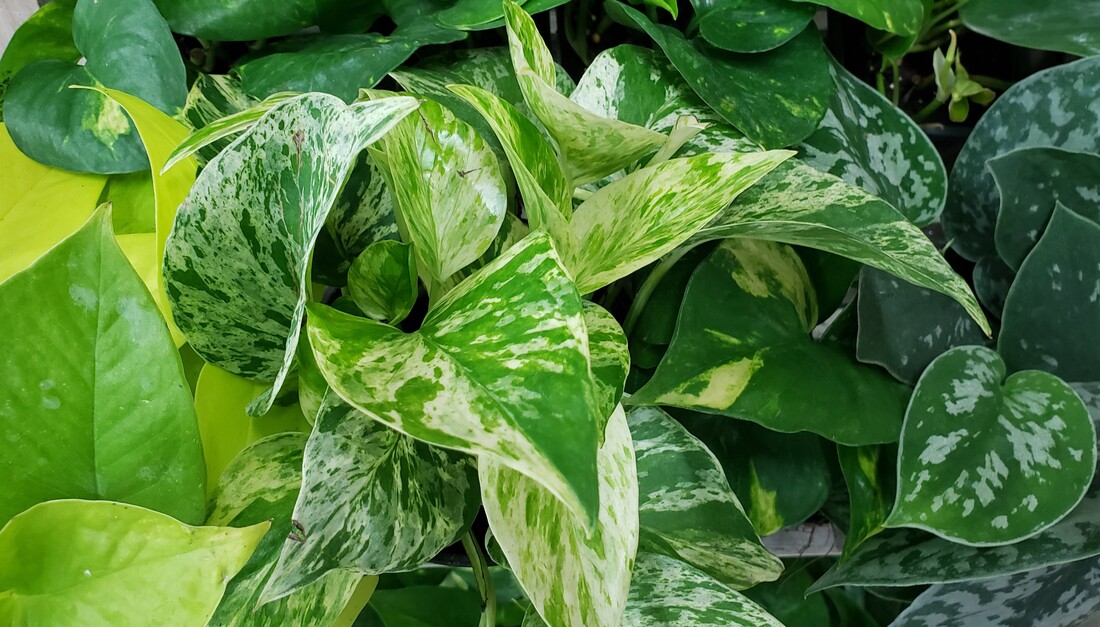 Healthy varieties of pothos and philodendron The inside of a grocery store or large box store does not provide the ideal growing conditions for many tropical plants. Therefore, the hibiscus you are tempted to take home may already be stressed before you place it in your cart. Each plant has their own specific set of sunlight and watering requirements which should be maintained up until the point of sale. This is why local garden centers like Burlington Garden Center (BGC) should be your first choice when purchasing houseplants. In addition to assisting new plant parents with the right selections for their homes, we also offer care cards for most of the houseplants we sell. If cards are not on hand, our staff is more than happy to give you instruction on where to place your new plants and how often to water and fertilize them. You can also rest assured that our greenhouse staff is always on the lookout for unwanted pests, and all of our plants are treated immediately and appropriately. We even welcome your questions and are happy to diagnose treatments. In addition to their vast plant knowledge, many garden centers like BGC have talented staff on hand to assist you with plant styling. Houseplants placed in the appropriate ornamental pots and locations are an extension of your interior design style. BGC also welcomes your plant requests and is always on the lookout for those new and rare houseplants, books and accessories. In the long run, you will save money by purchasing healthy plants and enjoy greater success in caring for them. You also help to support small, local businesses.  Visit the events page on our website or Facebook page for more information Join us at Burlington Garden Center for one of our Houseplant Happy Hour, held on the second Tuesday of each month from 5p-7p. We serve refreshments and offer 20% discount on houseplants. We also have additional staff on hand to answer questions and assist in matching you with the right plants and pots. Beware…houseplants can be addicting! This time of year is a little sad to me. The sun is setting significantly sooner, some trees and shrubs have long since stopped blooming and all the bird houses are empty as of today. The last tenants have evicted themselves. So I try to look on the bright side and now find myself a little giddy about all that is still going on. Tomatoes are roasting in the oven, garlic is cured and ready to use, red bell peppers, zucchini and all good things are overflowing. The other thing I look forward to is the blooming of the Seven Son tree or Heptacodium. It is a butterfly and bee magnet. My Seven Sons are ripe with full unopened blooms and now the wait is on for the first fragrant blossoms to open. 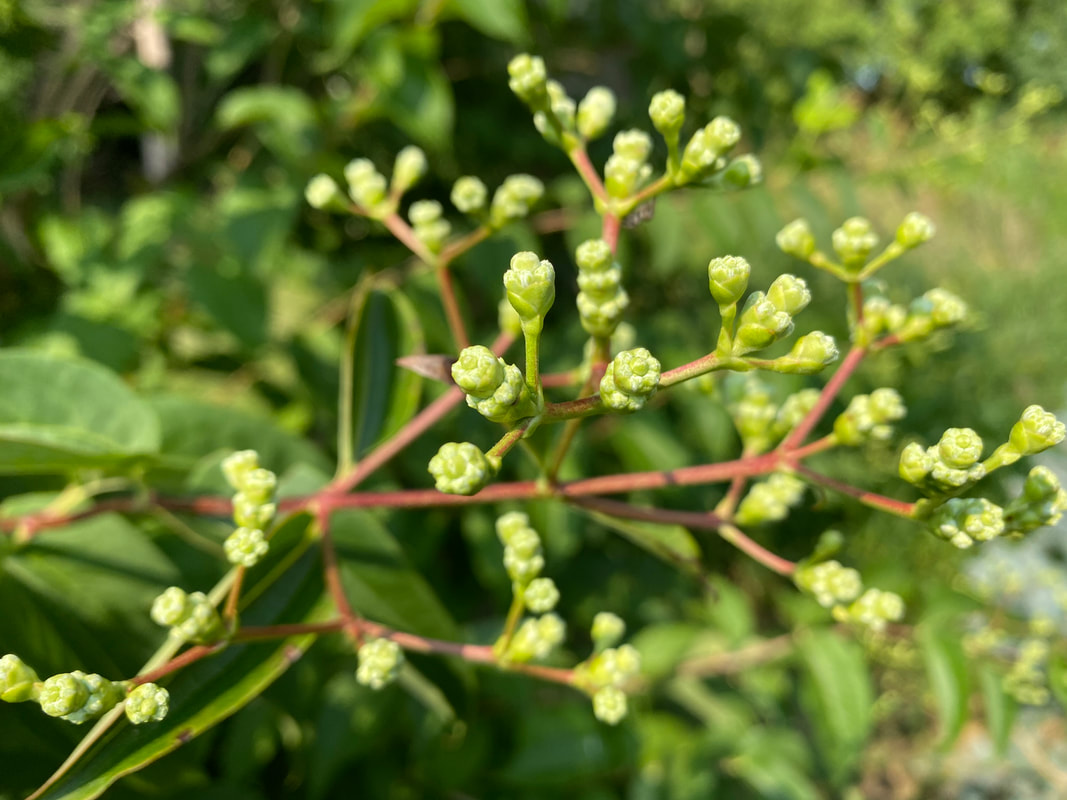 Heptacodium, Seven Son tree is getting ready to bloom at this time of year. photo by Beth Martin I also enjoy the ninja hummingbird activity going on at the annuals on our deck and feeders. Hummers will chase anything! 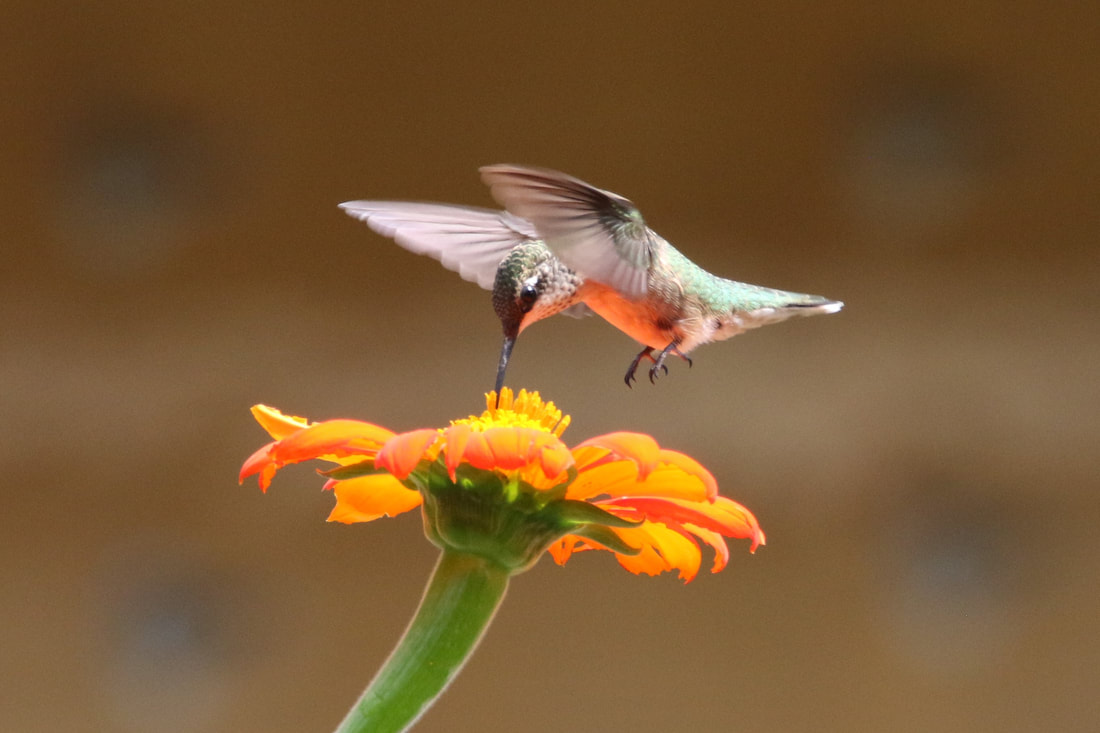 I finally caught one of the hummingbirds drinking from Tithonia! photo by Beth Martin Another magnet that is starting to bloom is goldenrod. There are several versions of this and honestly I have no idea what variety I have. It showed up one day and has been a bit of a nuisance to manage, but I would not want to be without it. Again, bees all over it of all type and size. The other activity I enjoy at this time of year is seed saving. It typically starts with a tomato if I ate one I particularly love. I somehow feel a little wise that I have seeds on hand for next year. Out on the prairie, I really count on the wind and the goldfinches to disperse seed. Of prairie plants that I would like more of, I will collect the seeds to try to fill in barren spots. This could just mean cutting off a dried head of Echinacea (coneflower) and shaking it in a barren spot or gently rubbing two coneflower heads together to dislodge seeds. But if I want to be assured, I will pull a few weeds, come in contact with the soil and put a few of it’s seeds barely under the soil. Enough to hide it from hungry birds and to help propagation along. And myself of course, because it will grow where I want it. There are a few seeds that I must harvest to be sure I have the plant the following year. Some of these are annuals, like castor bean, Cleome and Tithonia. And the best of all is the perennial milkweed, any and all varieties. Let’s start first with a general idea of any seed saving. Whether it is from annual or perennial, you want the healthiest specimen. You do not want to take seeds from a plant that was barely producing, was weak stemmed, had washed out color or was not prolific. You want to take from the best of the best. Once you have the plant picked out, you have to wait until the plant has started to die back or a flower head that has died back. In the case of Echinacea (coneflower), even with bird activity, I can find a few that aren’t fully missing their seed. It is easy to look at the top of the plant to see if seeds remain or not. You can always place some lightweight gauze bag or something similar over the seed head so that birds do not get it before you do. Cleome is just kind of fun to take the seed from. As the flower grows taller, it leaves a pod behind. You do not want green pods but you may want to identify healthy green pods that you want to come back to later when they are ready to take. You want to take seeds from the brown ones that are just starting to split. I don’t even take the pod off, I just rake my finger over the pod and pop them into an envelope. If I know where I want some next year, I will scatter some in the area and then save the rest to scatter in the early spring. Cleome is an annual but if it drops it’s seeds, it can reseed itself with a reasonable winter. 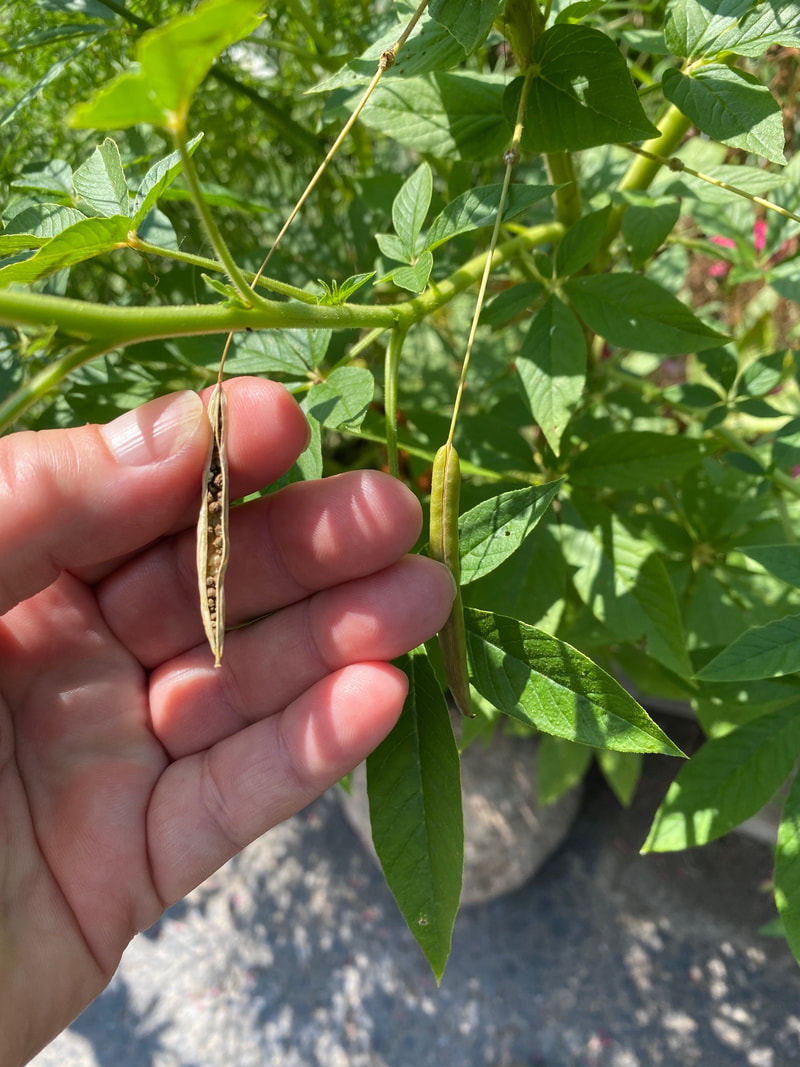 Cleome ready to save the seeds. photo by Beth Martin Tithonia can not survive a hard freeze, and I am not sure about it’s seeds other than they can not survive our winters. So I like to get outside while the weather is pleasant and start collecting some of the dead heads, in other words, not this 90 degree (!) week. I see plenty of hummers and insects coming to Tithonia for pollen and nectar, but not for seeds...that I can recall. So I will watch for it this year. Tithonia isn’t easy to extract the seed from. It is a bit prickly to touch.When the head is dried and usually crumpled over, I go by with scissors or pruner and snip the flower heads off into a paper bag. 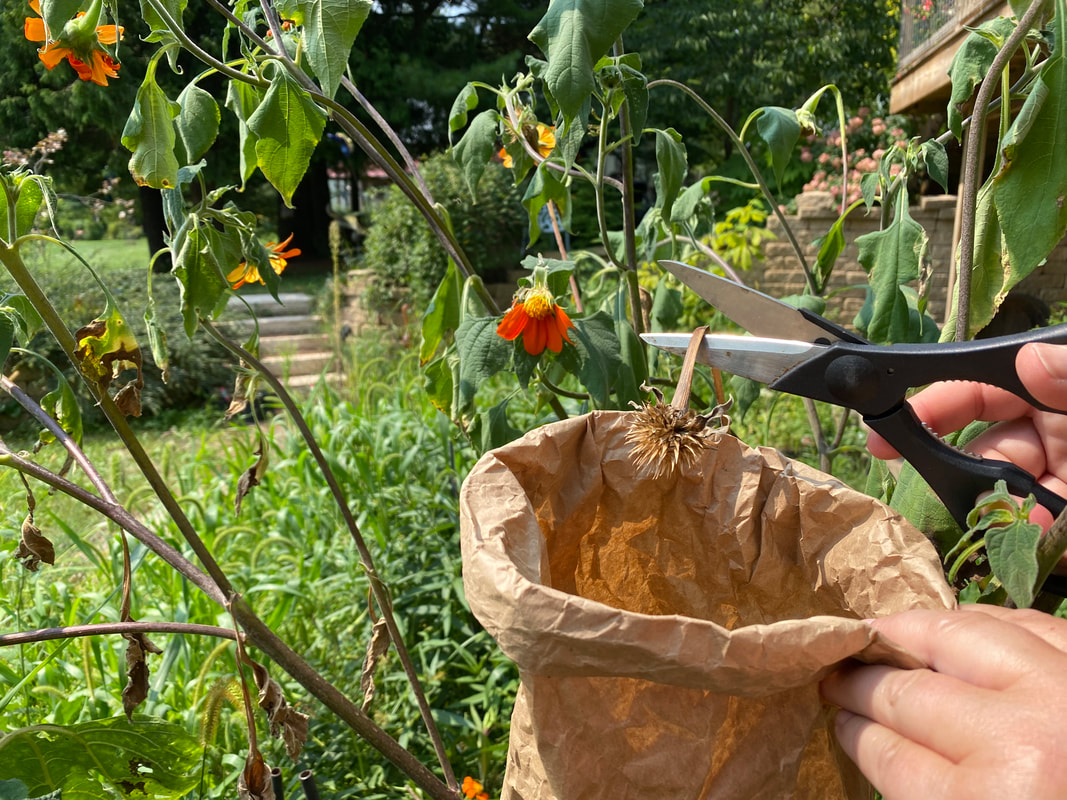 Cut Tithonia directly into a paper bag when it is fully dry on the stem. photo by Beth Martin I don’t bother handling them. I leave them in a sunny dry space for a while and then move them inside for winter and keep them in a cool dry location like a basement. Every so often, I will go by and shake the bag. This separates the seed from the flower, and then I have easy-to-handle-seeds to plant after discarding the flower structure. This is a plant I always start inside and transplant to the outside when the ground is nice and warm. Because it is more of a late season plant, I try to give it a head start. You can always buy it already growing at BGC. There are times when I just can not coordinate myself to start seed and this COVID year was one of them. So luckily, I know I can get it at work and am sometimes the person that gets to water and tend to some of my favorites. Milkweed is a different story of sorts. It is trickier. You can treat it like Tithonia where you put the pod in a bag and shake it, but that is going to be a lot of shaking and a lot of fluff to float out at you once you do! I want a fluff-less home! I have set off the fluff in the house before and regretted it, so, I have a foolproof OCD-lovin’ way to separate seed from the fluff. First, you have to be sure you get the pod in the right state of readiness for picking, but not ready for free flying seed! You want to collect pods off plants when they have started turning brown and when they just start to open at their ‘seam’. To keep them in this state and not get fluffed, you can put a loose rubber band or tie a string around it. I do not bother doing either of those, but if you aren’t going to get to them for a few weeks, you will want to do so. I am so quick at separating the seed now, that it is a quick clean job when I bring a pod into the house. First, get paper bags and/or containers and label them with the seed type. I collect mostly Common, Swamp, Whorled and butterfly weed. I label paper bags to drop only those pods into each bag and bring them home. Be aware that Common milkweed pods look much larger than any of the other milkweed pods but the seeds themselves look about identical to the others. So bag and container labels are a must! Then I take old restaurant take-out delivery containers to prepare to put the seeds into. I collect a lot! Envelopes or paper bags work if you are doing just a few. All the milkweeds basically operate the same way:
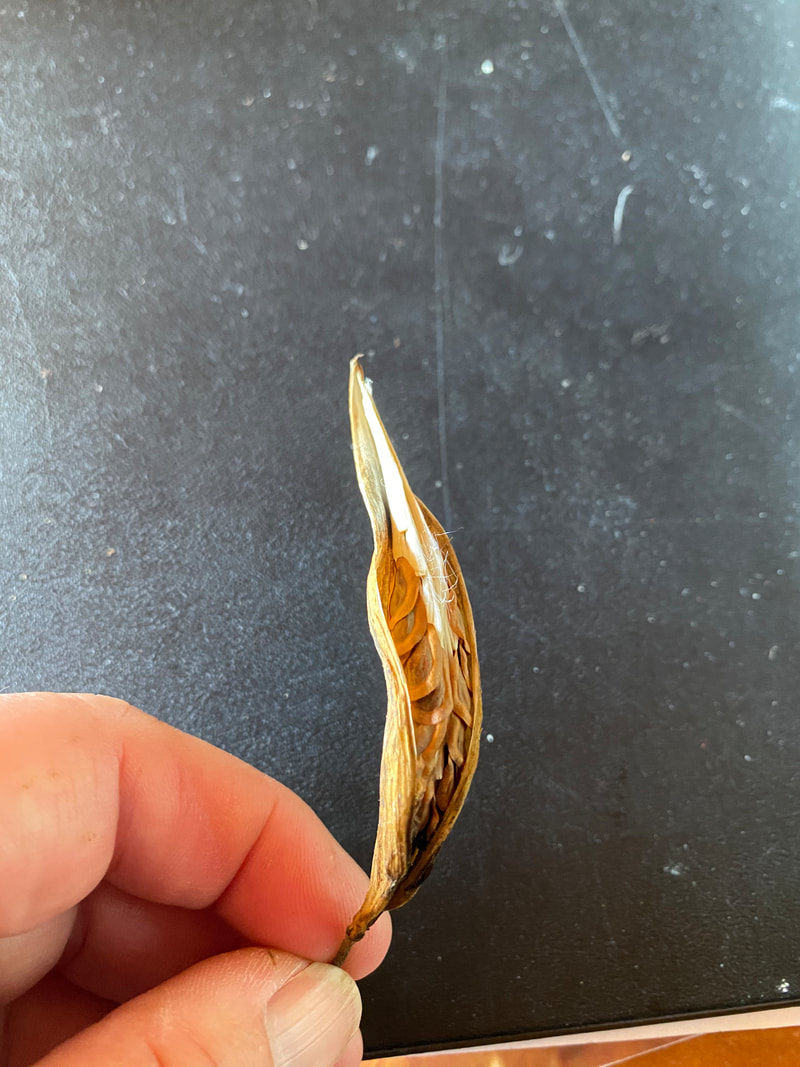 Almost too late to harvest without difficulty with fluff but it worked out just fine. Seeds are fully brown. Swamp milkweed. photo by Beth Martin
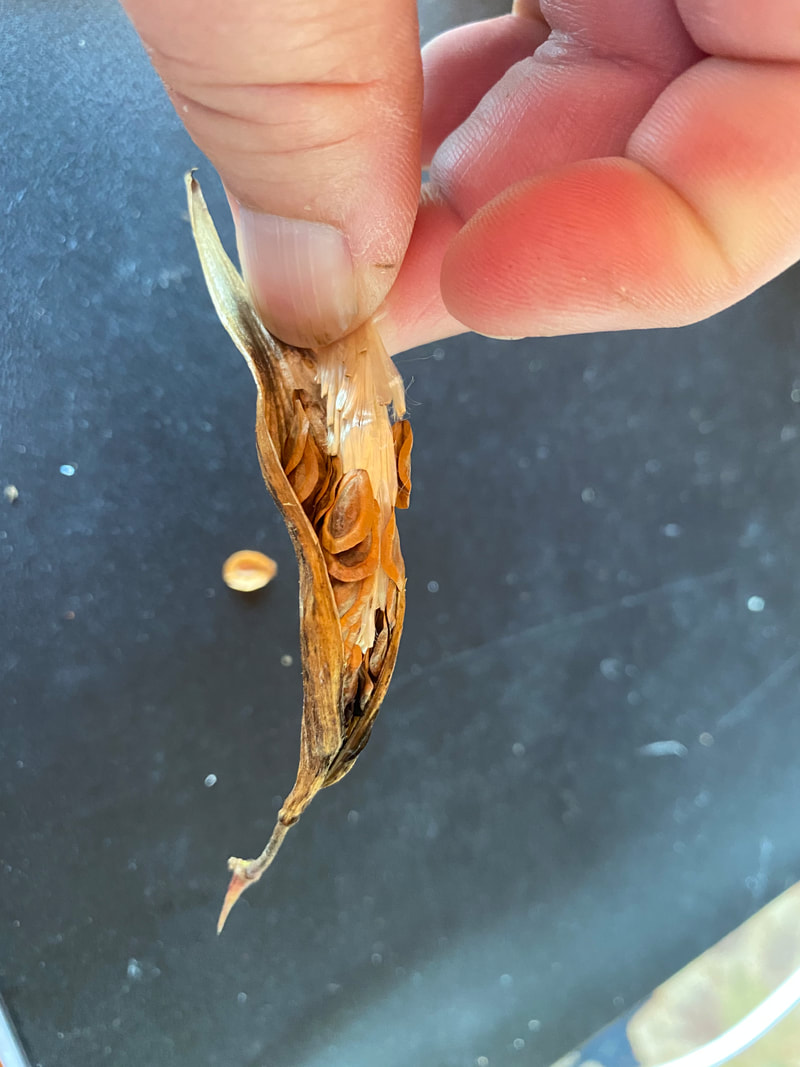 Grab silks at tip, not at the stem. photo by Beth Martin
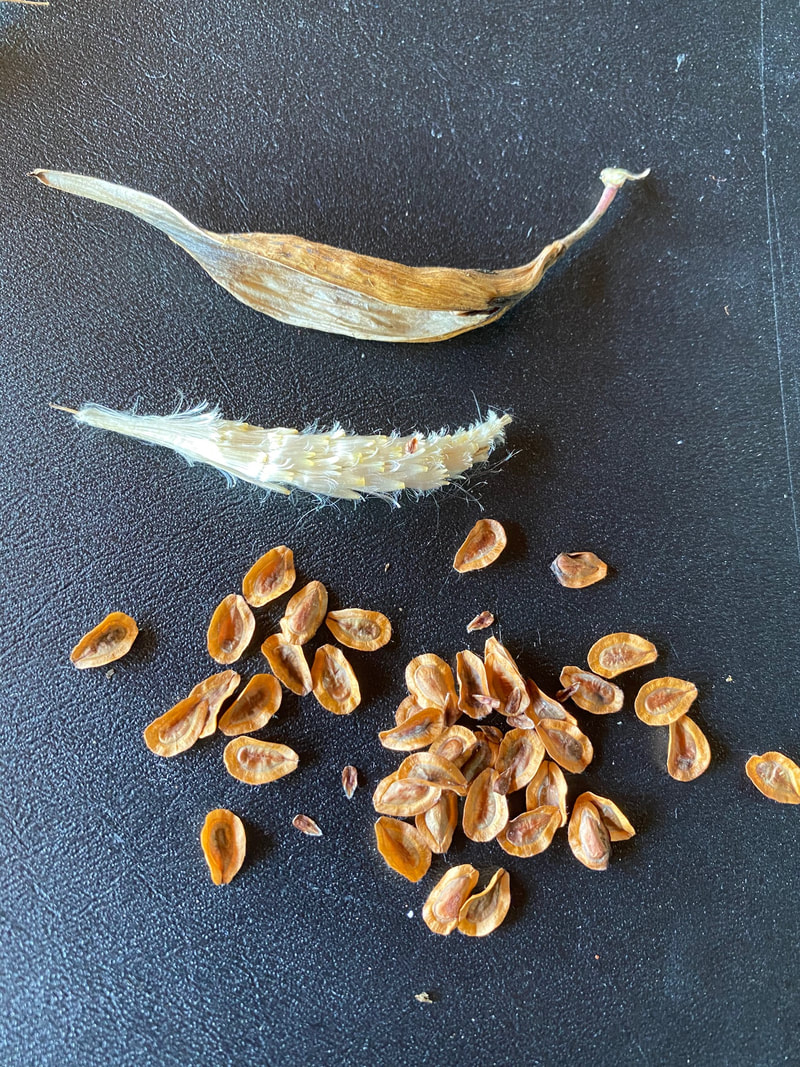 Pod, silks, seeds. photo by Beth Martin
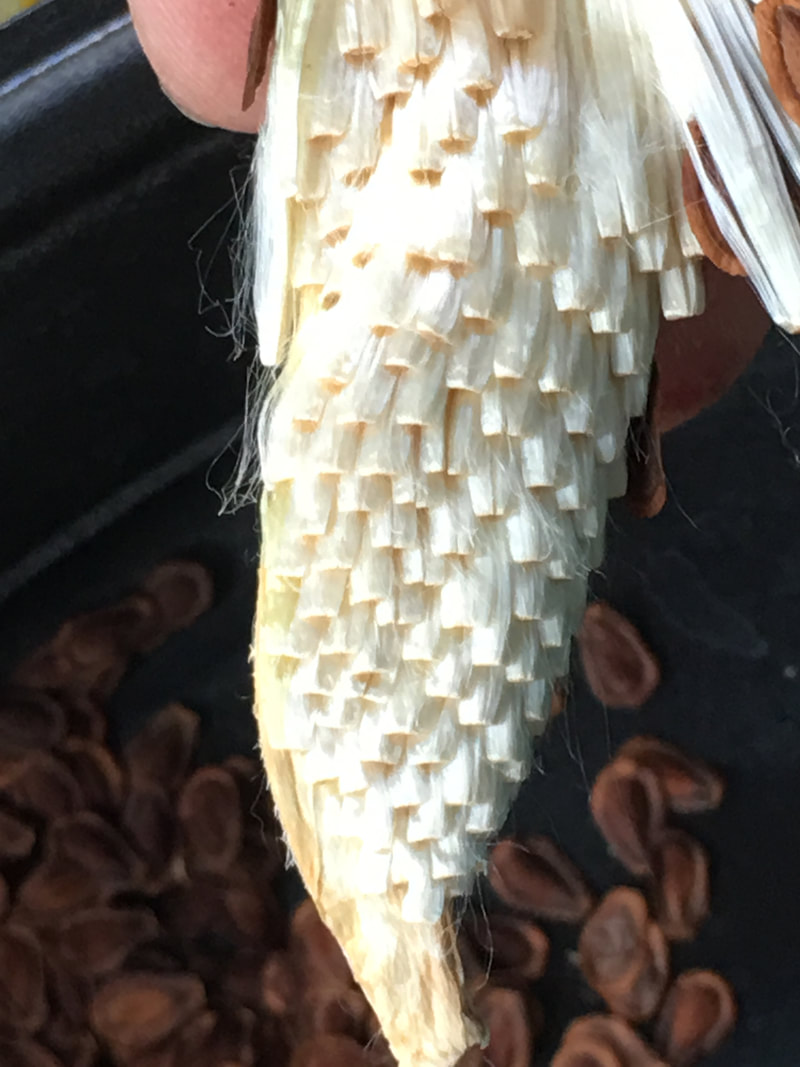 photo by Beth Martin 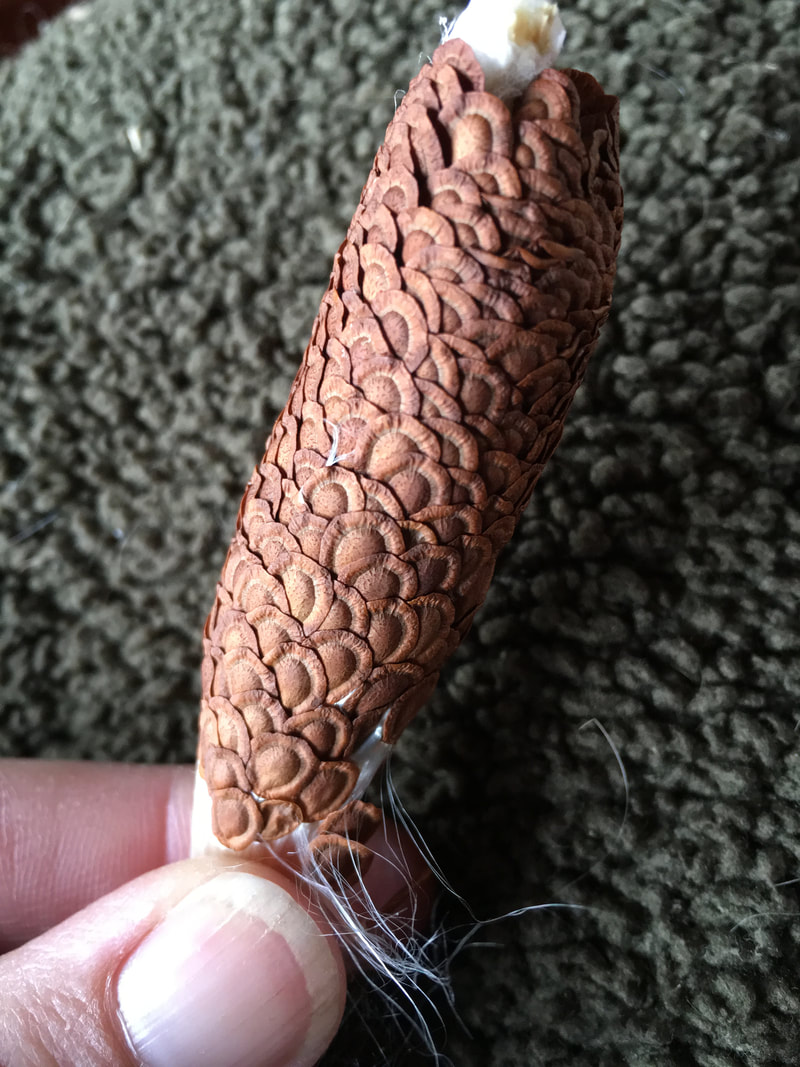 photo by Beth Martin 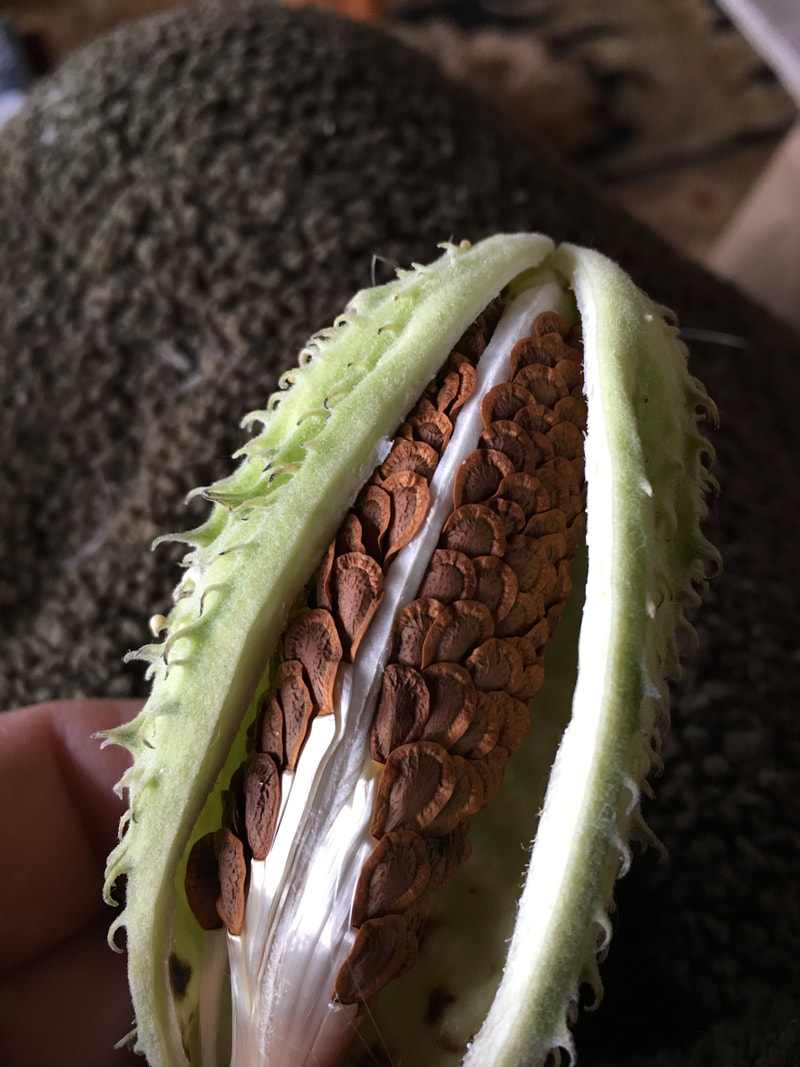 photo by Beth Martin
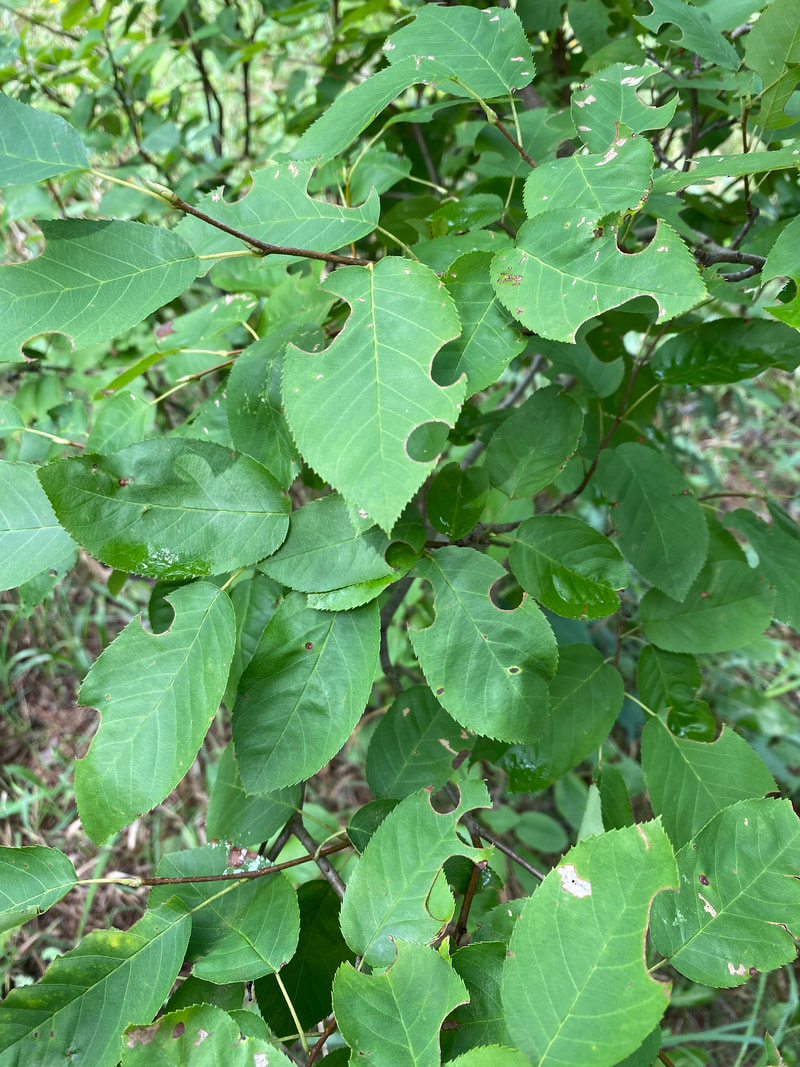 Leaf cutter bees at work. photo by Beth Martin If you have, don’t think something bad is happening. It is a good thing. Somewhere likely nearby, in a dead stem of a plant or dead section of a tree limb, a leafcutter bee has stored it’s eggs for next season's pollinators. These little circles of leaves is what separates one egg/larva chamber from the next. Like a little studio apartments for bees! Try to NOT be too tidy cleaning up your yard. Leave some dead items around because they likely harbor good things like bees for next year. And remember, if you are going to use any type of weed killer or insecticide, remember they kill good insects as well as pests, so use very sparingly. You will make these beekeepers very very happy. And if someone gives you a hard time about leaving dead stems or limbs around, tell them you are providing habitats for birds and insects and if they don’t like it to come see me!! If you have planted any of the items we have discussed over the last four blog postings, let us know about it. What did you plant and why did you choose that particular plant? I hope you had a great, err, reasonably good summer in this strangest of summers. Remember, contact with the earth always makes you feel more grounded, is good for you body and soul, and helps you to stay planted.  photo by Beth Martin 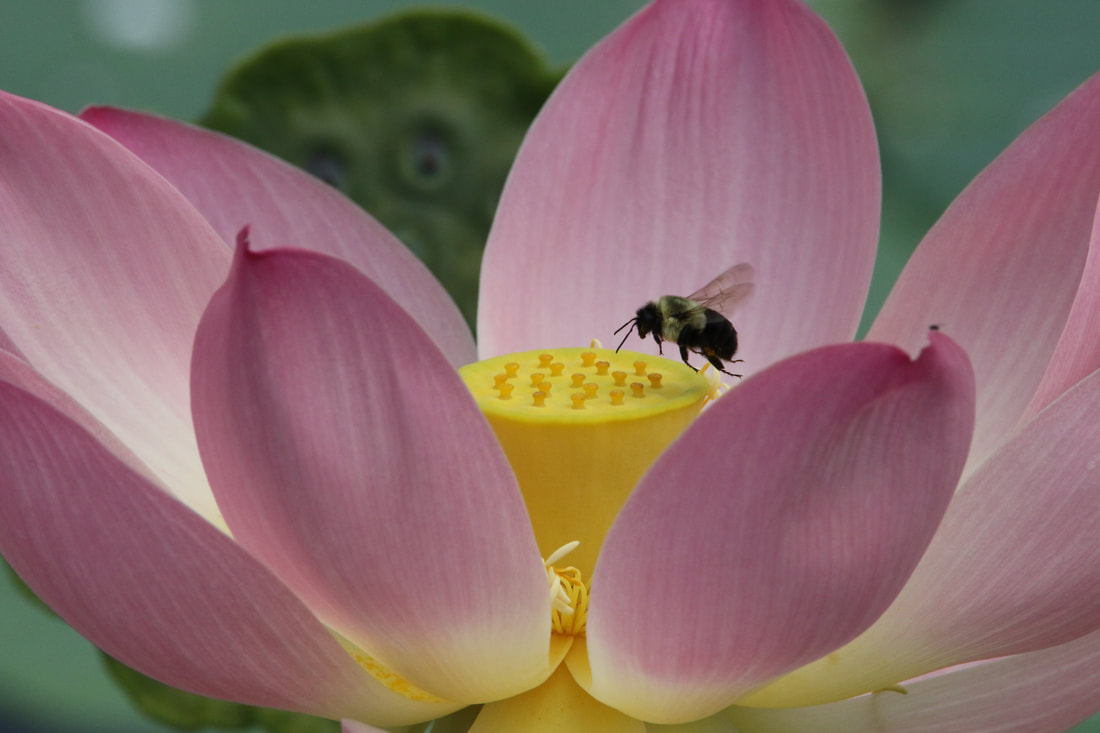 photo by Beth Martin Beth Martin is a BGC employee, Master Gardener, Master Composter, and Naturalist.
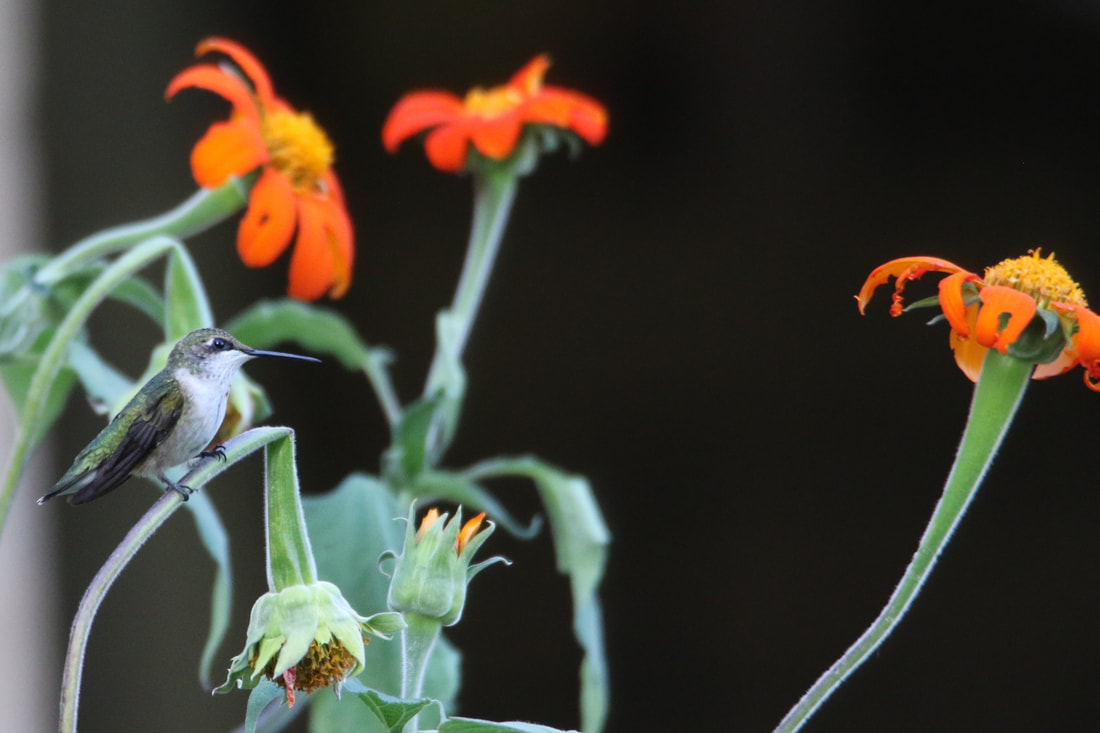 When talking about annuals, you are assured of one thing. They are not native! Annuals typically only survive in climates warmer than ours. Our winters are too harsh for them. Some of them might have seed that can survive, but the original plant will not. But before we talk annuals, back to shrubs one more time. The heavy rain of last week put an end to my bottlebrush buckeye blooms but now I see swallowtails and other butterflies and bees on my hydrangea paniculata ‘White Blush’ and Clethra Summersweet, Clethra alnifolia. Because Clethra is a late season bloomer, they have recently sprung alive with fragrant blooms that look like mini bottlebrush buckeye blooms. These are slow growers to me and this is the first year they have really bloomed. I am quite pleased with what I see and would plant a few more of these next season. I know where they will go too...they tolerate wet soil so they will go to a low lying area of the yard where they will do the most good and be happiest. But be aware that they are one of the last shrubs to show signs of life in spring. Patience is needed. Likewise, Deb from BGC has chimed in to say she sees many Swallowtails as well as small pastel butterflies and a wide variety of bees on her Hydrangea paniculata ‘pink diamond’ shrubs. I have a wide variety of hydrangeas on my property and it doesn’t seem that, when it comes to pollinators, all hydrangeas are equal. Some seem more popular with pollinators than others but that could be due to when they are at their peak pollination. So, if you have them, take a look and see who prefers your hydrangeas and what type they are. Let us know in the comments below if you see preferences like Deb and me. 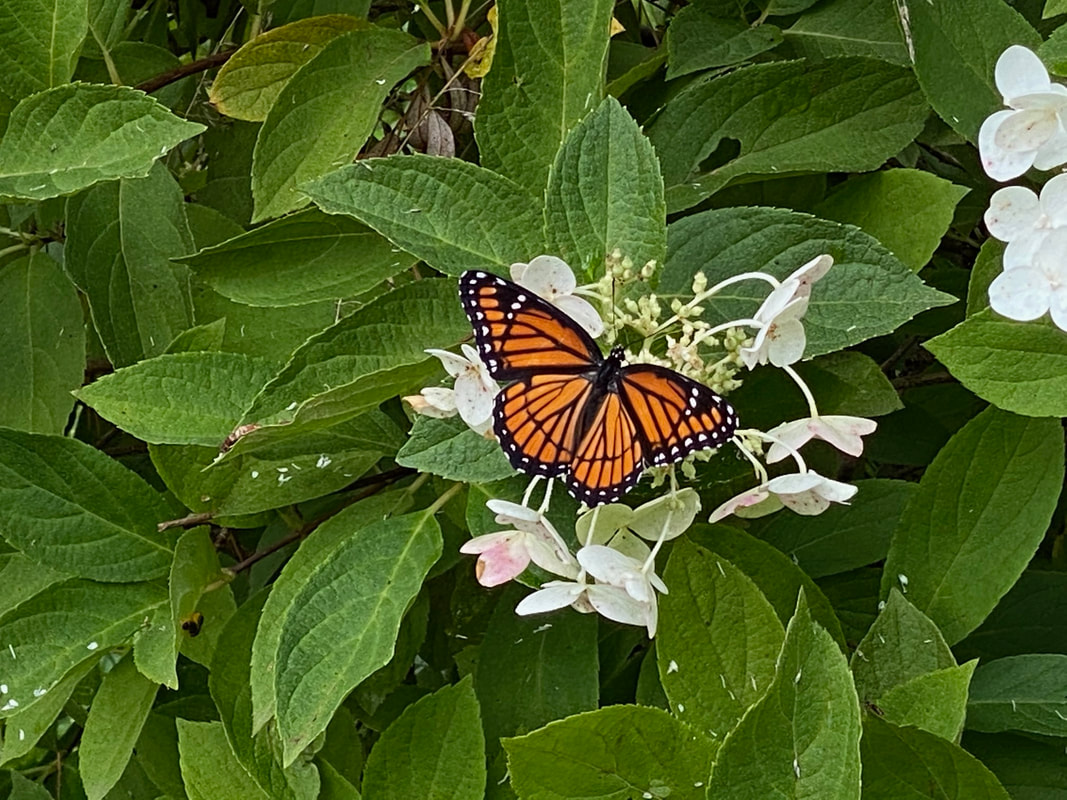 Viceroy on White Blush Hydrangea, photo by Beth Martin Now, onto our non-native pollinator enhancers! Why would annuals be so important? Shrubs and perennials have their moment in the sun and then their blooms fade away for the rest of the season. Annuals tend to bloom consistently all season as long as they are well watered and fertilized. So they can keep blooming well into fall as long as conditions are right. If pollinators can find them, they give them those all important last chances to help bulk up food stores for migration or hibernation. My absolute favorite is the first one on my list because it is important for Monarch migration. And I think we all know by now, Monarchs need our help. 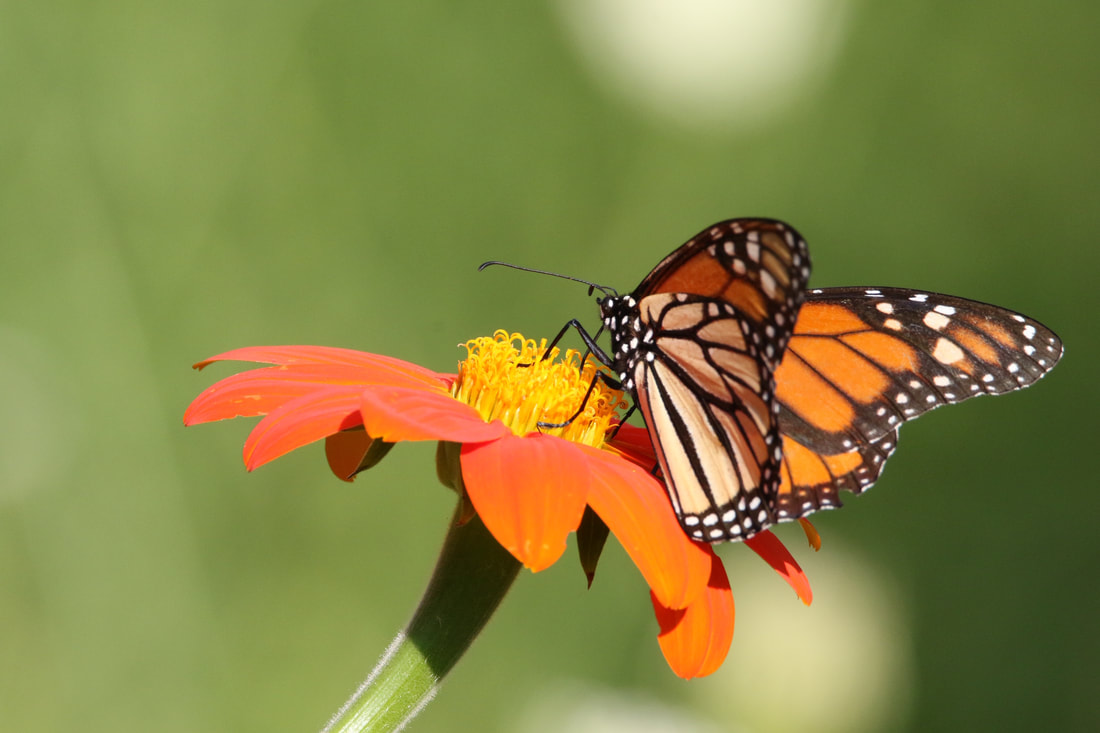 Monarch on Tithonia, photo by Beth Martin
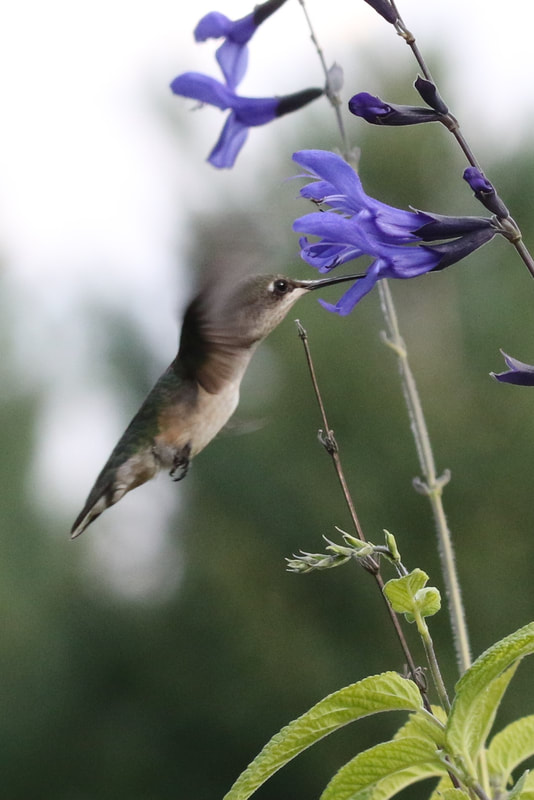 Hummingbird on Black and Blue Salvia, photo by Beth Martin 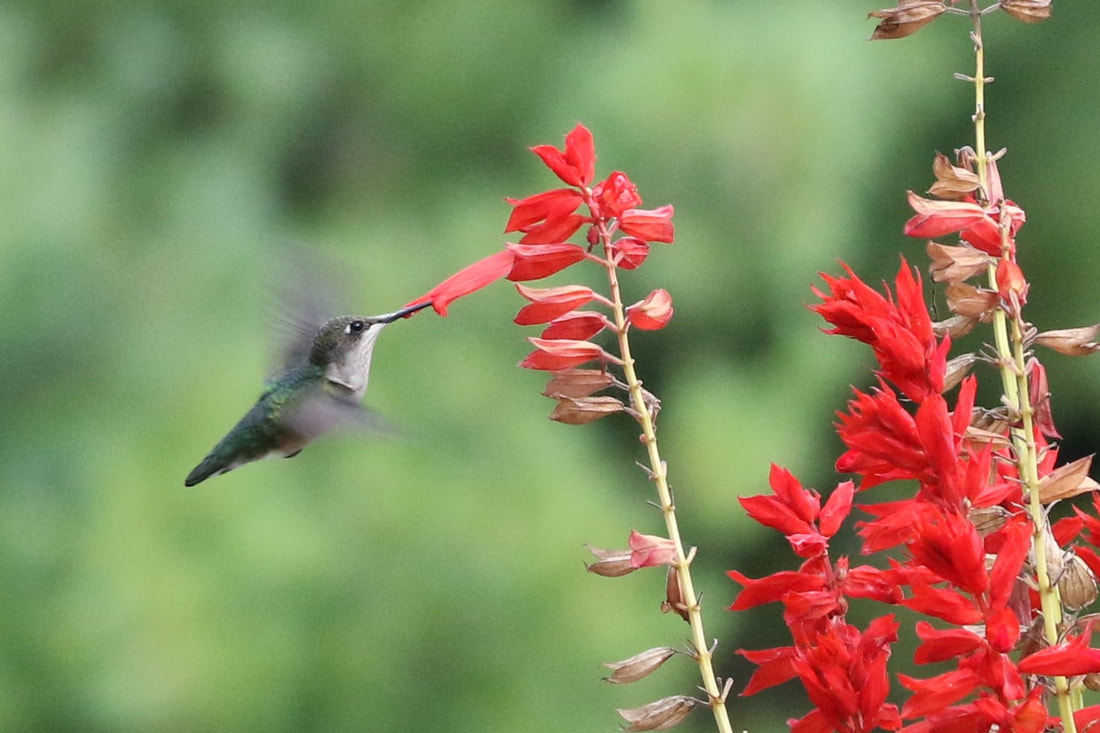 Hummingbird enjoying red salvia, photo by Beth Martin 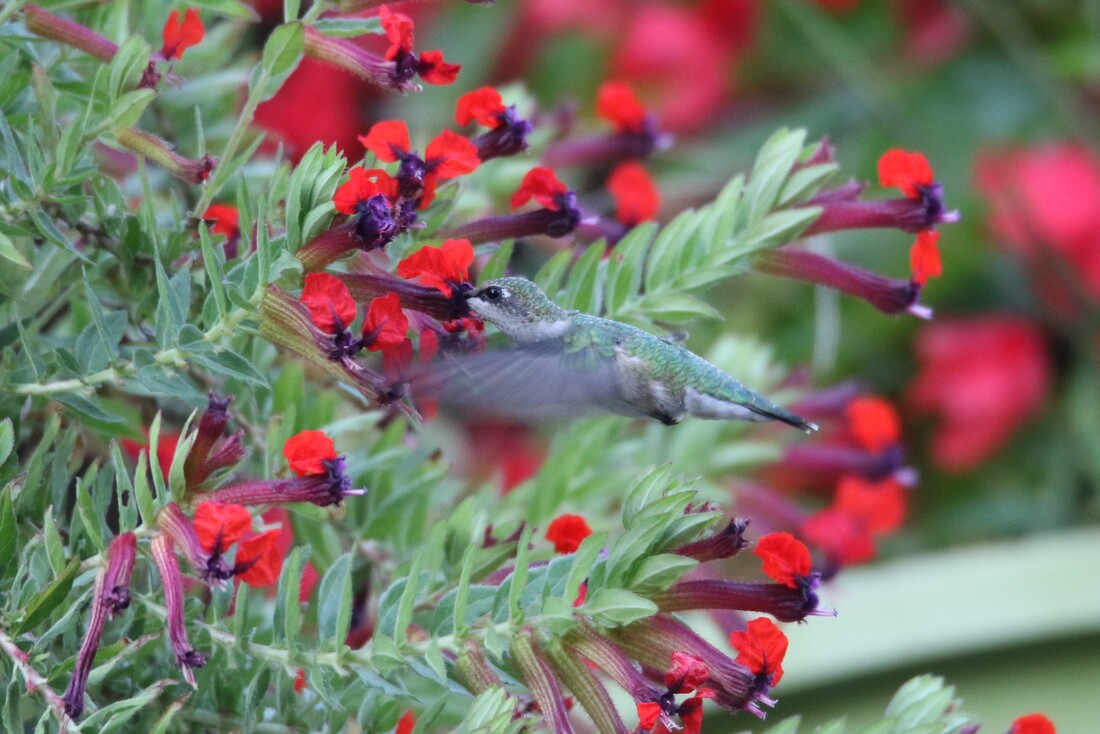 Hummingbird in Cuphea 'Bat Face', photo by Beth Martin 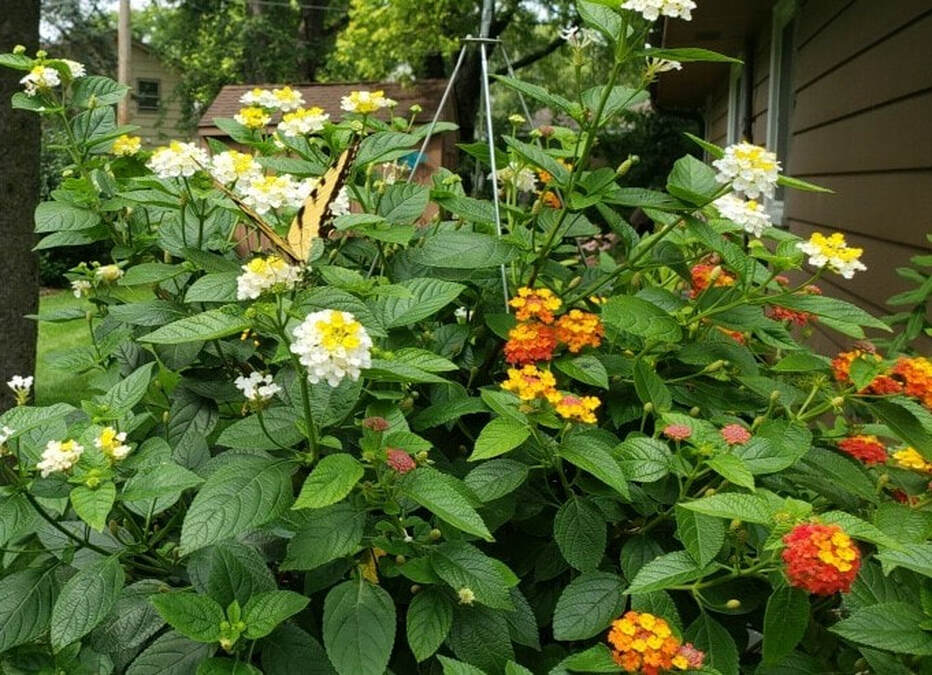 Lantana hosts many pollinators like this swallowtail. photo by Janet Kosut Almost any annual will benefit our pollinators and there are more good annuals besides those suggested above. Maybe these will give you a few new ideas for plantings you would like to do for next year. Or if you are a fan of a particular pollinator, some of these specific suggestions may further help you attract them to your yard. The important thing to remember is:
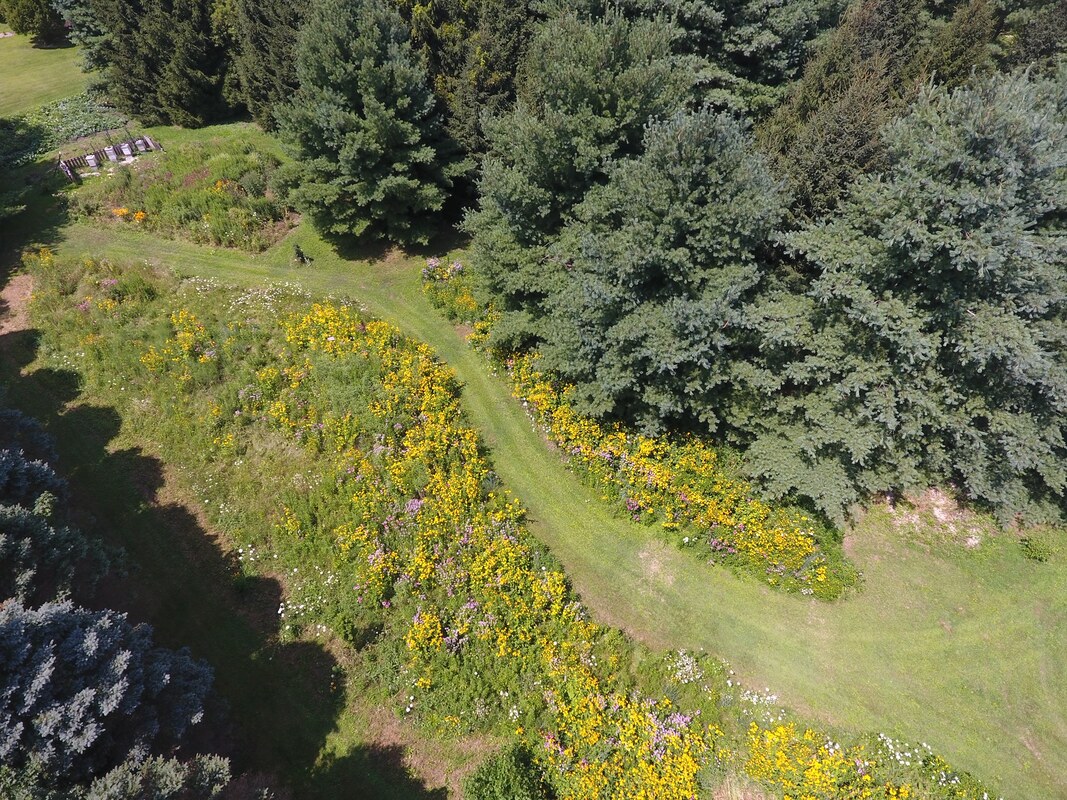 an overview of Beth's prairie 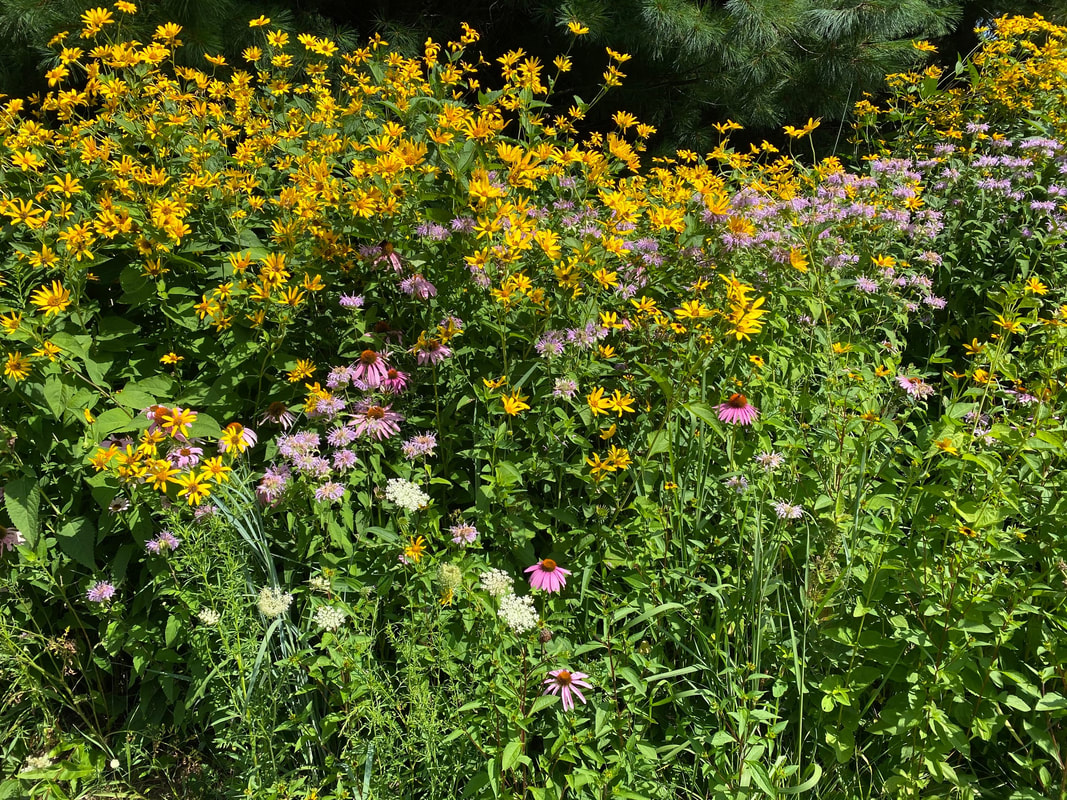 A close up of the prairie, photo by Beth Martin What is the result of all of this hard work on your part? For me, I took about an acre of property and have struggled to turn it into a prairie. I fail, succeed, fail, succeed, etc. But overall, I am heading in the right direction. It helps to have a partner who helps you pull invasives and listens to you debate the merits of this plant or that plant. He nods his head, smiles, agrees and pulls another weed. But it gives me great joy to see him with his phone out trying to take a picture of a bee he has not seen before or of a bird that is in the prairie and does not visit the feeders. Every year our insect quota seems to be greater. And with that, you get some surprises. For the first time ever last week, we have seen mating monarchs. I wasn’t sure what I was seeing at first, but this morning, I saw another mating pair. The result of this pairing will be the monarchs that live 8-9 months that will make the difficult trek back to Mexico. There is a saying something to the effect, “it’s the little things in life that are important.” All the hard work seems worth it to know you have created a space with a goal in mind and have achieved it. 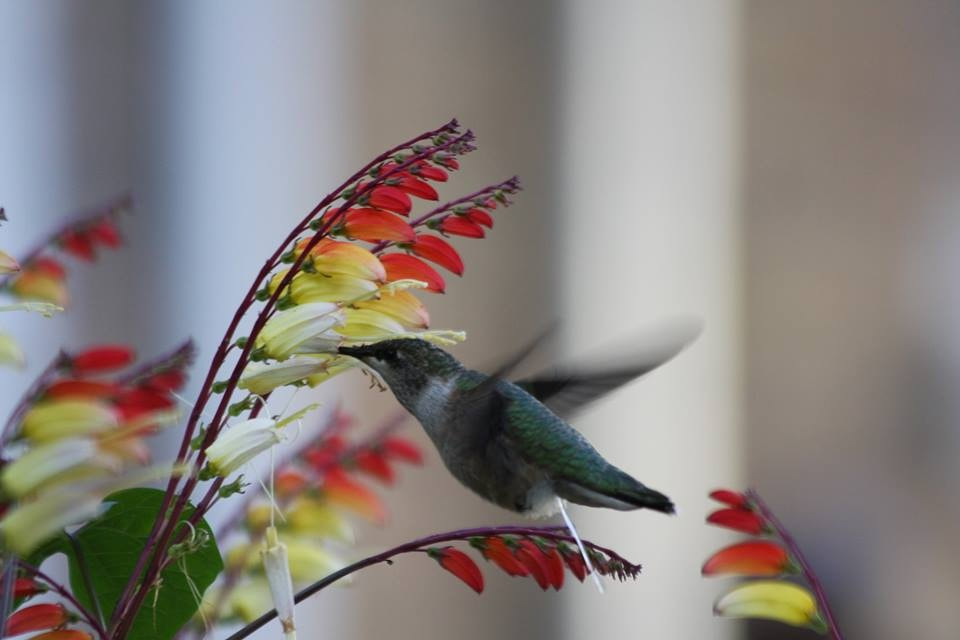 Hummingbird on Firecracker Vine, photo by Beth Martin Pollinator week is June 21-27 next year. Do yourself a favor. In these times of uncertainty, nothing keeps you more grounded then being in touch with nature, getting plenty of vitamin D from the sun and helping out nature. Buy a single plant of anything we have discussed in this series and plant it this week. You will be at the beginning of a wonderful path that gives you joy... along with an occasional back ache. If you get a chance, let us know what you plant in the comments below.
Next time, we can discuss a little seed saving. It makes my OCD happy. Beth Martin is a BGC employee, Master Gardener, Master Composter, and Naturalist. 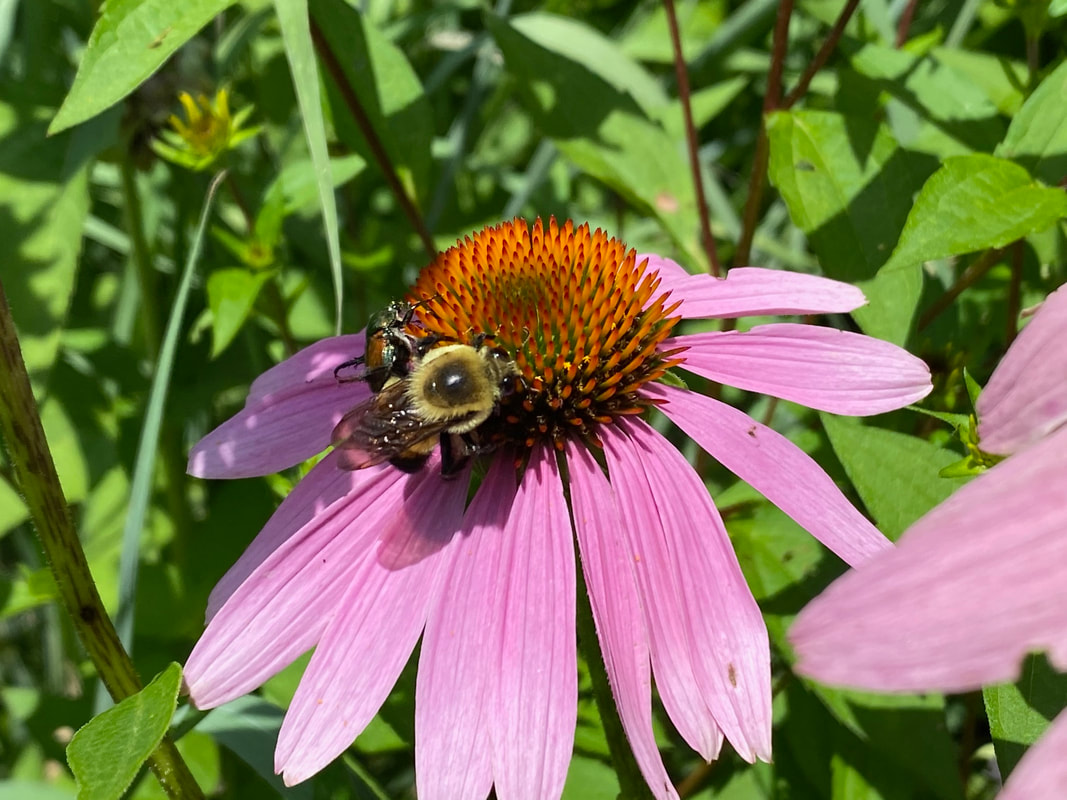 Echinacea purpurea The 10 Best Perennials for Pollinators by Beth Martin As hard as it is to pull myself away from the bottlebrush buckeye, I am going to do so to talk about perennials. But before I do, I would like to say something else on behalf of the bottlebrush and the other shrubs. Choose a variety of shrubs that will offer flowers through the season: Early spring - red buckeye, autumn splendor buckeye, Fort McNair, serviceberry, chokeberry Late spring/early summer - St. John's Wort 'Ames', bottlebrush buckeye, Kodiak Red honeysuckle Late season - seven sons tree I discussed these in the last blog post. You can read it here. Bolded shrubs are still available at BGC. One thing consistently recommended for the benefit of bees, and honey bees in particular, is mass plantings so the bees do not need to figure out how to best collect pollen by going between different types of plants. In this way, shrubs are really superior in that they are already a mass planting. Bees and other pollinators can flit between buds without changing effective pollination tactics. So as we begin to discuss perennials, we want to keep in mind that planting them in numbered groupings will be most beneficial for your pollinators. A single plant is fine. But for the case of benefiting pollinators, more is better. Aesthetically, to our eye, it looks better also. So now let’s make sure we have hardy show-stopping perennials to add to those shrubs. 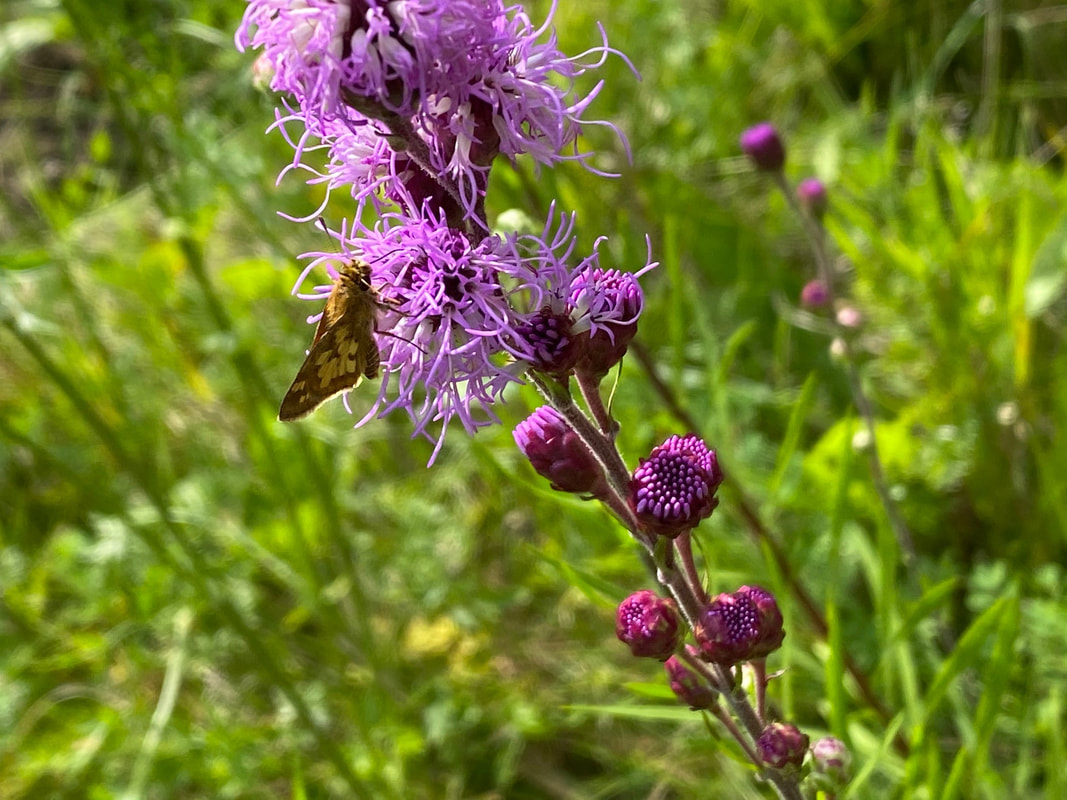 Moth on Meadow Blazing Star (Liatris ligulistylus), photo by Beth Martin What could be more obvious as a perennial pollinator than the beloved and reviled milkweed?! Loved for the fact that it is solely keeping the monarch butterfly population alive, but reviled because it sometimes does not know it’s place. I am one of those odd gardeners. Wherever it wants to pop up, it can pop up. I drop a bamboo stake in the ground where I see them crop up to mark the area. Hopefully I see it before I cut it down to size with my supersize mower. Surprised I have a supersized mower? Me too...but I am working to take away its domain. So, common milkweed (Aesclepias syriaca). Reliable? No. Not in the sense that it will come back up where you had planted it previously, but it likely will come up. Why is it important? Because it is the life source of monarchs. Will other milkweeds do? Certainly. But if you have ever raised monarchs, you know there is no other form of milkweed that has the large leaves of the common milkweed. And if you have hungry caterpillars at home, you want common milkweed. So let’s just agree to love it and bring about it’s best tendencies, okay?!? My favorite milkweed is Swamp milkweed (Aesclepias incarnata). I like it best because it generally comes back up right where it was the previous year. You want to be sure you keep weeds at bay, because it does become less reliable with thick grass or creeping charlie or another ground covering weed. Sometimes it’s hard to think of it as a milkweed because it is a classier looking plant than the common. The same is true for butterfly weed (Aesclepias tuberosa). That bright orange is such a showstopper for me. The color of the unopened buds is the color of a spectacular sunset in my eyes. So raise all 12 Wisconsin native milkweeds if you would like, but be sure to go heavy on Common, Swamp and Butterfly weed. To see all 12 types of Wisconsin milkweed, visit https://madisonaudubon.org/s/WisconsinsMilkweeds-printerfriendly.pdf Also, save the seeds if you want more of that particular plant. We can talk about seed saving at a later date. Those are the givens for the monarch population, egg laying through enclosing (emerging butterfly stage). Once a caterpillar has become a butterfly, their nectar needs change and there are several additional plants that are important for the monarch butterfly as well as other native pollinators. And of course, the best possible perennials are our native species which will attract the most pollinators. 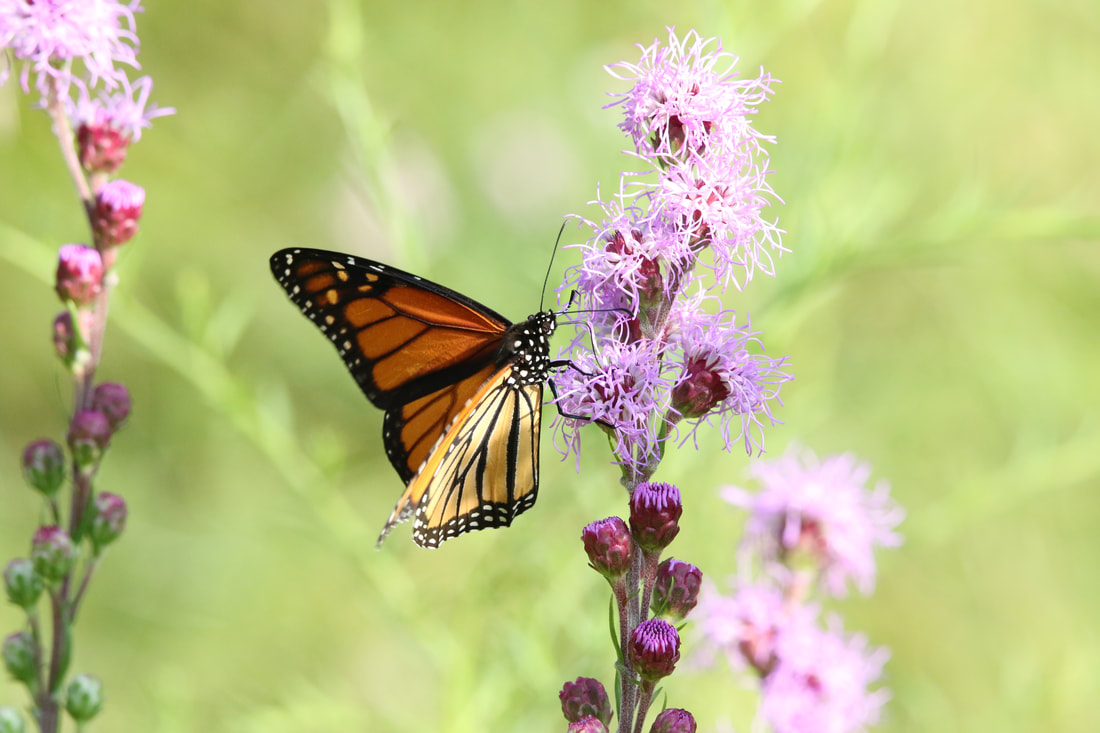 Monarch on Liatris ligulistylus - photo by Beth Martin I tell customers at Burlington Garden Center all the time that I have my top 10 perennials or annuals and then stop myself to ask “Where is this plant on my list?” So here it is, based on my observations from my own garden. By the way, if you have the 2020 BGC t-shirt, you will find many of my favorites on it!
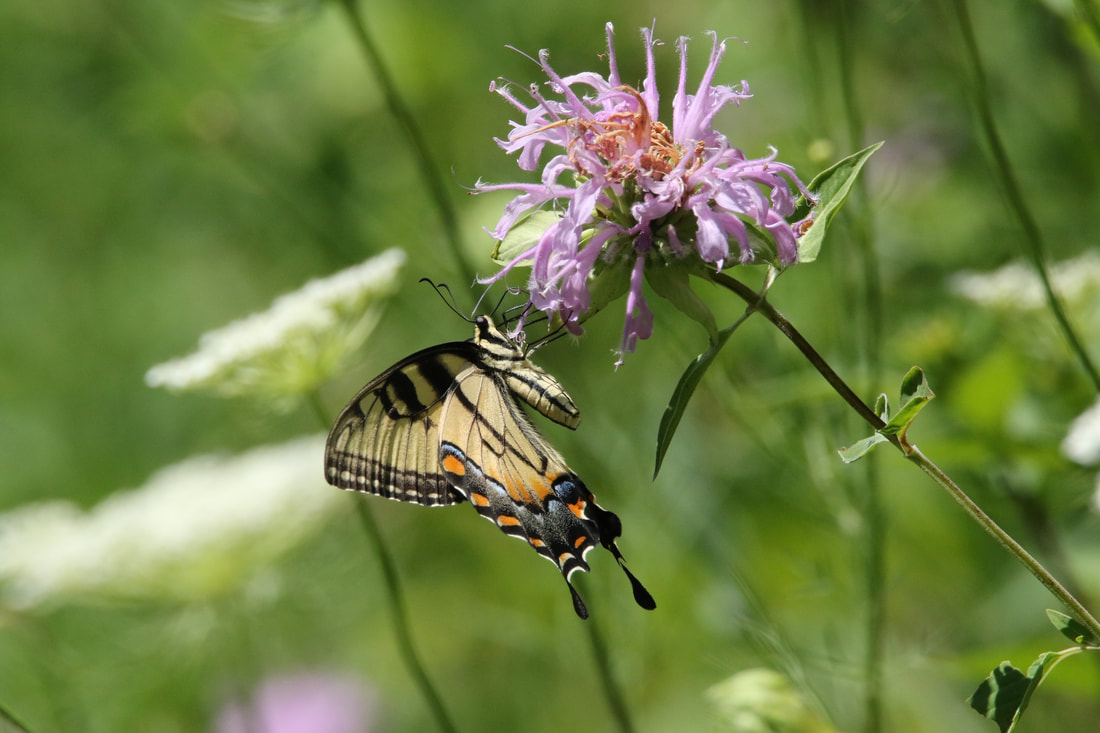 Swallowtail on Monarda fistulosa, photo by Beth Martin 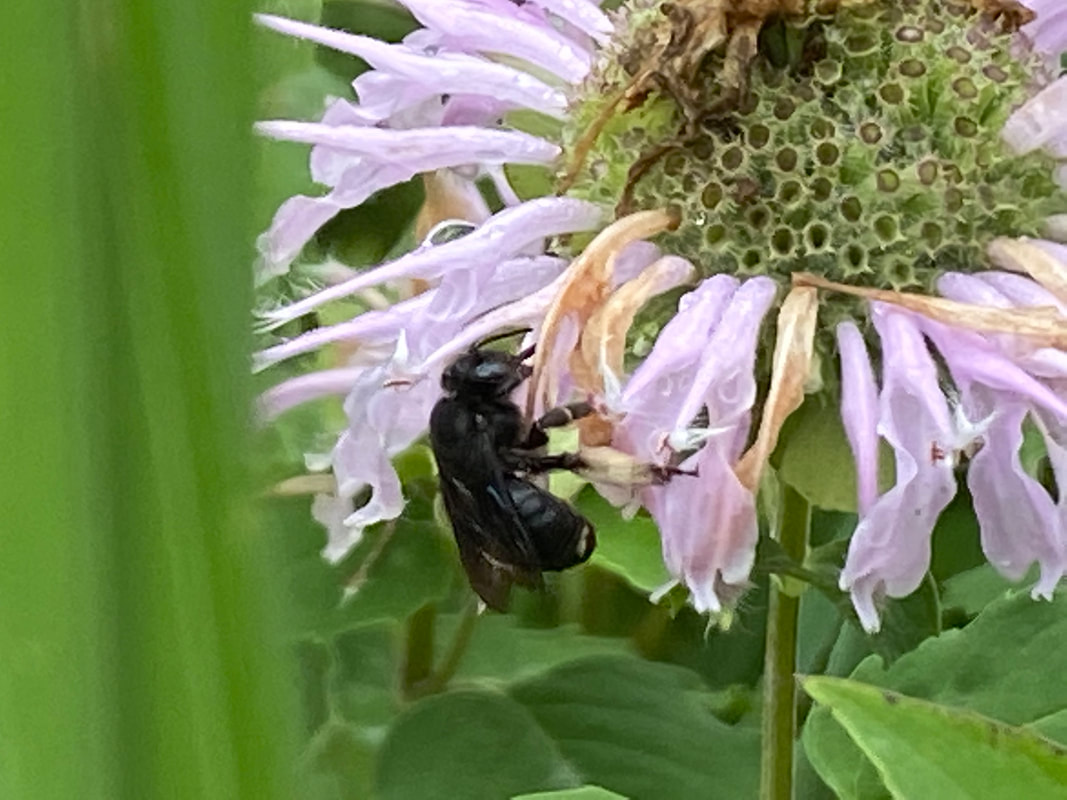 Black bee on Monarda fistulosa, photo by Beth Martin 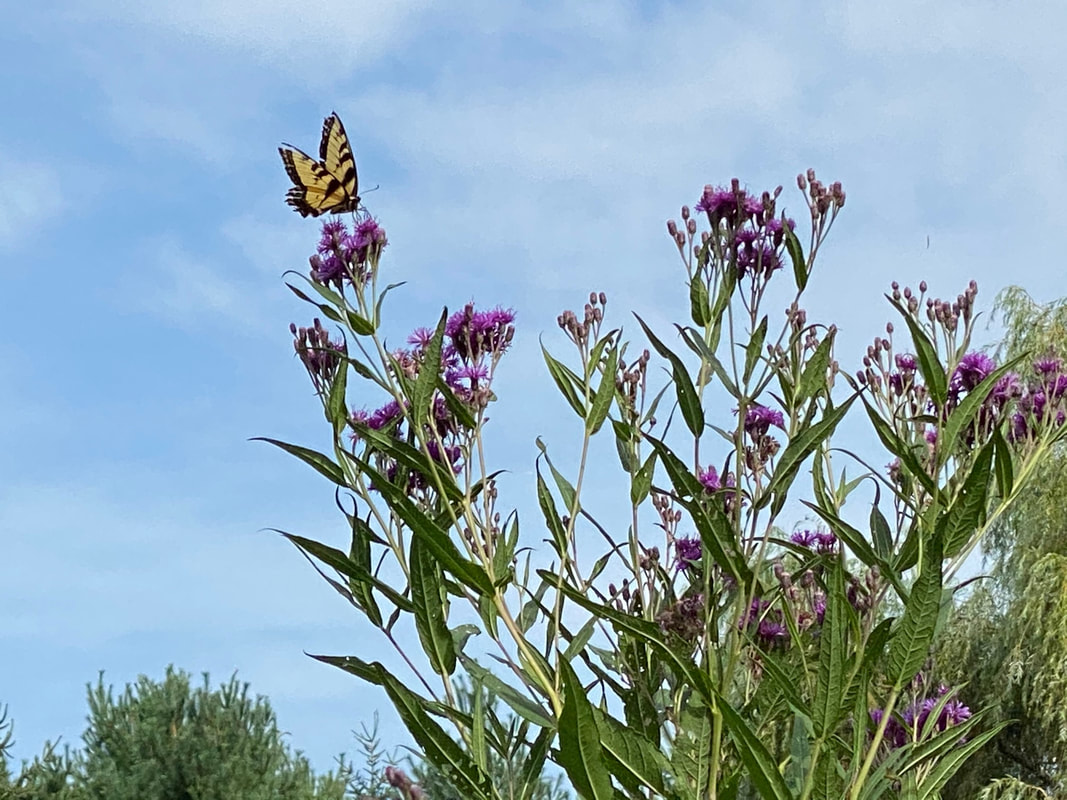 Ironweed (Vernonia fasciculata), photo by Beth Martin 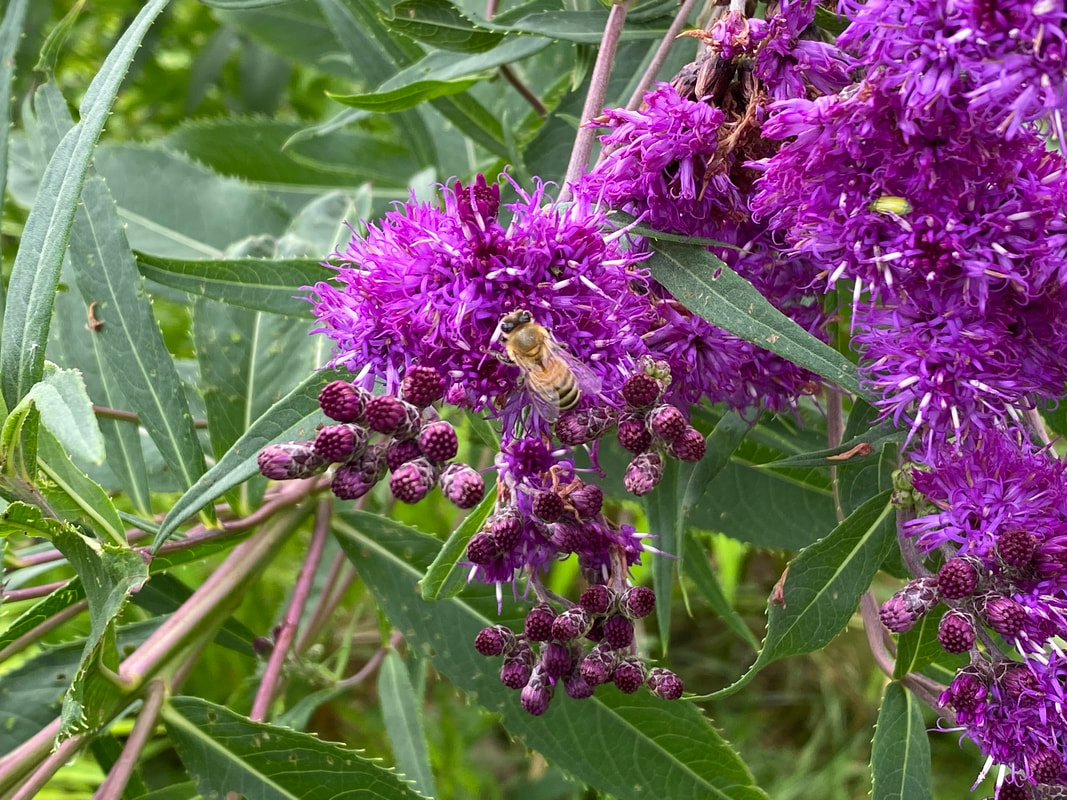 Honeybee on Ironweed (Vernonia fasciculata), photo by Beth Martin 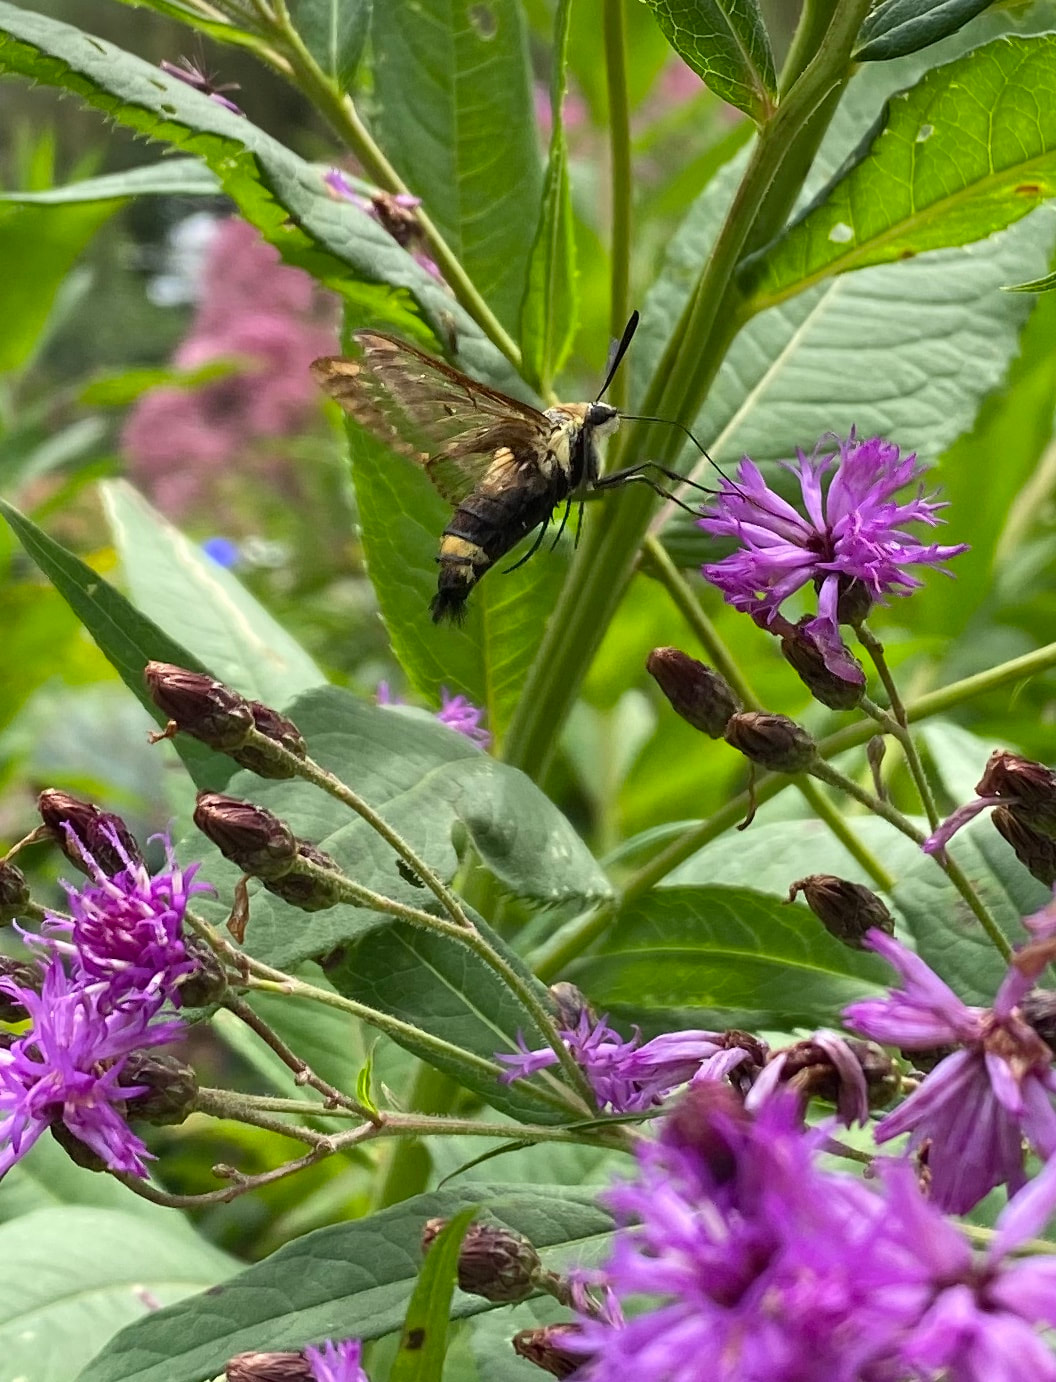 Clearwing hummingbird moth on Ironweed, photo by Beth Martin 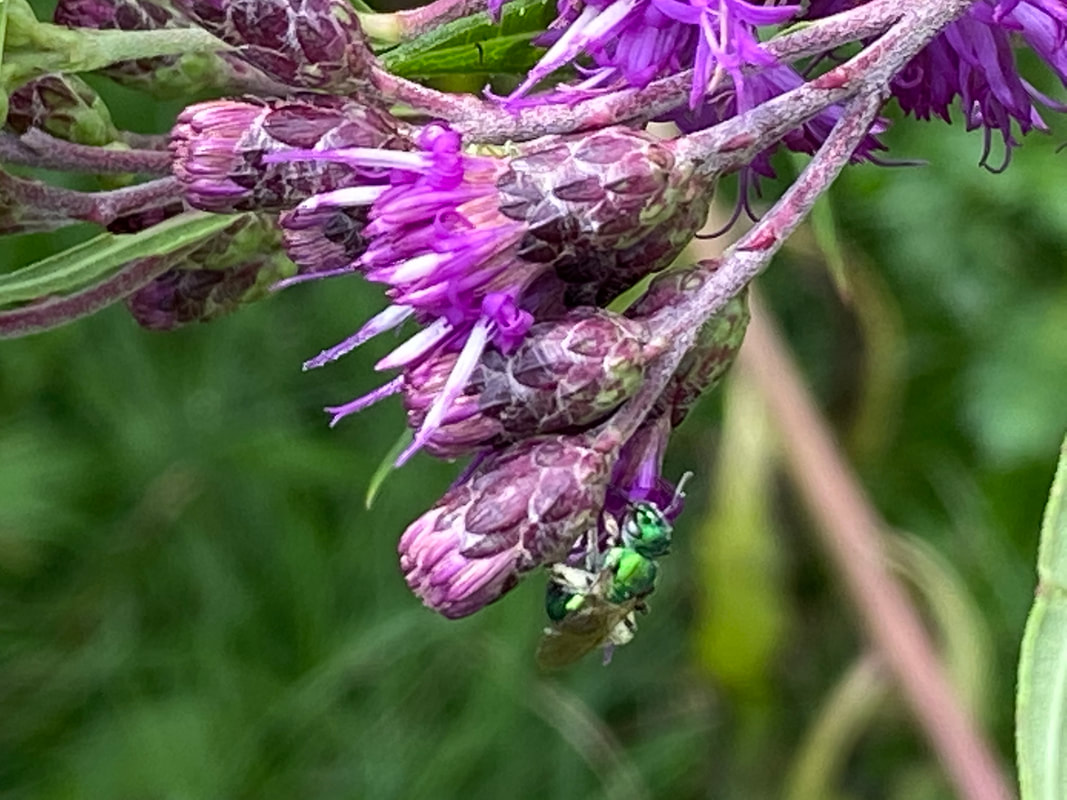 likely a sweat bee on Ironweed, photo by Beth Martin So I went a little beyond 10. I could keep going but these are the plants on which I have observed the most activity. But keep in mind, downy phlox, smooth phlox, stiff coreopsis, goldenrod, prairie dropseed, columbine are also plants that could slide into this list.
Once you have some good backbone trees and shrubs, you can work groupings of three of these into your garden to mesmerize you during the spring, summer and fall. We walk our gardens daily to note any changes we see and to try and notice not just the big spectacular pollinators, but also the tiniest and less appreciated. Do I have non-native perennials in our gardens? Yep, I sure do. I can not pass them up either, but I make sure I have natives throughout as well. Over time, I have found myself appreciating the native selections more and more. Natives are so important to our pollinators, but next time I will tell you about a few of my favorite annuals which are particularly important early and late season to help our insects bulk up for hibernation and migration. Beth Martin works at Burlington Garden Center and is a Master Gardener, Master Composter, and Naturalist. 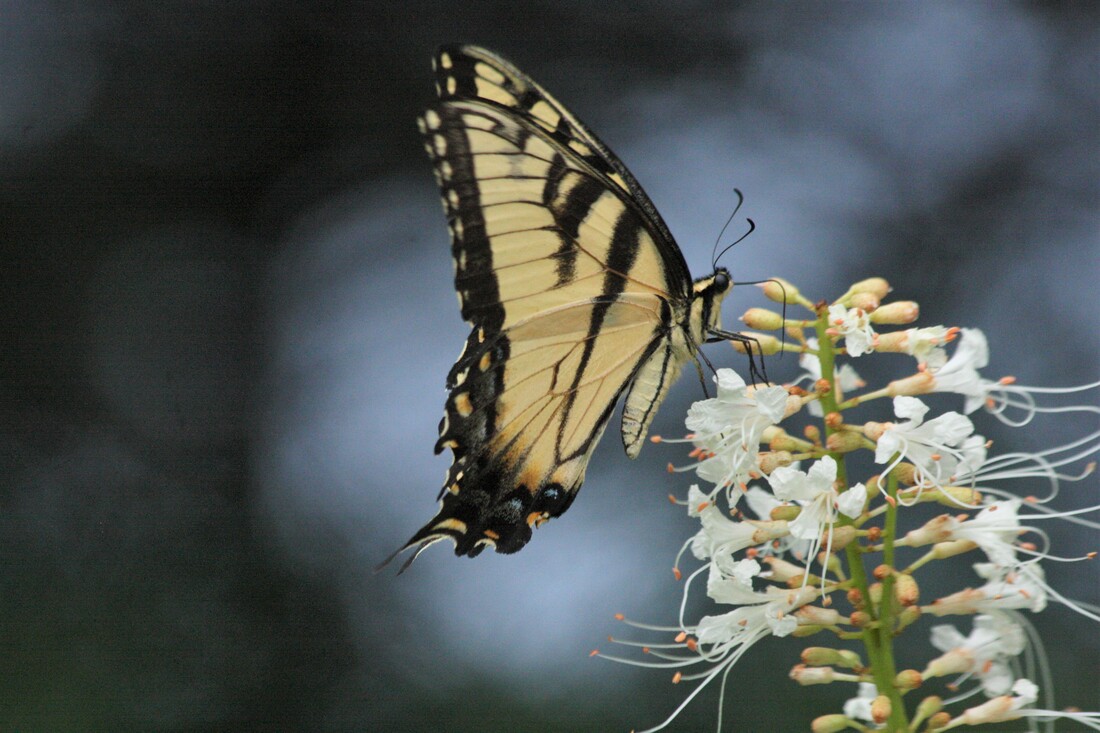 Who wouldn’t be excited to see multiple types of swallowtails and hummingbird moths, monarchs, butterflies and dozens of types of bees on a single shrub? Some plants tend to be specialists, but the bottlebrush buckeye, aesculus parviflora, is a real generalist showstopper, beginning in July. I am not aware of another plant that has such a wide variety of appeal to pollinators. We live on a property large enough to host several Bottlebrush Buckeye. They can get quite large, around 12’ x 12’ (but can be pruned), and are a native to the USA, particularly in the southeast. They are tolerant of different soil types and prefer to be watered in periods of drought. They can be planted in full sun or part shade. We have some planted in heavy shade and they perform just as well, however, they are not as large as those in the sun. We use them mostly as an understory shrub but they could easily be used as a specimen shrub because of the pollinators they attract. 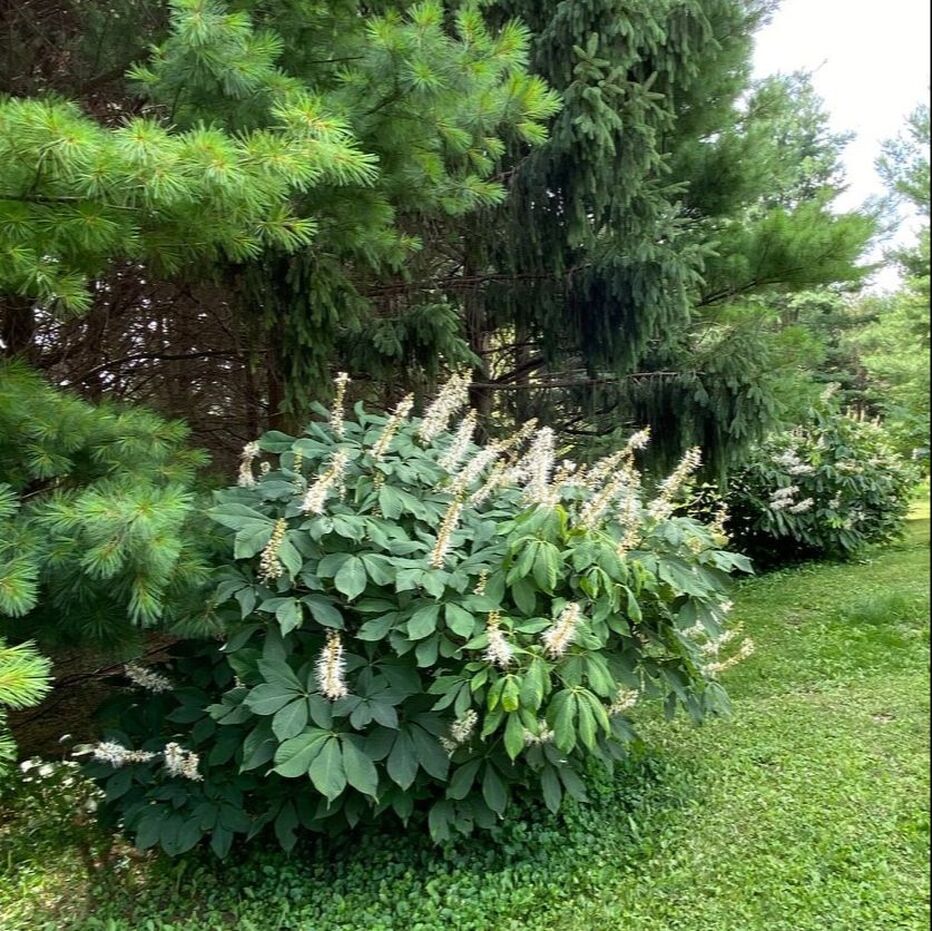 Right now, our bottlebrushes are roughly 6 feet wide, deep and tall. They are called bottlebrush buckeyes because the flowers resemble a very large brush, around 12 inches long, that would be used to clean out a wine bottle. Each bottlebrush has hundreds of small flowers on it to form a single bottlebrush. So there are plenty of flower heads to go around for all the various feeders…even hummingbirds. The tiny green metallic bees may be one of my favorites to come to this shrub to feed. They are very small, about a third of an M and M (Covid snack food in this household!) with an entirely shiny head, thorax and abdomen. When not flying, their wings cover much of their metallic green bodies. These small bees are huge compared to some of the other even smaller varieties of bees that also pollinate this shrub. Remember, Wisconsin has over 400 different bee species. Having a shrub that attracts so many different pollinators is a great addition to any yard. As beekeepers, we are thrilled to see our honeybees throughout all our bottlebrush buckeye. Knowing what makes the honeybees happy helps us to be more successful with honey harvesting. But seeing the wide range of insects is even more thrilling. We have seen hummingbirds in the shrubs, two variety of the clearwing sphinx moth or hummingbird moth, 6 different swallowtails, monarchs, silver spotted skippers, a variety of large bumblebees, honeybees, green metallic bees, black bees and bees I could not begin to name. We have an area where we have three of these shrubs in a row. We are out investigating them at different times of the day just to see if the variety changes. So far we are thrilled with what this shrub adds to our overall garden. With bottlebrushes still forming, we have a long time to enjoy them. I cannot imagine not having this prize in our yard. If you plant one, I’m sure you will be impressed and thrilled with it as well. Be prepared to pull up a lawn chair to watch the non-social distancing pollinators! 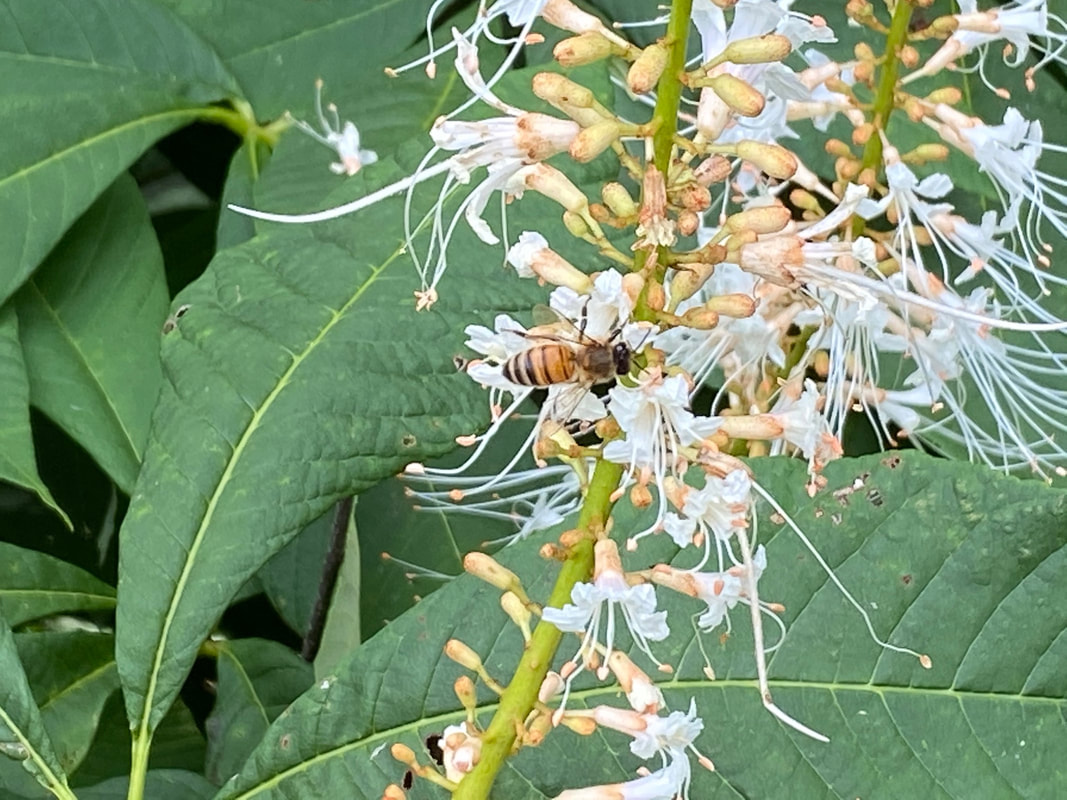 To keep pollinators happy, consider planting shrubs and small trees that flower at different times so pollinators are kept busy on your property. It can only help your crops if you are also growing food. For early spring, some of my favorites are red buckeye, autumn splendor buckeye (both of these beloved by hummingbirds!), serviceberry (which also has tasty small fruit) and chokeberry (which has small fruit to feed the birds). Late spring and early summer, I am a big fan of St. John's Wort 'Ames', a reliable well performing shrub that blooms July and August about the same time as the bottlebrush buckeye. I love it too for its small flowers that resemble buttercups. Kodiak Red honeysuckle (non invasive) is also a beloved pollinator shrub at this time of year. 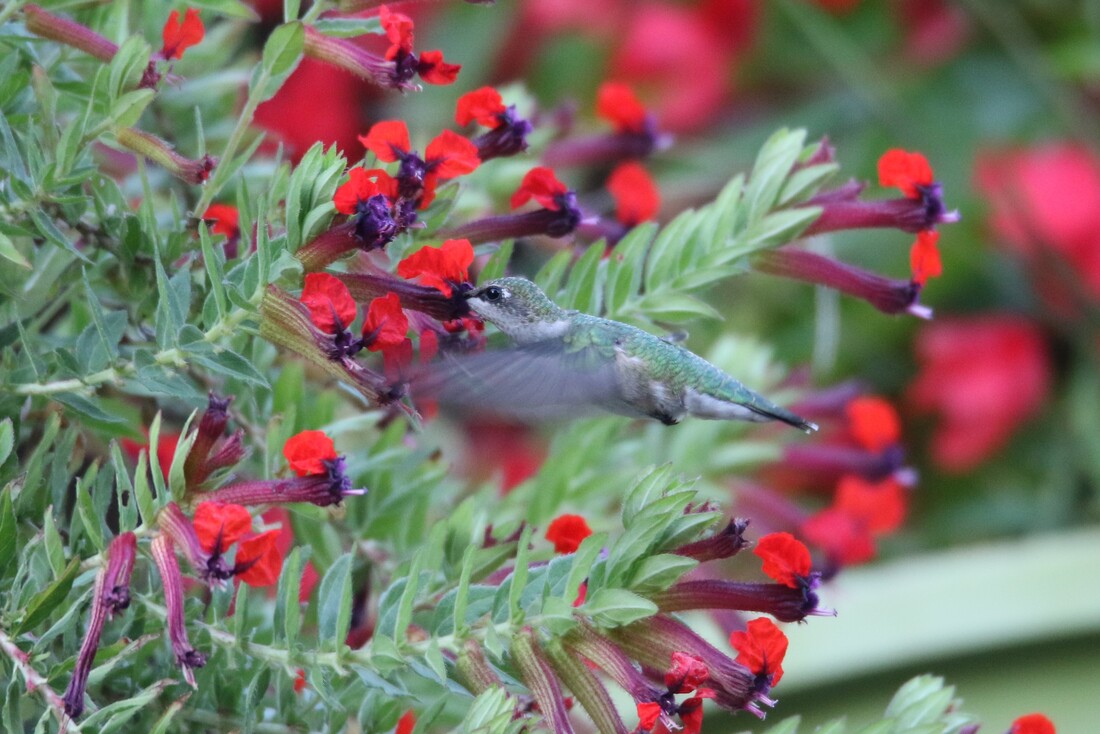 Yet to bloom would be another favorite of mine and the pollinators, the seven sons tree. I can not say enough wonderful things about this shrub. It is just as popular as the bottlebrush buckeye but is at that all important time of the year when the days are getting shorter and pollen is in shorter supply. It is fragrant and such a joy to watch as all types of butterflies, bees and hummingbirds migrate to it in numbers.
The shrubs listed above in bold are still available at BGC at this writing. Also, we have all of these except the autumn splendor buckeye (but we have the similar Fort McNair) planted on our property and have been observing them for several years now. There are other shrubs that could be placed into this article but I am only writing about what I observe on my own property. Shrubs I know can take some abuse and still bloom prolifically! One last clarification. On multiple occasions this spring, people asked me why something is called a tree yet it is multi stem, like the crabapple and seven sons tree by the pond at BGC. Many trees like crabapple and magnolias can be pruned to be trees but their natural habit is to be multi stem. Growers keep them single stem so they take up less room in the greenhouses. Makes sense. So if you do not want it to become more shrub in habit, you need to prune suckers. As for what makes something a tree vs a shrub in technical terms, a tree is over 20 feet and a shrub is under. But a tree can look like a shrub! There you have it. Coming up in the next addition, perennials and annuals to support your pollinators. Beth Martin is a BGC employee, Master Gardener, Master Composter, and Naturalist. All photos are taken by her. 6/6/2020 1 Comment Growing Epic Tomatoes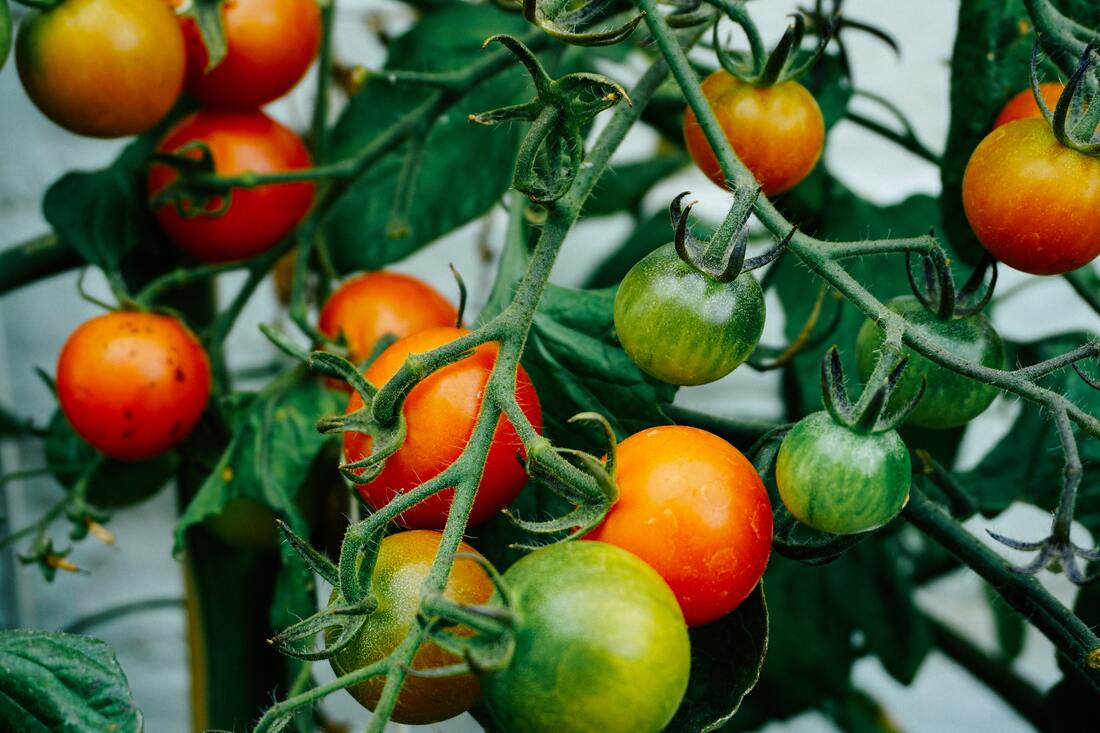 With the recent interest in gardening and growing your own food, perhaps a few pointers on growing great tomatoes would be helpful as the growing season is now well under way.
Types of Tomatoes There is a great variety of tomatoes available in many colors, shapes, and sizes. Types include cocktail, cherry, grape, sauce, slicers, beefsteak, and canners; and come in colors of white, yellow, red, pink, purple and brown. Knowing how you will use the tomatoes in the kitchen will narrow down the selection field. But what, then, is all this about hybrids and heirlooms? Hybrid vs. Heirloom Hybrids are a good place to start for most gardeners. Varieties, including Celebrity, Big Boy, and Sun Gold, are a result of crossing two other tomato varieties with the goal of producing a better tomato with greater disease resistance, more vigor, and more uniform fruit. Heirlooms, such as Cherokee Purple, Brandywine, and Mortgage Lifter, are open-pollinated and have a history or story that traces back to its origin, which is generally before 1950. The selection of heirloom varieties is vast thanks to the seed-saving efforts of numerous generations of gardeners. Heirlooms are often preferred due to their outstanding flavor and huge yields at harvest. Indeterminate vs. Determinate Most tomato varieties have an indeterminate growth habit, meaning they have a central stem that can easily reach 10 feet in one growing season! The fruit develops in clusters in stages providing a longer harvest time than determinate varieties. The latter top out at a much lower height and fruit set usually happens around the same time. Romas, for example, are determinate, which is perfect for the gardener who wants to make sauce or salsa, because the tomatoes ripen around the same time. Epic Tips Don’t plant too early. Tomatoes are a warm season crop, preferring warm nights and warm soil temperatures. Though it’s tempting to plant early to mid-May when we are treated with a few pleasant days, it’s best to wait until the danger of frost is past. Make Memorial Day weekend planting time. Plant deeply. This is one of the best tips for growing a strong plant that can support all the heavy fruit that is sure to come. Dig a trench and lay the plant in the trench, allowing only the top few sets of leaves above ground. Roots will form along the buried stem creating an anchor for the plant. Mulch. One of most common diseases that plague tomatoes is early blight. This happens when soil full of bad microbes is splashed onto lower foliage, but a thick layer of mulch can prevent this. Straw, untreated grass clippings, shredded leaves, and newspaper are good options. Stake them early. Tomato cages work well for determinate varieties which have a genetically shorter stature, but will not give others enough support. Remember that indeterminate varieties have a main stem that can be supported by a tall stake and some twine. Companion planting. There are herbs and flowers that repel pesky insects and attract the beneficial ones: Alliums (chives and onions), marigolds, peppermint, parsley (allow to flower), and basil (especially African Blue flowering). Keep potatoes away from tomatoes, and never plant tomatoes near black walnut trees. Feed them well. Tomatoes have a hearty appetite, so start them off right with a healthy dose of organic matter, such as compost, worked into the soil, and supplement with fertilizer at planting time. An additional feeding is recommended when flowering by side-dressing the plants with another helping of compost or fish emulsion. Water consistently. One of the problems gardeners face with tomatoes is blossom end rot. This occurs when calcium is not available to the plant at the time of fruit set, but can be prevented in two ways: water consistently and add calcium nitrate or gypsum to the planting hole making the nutrient available to the roots. More watering tips: water the soil, not the foliage to further reduce the possibility of diseases, and it’s best to water first thing in the morning. Remove lower leaves. Once the tomato plants are growing by leaps and bounds, remove the lower leaves (12” from the ground). This will also help reduce any blight spores splashing up onto the foliage. These simple practices can make a huge difference in the health of your tomatoes and don’t take much of your time. Set up a regular watering schedule so you can observe them daily, watching for signs of pests and diseases. In a few months, you’ll be enjoying the fruit of your labor. -Tracy Hankwitz Horticulturist and General manager at Burlington Garden Center. Contact her and the BGC staff with your gardening questions @ 262.763.2153 or [email protected]. 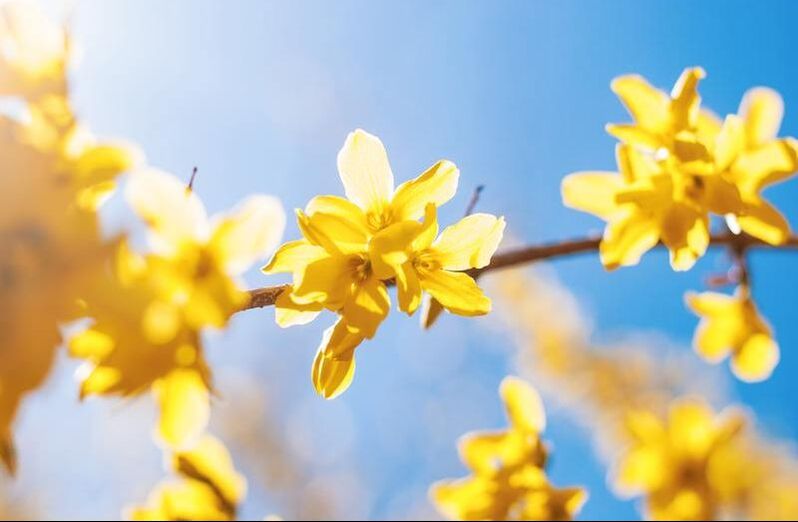 Marking time. . . waiting . . .
It's what we all are doing right now as we wait for the all-clear that life can return to some form of normalcy. Slowing down and settling into a more relaxed daily rhythm can be unsettling if we aren't use to it. But good will come of all this, and it may begin by looking to nature's calendar rather than yours to mark time. The earth is beginning to awaken, have you noticed? Birds are migrating back north, pollinators are emerging, spring perennials are bursting into bloom. Are you paying attention to what nature is telling us? Nature's cues have long been studied - the timing of such things and matching them with other things is called phenology - the study of the cycles of plant and animal life. Translation: when this happens in the natural world, it's time to do that. . . Here are some examples: - When you hear the spring peepers, its time to plant peas. -When the Forsythia bloom, it's time to prune the roses and apply a crab-grass pre-emergent to the lawn. - When the daffodils bloom, it's time to plant beets and chard. - When the Serviceberries (Amelanchier) are in bloom, it's time to plant potatoes. From another source I found these observations:
Some may consider this folklore, but much of phenology is based on soil temperature. day length, and decades of observation - aka being tuned into nature. It can vary region to region, but can be helpful when determining the general timing of flower and vegetable planting. As I dug deeper into phenology, I learned how important observations really are and how recorded data is used in a much bigger way - to study how urbanization affects phenology and how ecosystems systems change overtime. It's one thing to use phenology for your own benefit, but why not be part of something bigger? You can study what's happening in your own backyard, record your observations, and send the data in to be used by researchers across the country. Nature's Notebook is one such program that 'gathers information on plant and animal phenology to be used for decision-making on local, national and global scales to ensure the continued vitality of our environment.' You can learn more and get involved at https://www.usanpn.org/natures_notebook. As time marches through another month of being safer-at-home, don't miss the wonders of a world awakening right before your eyes. Use this time to connect with the natural world, tune into the cues from plants and animals, and learn from nature to nurture your garden and even contribute to a bigger movement. Slowing down can be a very good thing. - Tracy Hankwitz horticulturist and general manager of Burlington Garden Center 3/9/2020 4 Comments Spring Pruning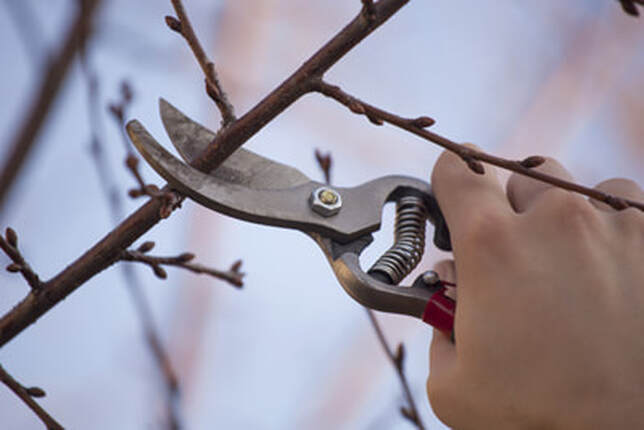 photo source: ridgeviewgarden.com Every year about this time, gardeners stand in their yards with pruners in hand ready to cut, whack, saw, and do the meatball. But wait. Not all woody plants should be pruned the same way or at the same time. Other gardeners are intimidated with pruning, get out the hedge sheers or prefer to do nothing. No matter which you are, these helpful tips will boost your confidence and arm you with the know-how to make the right cuts. Pruning Basics
The Unprunables * Some shrubs can be intimidating even for experienced gardeners. Elderberry, Flowering Quince, Forsythia, Mock Orange, and Weigela can be pruned using three different techniques. One is known as rejuvenation which involves cutting all the branches back hard to about 6 inches from the ground. This stimulates an explosion of new growth and is best used when shrubs have grown out of control. If this is too drastic for you, break it into a three-year plan. Every year for three years, remove one-third of the oldest canes to the ground level. By year three, you'll have a completely new, nicely-shaped, healthy shrub. The other two methods for the unprunables are described here. Other Tips & Resources
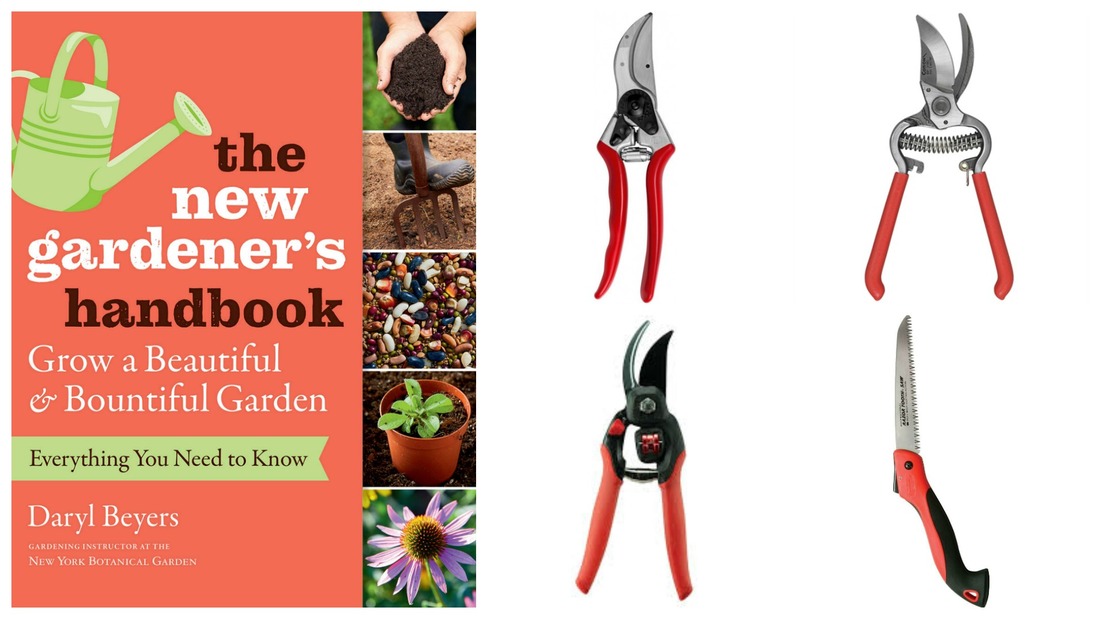 Fruit Tree Care in Spring
We get lots of questions every spring about fruit trees, including when and how to prune. The following should help answer your questions:
Tracy Hankwitz, horticulturist and General Manager at Burlington Garden Center. After winter’s long hold, the first signs of spring are the sweetest. Despite the transitioning temperature swings as the two seasons duke it out, a late snow or frost will not hurt early-emerging perennials. Imagine the ground thawing, birds singing, and the sun warming as we walk through the shade garden in early spring. Prepare yourself for the thrill of excitement that only nature can provide. . . One of the first to awaken is the Lenten Rose (Helleborus). In mid-March, brush away the layers of leaf mulch and you’ll find new leaves emerging followed quickly with whites, creams, pastels or deep purple flower buds low hidden under last year's foliage. As the ground warms, foliage and flowers expand to their full glorious selves rising to 12-24 inches. A new one to look for is H. 'Sun Flare'. Plant them along a pathway and on a slight slope in part shade to keep them happy. Though Hellebores can be pricey, the reward is well worth it. 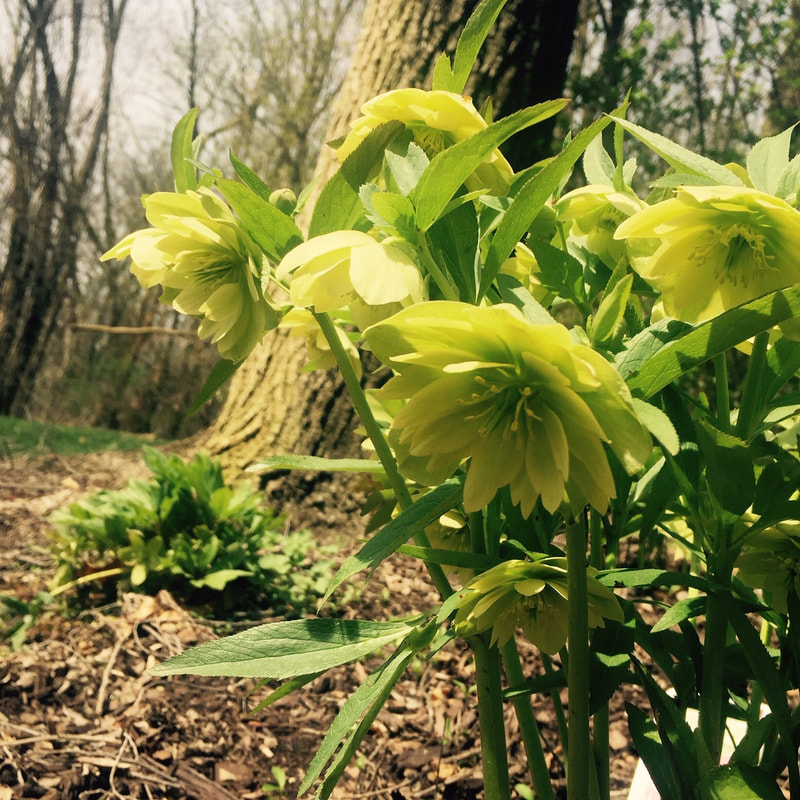 Hellebores in early spring Following quickly on their heels is Lungwort (Pulmonaria). Delicate blossoms range from white to shades of raspberry. Their attractive leaves are speckled, spotted, or splashed with silver and will expand as the season progresses making this shade perennial a good alternative to Hostas. 'Twinkle Toes' is a delightful variety that sparkles in the shade. A fascinating change happens to the flowers when pollinated. After a bumblebee nestles in to collect nectar, the flower changes color, signaling to other pollinators to find another bloom. Isn’t nature fun?  Pulmonaria 'Twinkle Toes' photo source: provenwinners.com A lovely companion to the pinks and purples of Lenten Rose and Lungwort are the sky-blue dainty flowers of False Forget-me-not (Brunnera). Like her shady sisters, it is flowers before foliage in the spring. The species will often reseed and after a few years, the garden will be a sea of blue. Once the initial show is done, the foliage expands into attractive hearts that grace the landscape. Look for variegated varieties with white or silver like 'Sea Heart' which won’t spread as quickly. 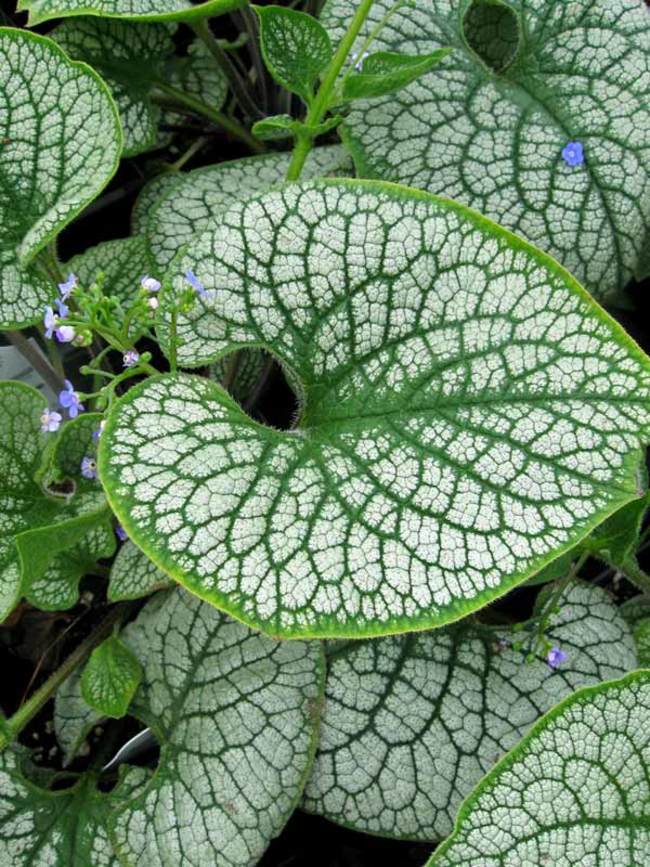 Brunnera 'Sea Heart' photo source: bluestoneperennials.com Primroses (Primula) are a seasoned harbinger of spring. Their lovely pastel flowers embody the hope and joy that spring brings. Many Primula species are self-seeding and create a naturalized feel in the shade garden. In addition to the low-growing posies, look for the taller drumstick or candelabra types to add variety. Two other favorites to look for are the apricot, double blossoms of ‘'Nectarine' that will dance their way into your heart, and the frilly, apple-green ‘Francesca’ which blooms a little later than other Primrose. 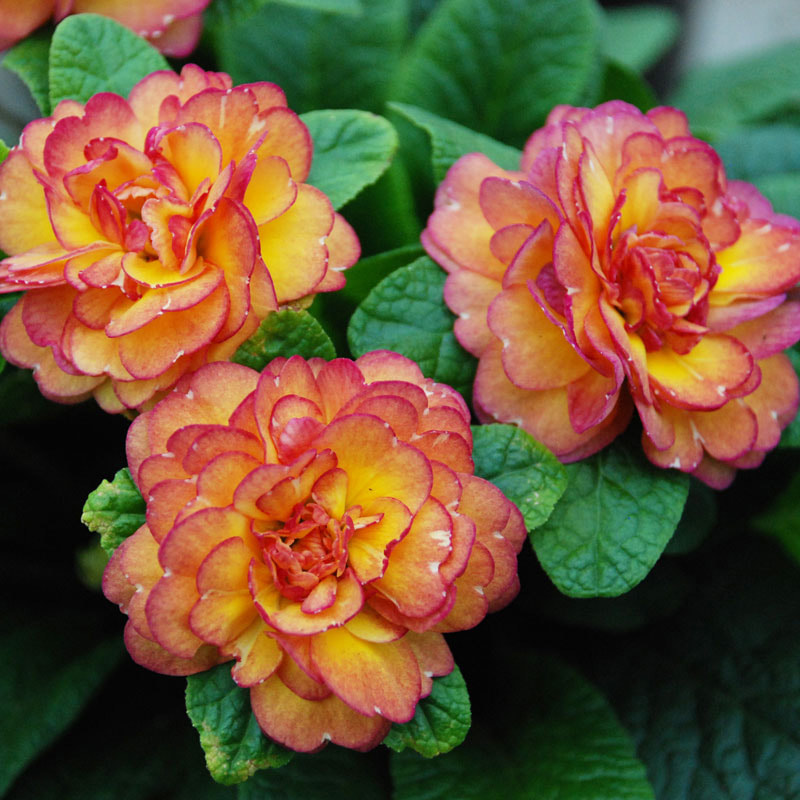 Primrose Belarina 'Nectarine' photo source: greatgardenplants.com What spring garden would be complete without unfurling fiddleheads? Like a child, I often find myself on my knees with my face pressed in close to capture those fresh, green fronds with my camera. But green is not the only color of ferns. Pepper in the burgundy, lacy foliage of Japanese Painted ferns and all her offspring varieties. They make a lovely contrast to the emerging, broad leaves of Hosta. 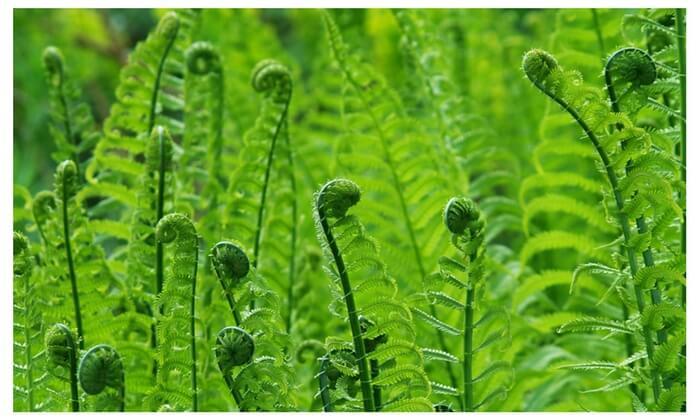 Fern fiddleheads opening in the spring. photo source: onlineplantnursery.com In the summer, the shade garden cools us with calm, green hues and a mix of bold and fine textures. It’s in spring when she arises and shines with an entirely different color palette. With a few of these early beauties in your landscape, you can more fully experience the excitement of spring as the earth awakens.
Tracy Hankwitz is a horticulturist and general manager at Burlington Garden Center. 2/24/2020 0 Comments Book Review: A Way to Garden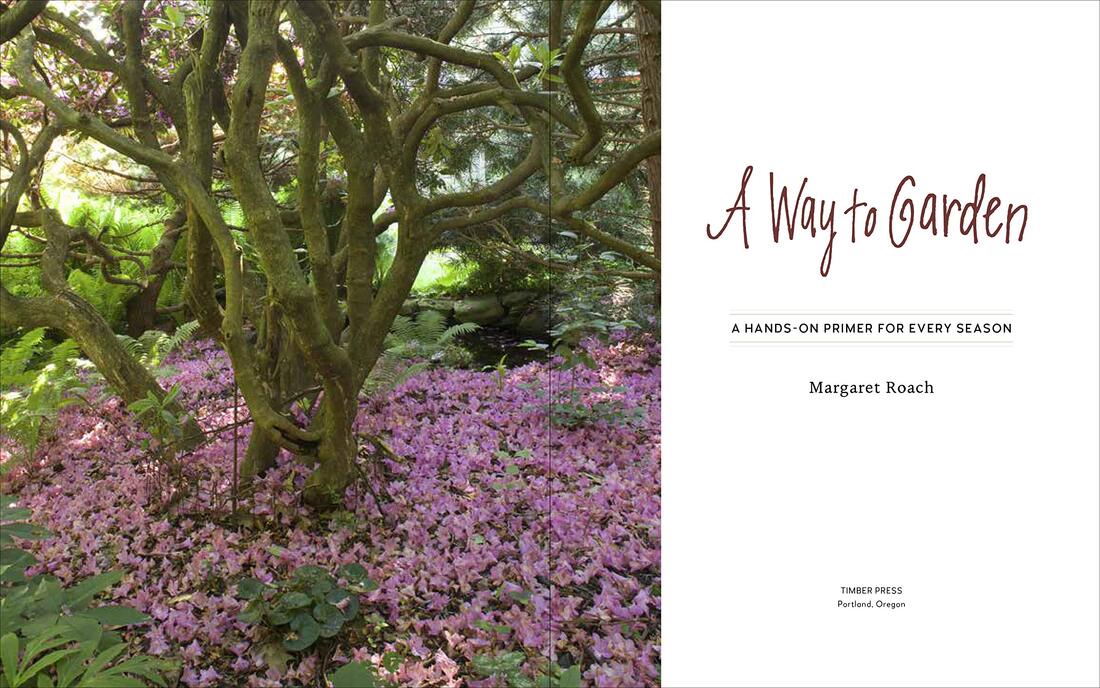 Conception. Birth. Youth. Adulthood. Senescence. Death & Afterlife. These stages of life that we experience are used in Margaret Roach's book to describe a plant's life cycle through the year. That in itself tells the reader this is a very special book. First published in 1998, this updated edition contains new information. Following are examples of her breadth of garden wisdom. CONCEPTION: In this first chapter of A Way to Garden, Margaret tackles two topics that can be intimidating to the gardener: scientific names and pruning. Her tips on keeping deer away will empower you to finally take the necessary action to keep deer out of your yard. One of my favorite design tips she shares is to think early, middle, late when placing online orders. For example, if you are buying a lilac, do your homework and order three varieties with overlapping bloom times to extend that captivating season of fragrance.  photo source: awaytogarden.com BIRTH: The earth begins to awaken in March and April, and it starts indoors with seeds. An extensive seed-starting schedule and tips will answer questions that you may have. And it is here that we learn of Margaret's obsession with gold foliage and the red spring-flowering Pulmonaria rubra. She takes the mystery out of pruning Hydrangea and Clematis, and suggests alternatives to Forsythia. I whole-heartedly agree with her encouragement to learn to ID weeds. 'I do not think we have a prayer of subduing or at least outsmarting an opponent we are barely acquainted with.' One of her go-to websites is the University of California weed ID. You can find it here. 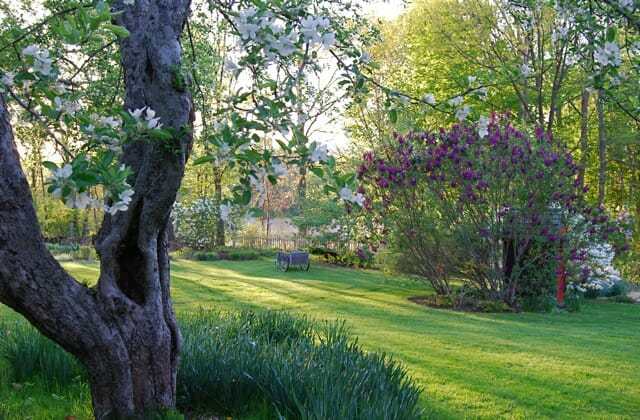 photo source: awaytogarden.com YOUTH: The world is in it's youthful stage in May and June when all is fresh, new, and in bloom. Margaret writes of transplanting, self-sowers, and growing tomatoes and potatoes. These are the salad days where there just isn't enough space or time to grow all the wonderful varieties available. Her suggestion is to choose a few and set up a seed trial. Grown side by side, you can observe which ones do best in the conditions in your garden and which appeal most to your taste buds. One to look for: 'Merlot' leaf lettuce. Margaret reminds us that we aren't the only ones interested in what's growing in our gardens - rabbits, deer, and woodchucks often get their fill at our expense. How to tell what's been munching? Look for these clues: deer leave jagged edges, rabbits cut at a clean 45 degree angle. In this chapter, Margaret encourages us to underplant trees with living groundcovers designed in what she calls 'garden mosaics'. Watch the video below to hear her describe this refreshing concept. The year continues through 'A Way to Garden' book in adult, senescence, death and afterlife stages. Each page offers observations, tips, and techniques gathered from years of experience bound together in this garden treasury. 'I garden because I cannot help myself'.
- Margaret Roach If you can relate to that, this book is for you. * - Tracy Hankwitz is a horticulturist, and General Manager of Burlington Garden Center 2/20/2020 13 Comments Landscaping for Wildlife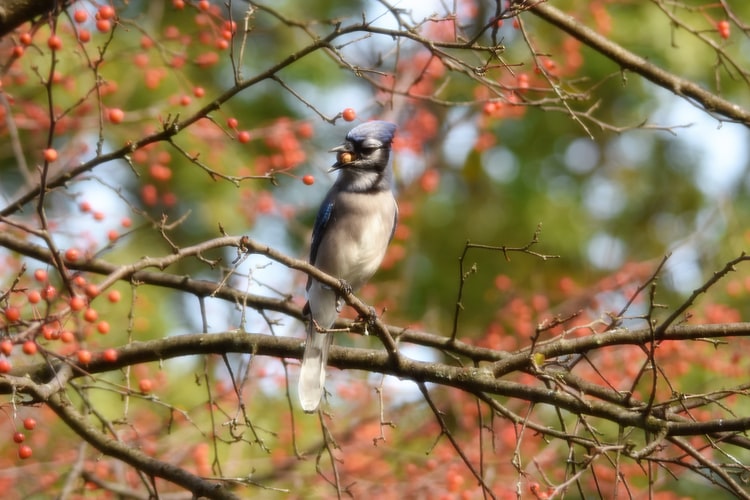 photo by Chris Chow Designing a wildlife-friendly garden may not be your biggest priority. You may have never even considered encouraging wildlife into your landscape or sharing your space with them. This quote by author Doug Tallamy may give you something to chew on:
'Chances are, you have never thought of your garden – indeed, of all the space on your property – as a wildlife preserve that represents the last chance we have for sustaining plants and animals that were once common throughout the U. S. But that is exactly the role our suburban landscapes are playing and will play even more into the near future.” ' Recently a few of our staff attended a presentation by David Drake, University of Wisconsin-Madison Division of Extension wildlife specialist in the Department of Forest and Wildlife Ecology. The talk was entitled Managing Wildlife and of course the expectation was that he would address how to keep rabbits out of the garden, squirrels out of the feeders, and raccoons out of the garbage. Instead, he gave a refreshing lecture on the benefits of drawing in beneficial wildlife such as birds, bats, snakes, frogs, toads, and turtles. Here are a few practical take-aways that we all can implement. Provide food, water, and shelter clustered in groups throughout the landscape. Feeders, shrubs with fruit, perennial seed heads planted near a birdbath or small pond check the first two boxes. Shelter can be in the form of bird houses, brush piles, and conifers. Plant for all four seasons and include trees and shrubs that have persistent winter berries. Install a bat house. Choose plants that have a purpose - like natives. Not sure what natives to plant? Check out the Native Plant Finder supported by the National Wildlife Federation to discover which indigenous plant species are the very best at supporting the insects that drive local food webs. A search of our 53105 zip code revealed that oak trees support over 300 species of butterflies, caterpillars, and moths. Goldenrod is the best native perennial supporting 102 different species. Be sure to check it out for the complete list. For more ideas, read Doug Tallamy's article here. Learn more about David Drake's work with urban wildlife here. 2/9/2020 0 Comments Award-winning Plants for 2020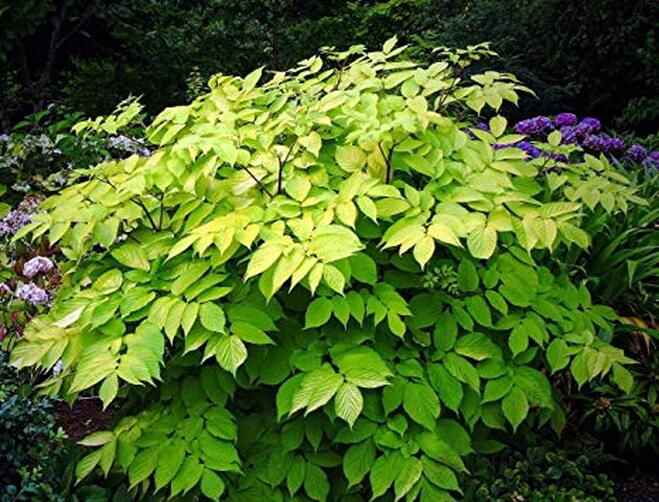 It's always fun to see the plants that receive special recognition each year. This year is especially interesting as the perennial of the year and the hosta of the year are both shade lovers and both have striking chartreuse coloring. The 2020 Perennial of the Year, awarded by the Perennial Plant Association is Aralia 'Sun King' (shown above). 'Sun King' is a beautiful addition to the shade garden growing at least 3 feet tall and wide every year. In late summer it produces tiny white flowers that are followed by deep purplish black berries (that are inedible). 'Sun King' is deer resistant and the flowers attract honeybees. 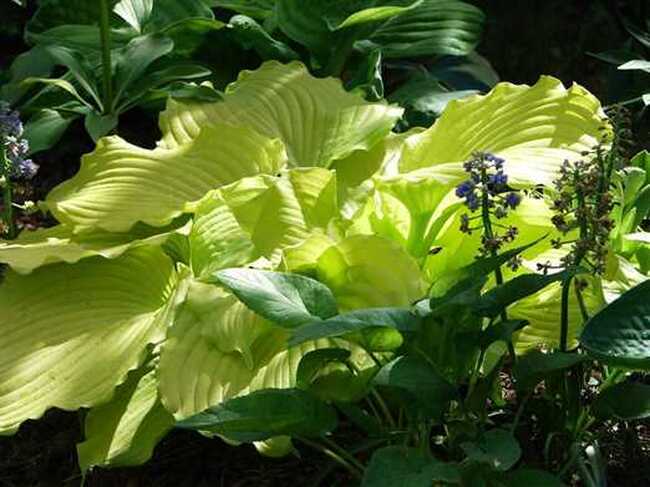 photo source: hostachoicegarden.com As you can see from the photo above, Hosta 'Dancing Queen' glows in the shade garden. Chosen by the American Hosta Association as this year's hosta of the year, the chartreuse foliage is stunning! The ruffled margins and deep, corrugated veins make her dance in the garden. She grows 22 inches tall and up to 40 inches wide. 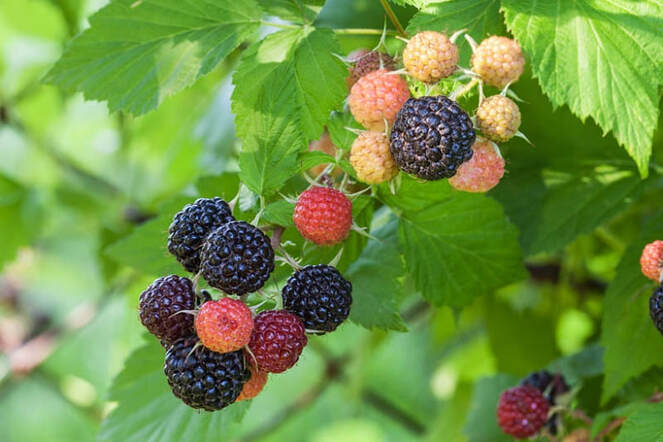 photo source: gardenia.net The International Herb Association is celebrating it's 25th anniversary this year and has chosen Rubus spp. as it's herb of the year. The Rubus family, which includes raspberries, blackberries, and other brambles, may not seem much like an herb, but the roots and canes have useful qualities in addition to the fruits. The leaves have medicinal qualities and have been used in teas. It's about time this yummy fruit gets some attention and is celebrated. 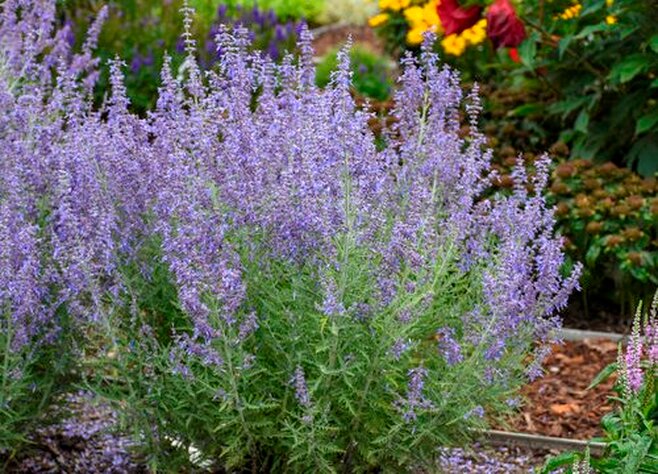 photo source: provenwinners.com Since 2016, Proven Winners has had their own set of award-winning plants. Those receiving top honors include Perovskia 'Denim and Lace' shown above. Euphorbia 'Diamond Frost'took top place among annuals, and Hydrangea 'Invincible Ruby' was chosen best among shrubs. To see their complete list of winners, click here. 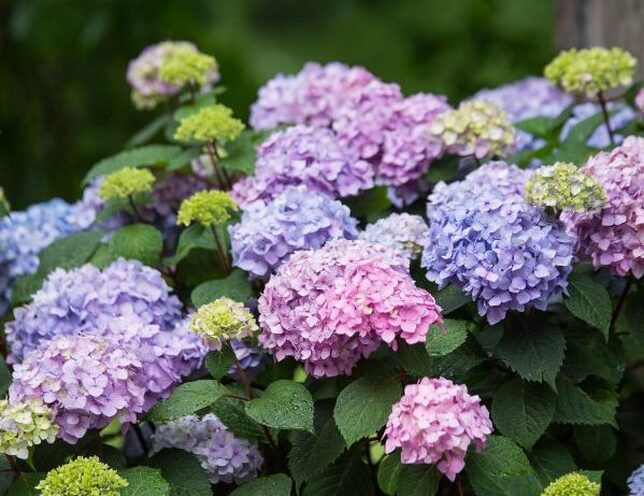 photo source: ngb.org Finally, every year the National Garden Bureau declares it's Year of the . . .' for each category including vegetables, annuals, herbs, perennials, and flowering shrubs. This year has been deemed the Year of the Hydrangea. We can't think of a better choice! To see their complete list of winners, click here.
2/9/2020 1 Comment Seed-Starting Do's & Don'ts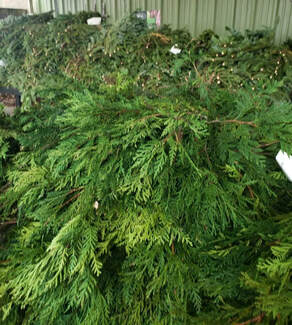 Seed Starting Do's and Don'ts
As Walt would say, 'Gardeners, start your engines'! It's time to begin gathering seeds and supplies for starting them indoors. It's a little early to begin sowing, but February is a good month for preparation. There is a wealth of information available on seed-starting techniques, but here are some basic do's and dont's: DO use a heat mat. It adds at least an extra 10 degrees of warmth right where you need it - the bottom of your seed tray which speeds germination. DO invest in good lighting. DON'T keep the germination dome on too long. As soon as you see them sprouting, remove the dome. DO read the seed packet. There's a wealth of helpful information there. Botanical Interests seed packets even have info on the inside of the packet. DON'T start your seeds too early. If you seedlings became too leggy in the past, it could be a lighting issue, but it could also be that you started them too early. Read the recommended start date on the packet. Many refer to the average last frost day as a benchmark which in our area is May 20. DO water from the bottom if possible. DO provide some air movement. Even a small fan near the seed trays will keep air moving and help prevent damping off. DO use a sterile seed starting mix. It's been formulated and screened to give seeds a good start. DON'T be afraid to try something new. If you tried starting seeds in the past without much success, give it another try. Analyze your conditions and determine what needs to be improved. If you are serious about starting vegetables, flowers, and herbs from seed this spring, you may be interested in taking Jo Gardener's online Master Seed Starting course. You can learn more about it at this link. 2/2/2020 4 Comments Gardening Intentions for 2020 How are you doing on your resolutions, intentions, commitments for 2020? Maybe you have long given that new year’s practice up, but I’m going to suggest making an intention for the new season of gardening that is approaching. As winter is in no hurry to leave yet, these quiet months are perfect for reflecting on new things you many want to try, new plants to grow, new areas to landscape, ways to improve the lawn, how to use fewer chemical inputs, or perhaps it’s time to downsize to a patio garden. 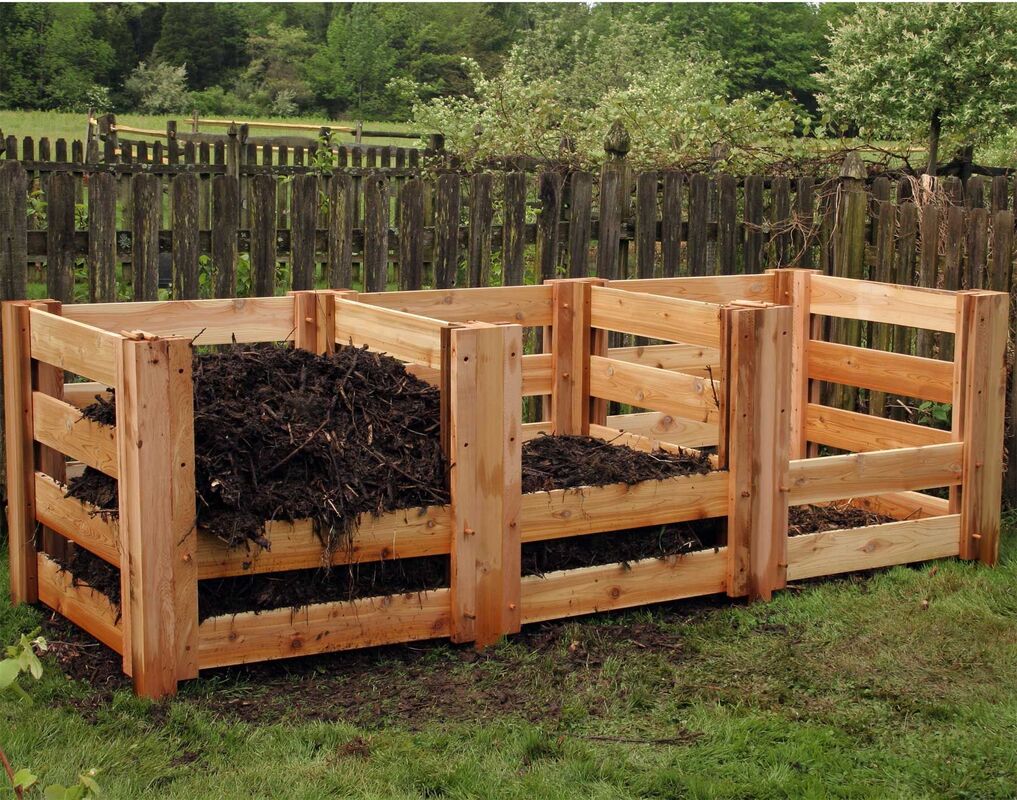 There are several movements within the world of horticulture that may interest you and give you some direction as to how you intend to spend your time growing this year. The first is one of regenerative gardening. It’s about being more conscientious and intentional about building up the soil we grow in. Composting, using natural and organic products, and no-till practices all aim to rebuild the soil’s organic matter and return nutrients to the soil. Healthy soil means healthy plants which lead to healthy food. Intention: Compost for a more sustainable garden. First step: Build or buy a compost bin. 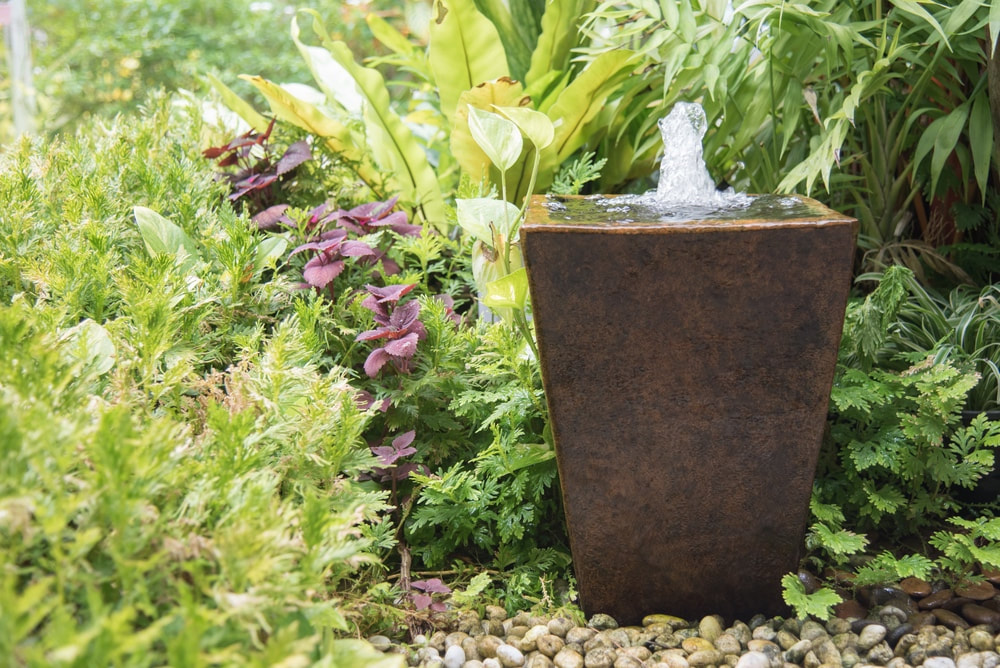 A second movement you may hear about this spring is small space gardening. Even in a large space, you can carve out a secluded spot in which to unwind. This can be done by seeking out dwarf varieties of plants which are becoming more prevalent. You may need to redesign an area if plants have become overgrown and crowded. Another strategy is to make use of vertical space and install a vertical garden. This is nothing new but there are new products available that make vertical gardening easy. Adding a small water feature can help sooth away the stress of the day. Intention: Create an outdoor space to relax in. First step: Analyze current landscape and consult with a designer. 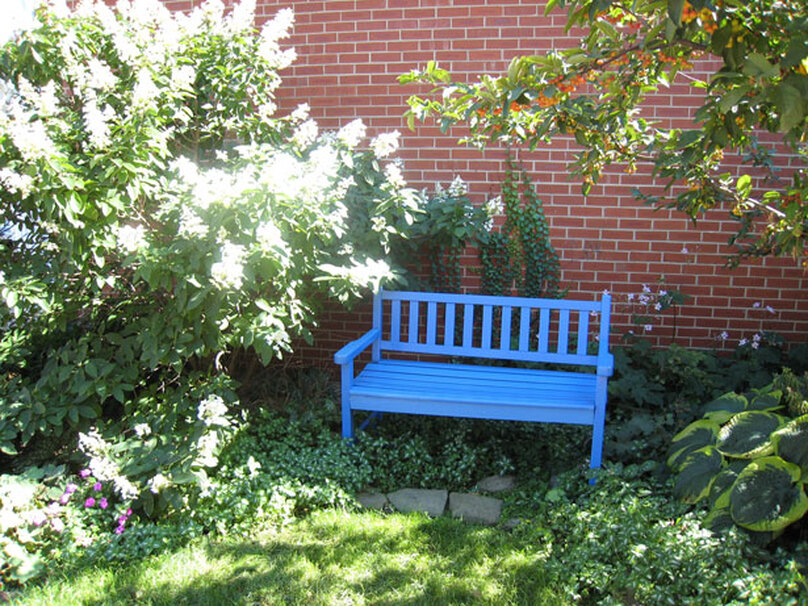 The color of the year is our next trend and it may surprise you. Classic blue. It’s already strong in interior design and fashion, but this is a great color to bring outside as well. Add blue pots to your outdoor garden, paint a trellis or fence, buy a blue birdbath, and grow plants with blue flowers. The intention isn’t to be trendy but adding color to your space can be reinvigorating. This hue of blue especially brings a sense of calmness. It’s solid and dependable in a time that isn’t so much. Intention: Add color to the garden. First step: Look up blue flowers easy to grow from seed. 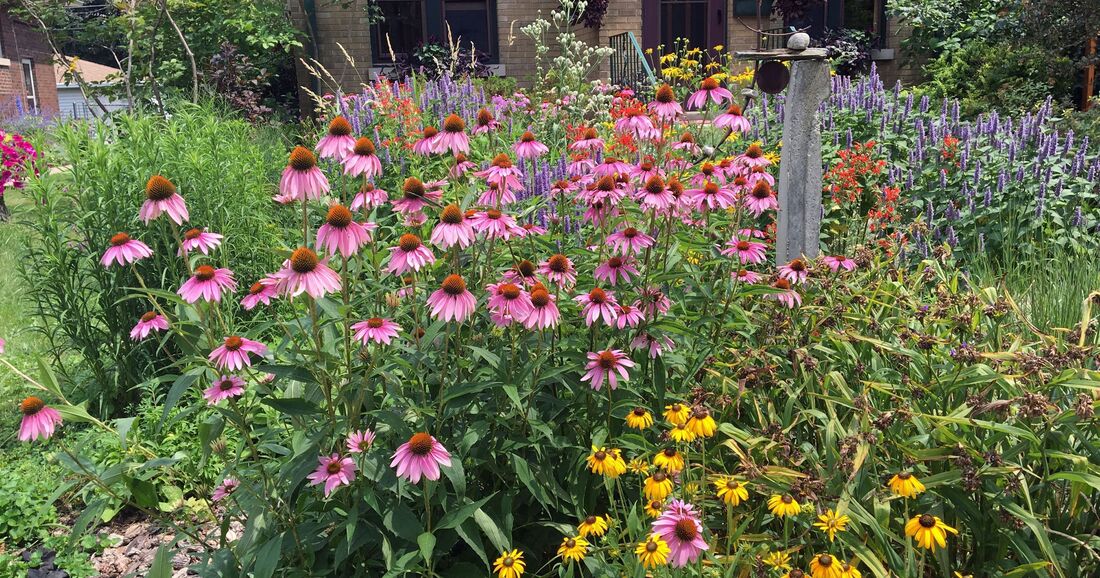 Finally, plant for wildlife. This movement is becoming stronger as more people become aware of the benefits of protecting pollinators from the many dangers they face. Grow plants that attract them and avoid using chemicals as much as possible. Natives are a good place to start. Intention: Plant a pollinator garden. First step: Find a list of pollinator plants and seek them out. Whether you try these intentions or not, hopefully you are thinking about the growing season that lies ahead and the possibilities it holds. As you do, you awaken the gardener within. Tracy Hankwitz is a horticulturist and general manager at Burlington Garden Center. For a list of pollinator plants and blue flowers to start from seed, go to www.burlingtongardencenter.com. 1/12/2020 3 Comments A New Way to Conquer Crabgrass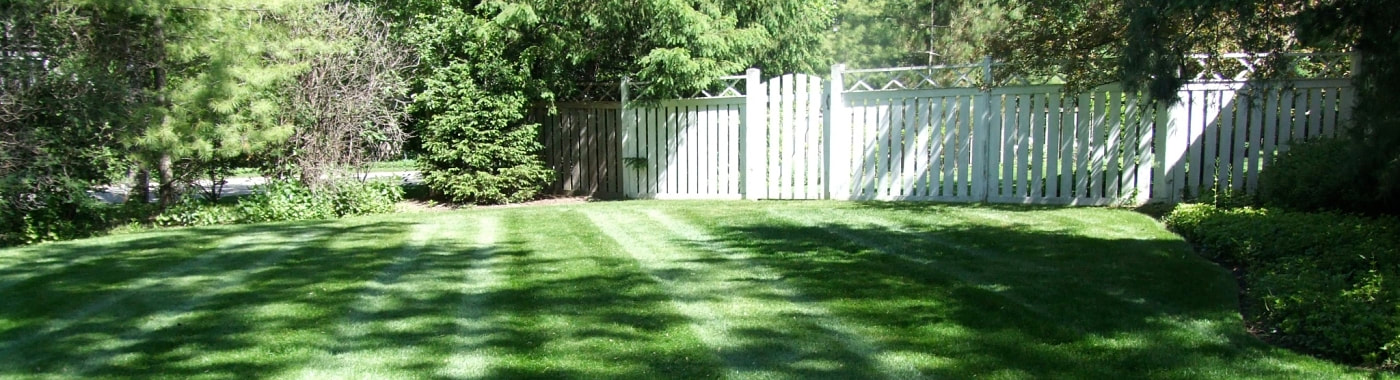 Ahhhh. The perfect lawn.
It's what some of us strive for: a lush, green carpet of bluegrass, rye, and fescue that makes you want to venture barefoot. Or perhaps your definition of the perfect lawn is one that contains dandelions and clover with hovering pollinators. Which ever ideal you relate to, most likely we all would agree that crabgrass is an unwanted weed in the lawn. There are effective ways to route out this annual monocot which seeds heavily if untreated, but not many are organic solutions. Up for a new method to try? Coming from the Cornell Cooperative Extension is an article explaining this sustainable technique called repetitive overseeding. For the last 15 years they have been demonstrating it's benefits on lawns in New York, and it works! Read the report here. If you are inclined to give it a try, let us know. We'll be happy to order perennial ryegrass or tall fescue seed needed for this project. 1/8/2020 2 Comments Nearly 30 Billion Birds Gone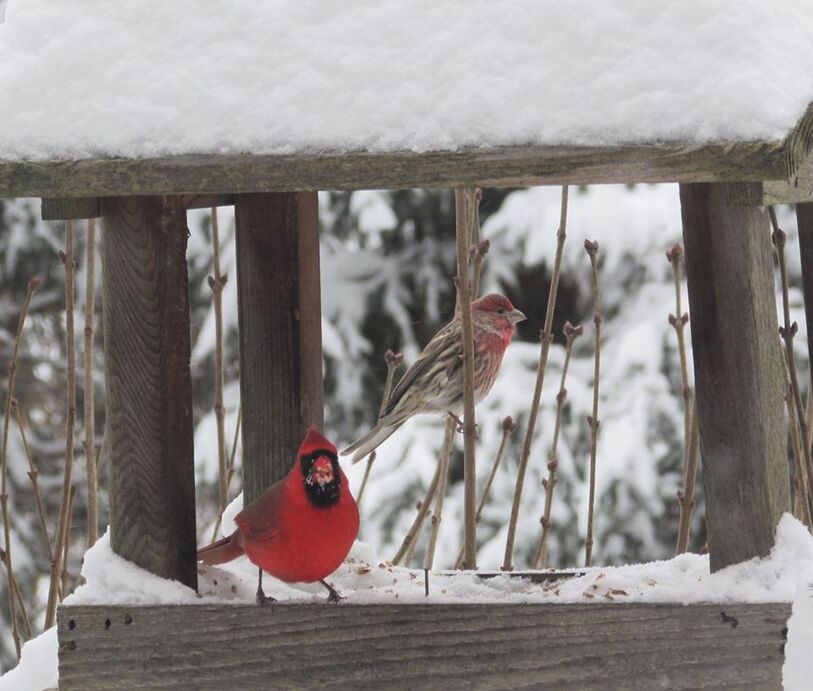 Decline in Bird Numbers The Cornell Lab of Ornithology recently published the astounding results of a study on bird populations. According to their report, the population of breeding adult birds in the United States and Canada has declined by a staggering 2.9 billion since 1970. These numbers took the birding community completely by surprise. One of the most startling facts from the study is that the sharp decline is completely across the board. One might expect that the declines represented birds that may already be threatened or endangered. However, they found that the affected birds came from almost all habitats, including some of the most common birds found in our own backyards, including cardinals, sparrows, juncos and more. The loss of important habitat, along with the wide-range use of agricultural pesticides have contributed greatly to the declines, especially for migrating birds that require a healthy habit in their breeding grounds, migration stops and their winter locations. 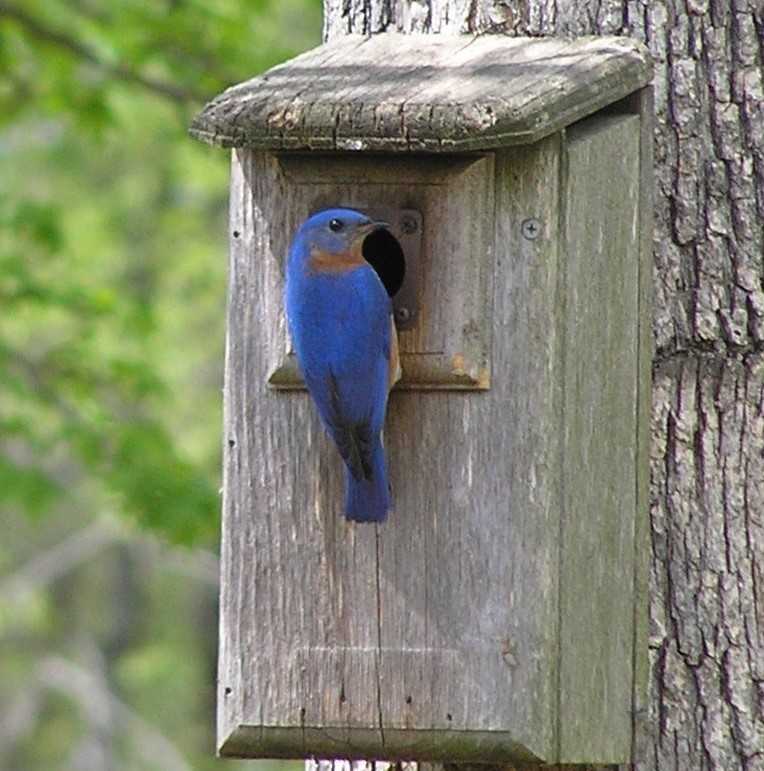 How Can You Help
What can you do to help? You can participate in programs like “Project FeederWatch” through the Cornell University Lab of Ornithology and help monitor bird species in your neighborhood. The Cornell Lab is the foremost source for all things related to wild birds. You can also start by transforming your backyard into a bird-friendly habitat. Add native plants to your landscape and resist the urge to cut down dead trees when you can. Provide nesting boxes on your property for birds like house wrens, chickadees, bluebirds, swallows, owls and woodpeckers. You can also help by putting up silhouettes on windows to cut down on bird vs. window deaths during both the spring and fall migrations. Join the BGC Bird Club Finally, you can become a member of the BGC Bird Club at Burlington Garden Center. You can send an email to [email protected] to sign up for the monthly newsletter or follow the BGC Bird Club on Facebook. The club shares photos and valuable information about species in and around the Burlington area, as well as seasonal tips for products that will help you to maximize your enjoyment of backyard birds. Contact Burlington Garden Center If you need some assistance with creating your bird-friendly habitat, you can contact Burlington Garden Center and have a designer visit your home. You will receive tips on where to place bird-friendly plants, as well as help in setting up the right bird feeders and/or water features. A 1-hour visit is $50 and includes a $10 coupon for the store. If you need to see a visual representation of what your habitat will look like, a computer-generated option is also available. Burlington Garden Center is dormant for the month of January through the middle of February, with regular hours starting up again on or about March 1st. In the meantime, don’t hesitate to contact us at the email address or phone number below to schedule an appointment, sign up for the newsletter or answer any of your gardening or backyard birding questions. Belinda Abendschein Landscape Designer/Backyard Bird Enthusiast Burlington Garden Center [email protected] 262.763.2153 10/3/2019 0 Comments Houseplants for Pet Parents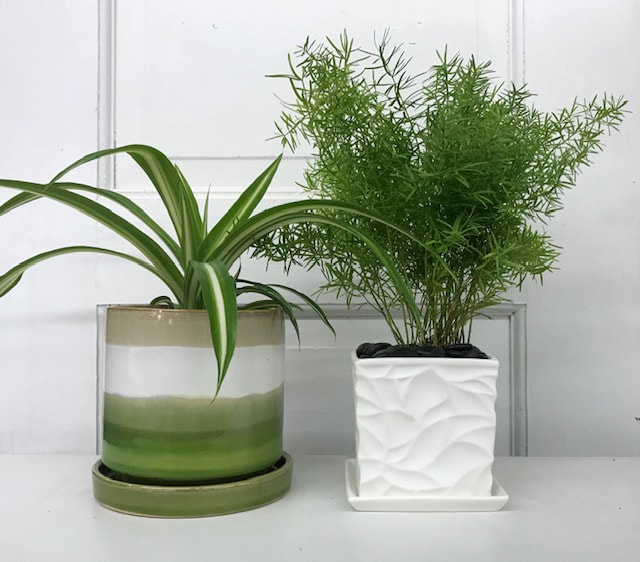 What was your first houseplant? Perhaps a spider plant, an African violet, or a succulent. Maybe it’s a Christmas cactus that was your grandmother’s. Nurturing living things brings us joy and purpose as they depend on us for their basic needs and houseplants are no exception. They can improve air quality as well as mood quality. Whether you are a new or a seasoned plant parent, houseplants are a fun way to decorate and try your hand had growing something. Even if every plant you’ve had has died, here’s an encouraging truth: everyone has watched a plant or two die under their care. It's not a matter of having a green thumb or not, it's more about finding the right plant that will thrive in the light and cultural conditions of the place in which you live. When choosing a houseplant, always consider the light factor first, then consider the plant's watering and fertilizing needs. If you are starting out, choose one that's easy to care for and is forgiving if you forget it’s weekly watering. Hoyas and Snake plants (Sansevaria) are two easy houseplants that can go 2-4 weeks between waterings and don’t need much light. It seems that we aren’t the only ones that love houseplants. Cats and dogs like to chew on them to calm upset tummies, to remedy nutritional deficiencies, or to use as a chew toy. Many houseplants are toxic to pets, but pet parents can also be plant parents. It’s always best to keep plants out of the reach of pets, but the following are recognized as being non-toxic to cats and dogs: African Violets (Saintpaulia ionantha) Air plants (Tilandsia) Christmas Cactus (Schlumbergera x buckleyi) Boston Fern (Nephrolepis exaltatan) Haworthia (Haworthia) Hibiscus (Hibiscus rosa-sinensis) Hoyas (Hoya carnosa) Chinese Money Plant (Pilea peperomioides) Spider plant (Chlorophytum comosum) The list of pet-safe houseplants is actually quite extensive - over 20 plants! So with a little homework, you CAN safely green up your living space for you and your pets. 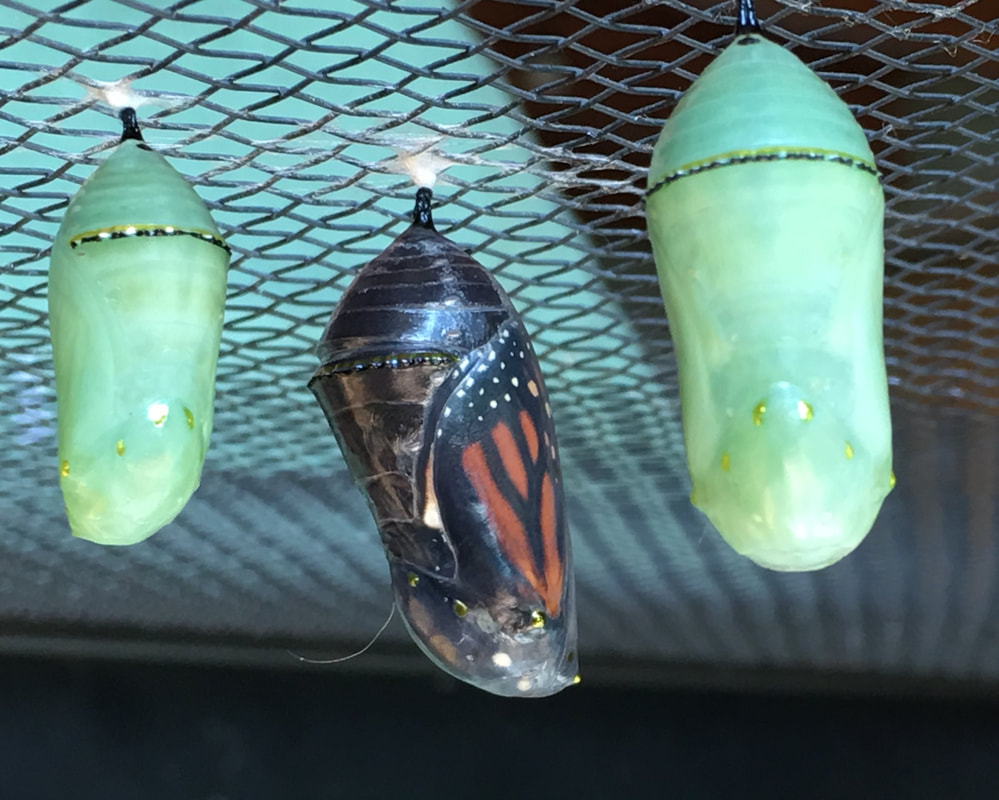 A Field Guide to Raising Butterflies
There is a magical process that takes place starting in late spring through fall in our area. It is the complete metamorphosis of a monarch caterpillar to a butterfly. Looking at the caterpillar, one of the first things that goes through your mind is how does this striped caterpillar become a butterfly? What part of the caterpillar is the wings? Which part is the thorax? Do the legs become wings? It is a wondrous process to witness the transition. When it breaks through the chrysalis and crawls out, the monarch's wings are completely crumpled up. The thorax or body is huge and filled with fluid. It’s first moments as a butterfly are spent pumping fluid from the thorax to fill and expand the wings. You have to be quick to capture the process. After it looks like a typical monarch, it will rest and occasionally flap its wings to dry them. A few years ago, I started collecting monarch eggs or small caterpillars and started bringing them inside. Why would I do that? One more thing to take care of, one more thing to worry about. But if you have heard the news, you know monarch populations have dropped off considerably. We have good years, but overall, there are fewer monarchs. There is a strong statement typically made about monarchs, that they produce a taste that is offensive or toxic to predators. That is true to an extent, but predators get around that sticky issue. First, ants, tree frogs and other predator insects will eat the entire egg. If the monarch survives to hatch, it may still be consumed by those insects and tree frogs. The bluebird has apparently learned how to eliminate the toxic part of the caterpillar so it can be fed to its hatchlings. That leads to the conundrum of who is more important; the bluebird or the monarch? No fear, by bringing the caterpillars inside your home or inside a protected enclosure, the monarch is protected from food predators. But more importantly it protects them from being infected with one of several diseases which also kills the monarch. So what can we do to make it easier for the monarch if you cannot provide them a protected home? Giving them plenty of native plants along with various forms of milkweed is a great way to start. Plants like Joe Pye Weed (Eupatorium or Eutrochium macrolatum), Meadow Blazing Star (Liatris ligulistylis), and Lead Plant (Amorpha canescens) along with many more, will feed your monarch butterfly once it is released. Milkweed or butterfly weed (Asclepias tuberosa) is important for the butterfly to lay eggs, so keep those within an area of your yard. If you find common milkweed too invasive, swamp milkweed(Asclepias incarnata) is an excellent substitute that is native to our area and is less invasive. We still have many monarchs to marvel at as summer slowly wanes. Look for chrysalises on Milkweed plants, watch the butterflies emerge, and make plans to actively raise them next year. Beth Martin is a Master Gardener here at Burlington Garden Center where you will find many plants helpful to the butterfly lifecycle. Feel free to contact Beth at [email protected]. 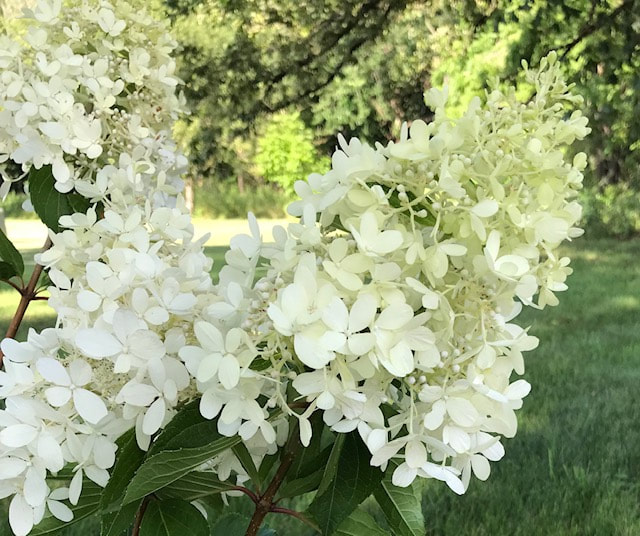 In August's early days, time seem to pause suspended in deep summer. The harvest stills momentarily, bees buzz on intoxicating nectar, and a relaxed mood dominates when it's too hot to do anything but sit in a hammock under the shade trees. It's during this time that landscapes are filled with the lacey blossoms of hydrangeas. Some have been blooming since June, but by now there should be a pretty display of white, blush, pink, mauve and even deep red varieties. The selection is vast and can be confusing as to which one to choose. Following is an explanation of hydrangea types. Read on to discover the one that is best for your landscape. 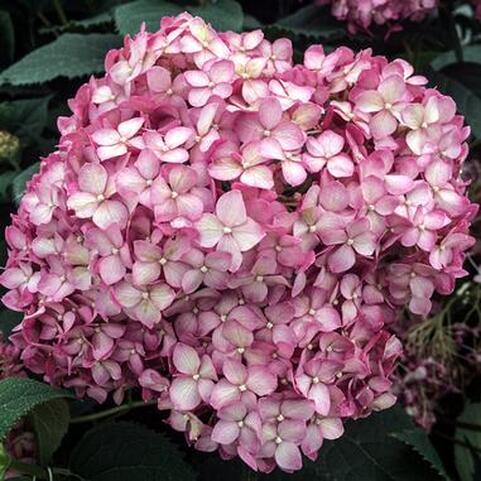 photo credit: www.midwestgroundcover.com Smooth Hydrangeas (Hydrangea arborescens) are better known as Anabelles and are native to the south eastern part of the US. They are the earliest blooming group typically showing flowers in June. Annabelle's family is quickly growing as more members are introduced such as 'Lil' Annie', 'Wee White', 'Incrediball', 'Invincibelle Spirit, and 'Ruby', and 'Mini Mauvette'. Newer versions of Annabelle have either sturdier stems, larger flowers, or a more compact habit. Flower colors are either white or pink and do not respond to soil pH levels. Most hydrangeas in this group can take sun or part shade. CARE TIP: flowers on new wood; prune back to 18" in late fall or early spring. 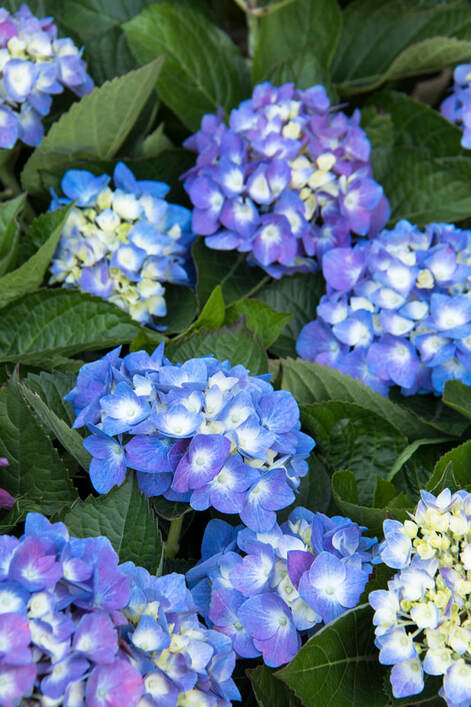 'Seaside Serenade' Cape Cod Hydrangea. photo credit: monrovia.com Big Leaf (Hydrangea macrophylla), also known as mopheads, have large colorful balls of florets. Plant in morning sun and afternoon shade, and playing with the soil pH can generally change the colors from blue, purple, and pink. Mature sizes range from 3-4' tall. CARE TIP: Most macrophyllas die back to the ground every year in our area. In spring, prune off dead wood and fertilize. Varieties to look for: any from the 'Cape Cod' series are hardy to zone 4 and are beautiful! 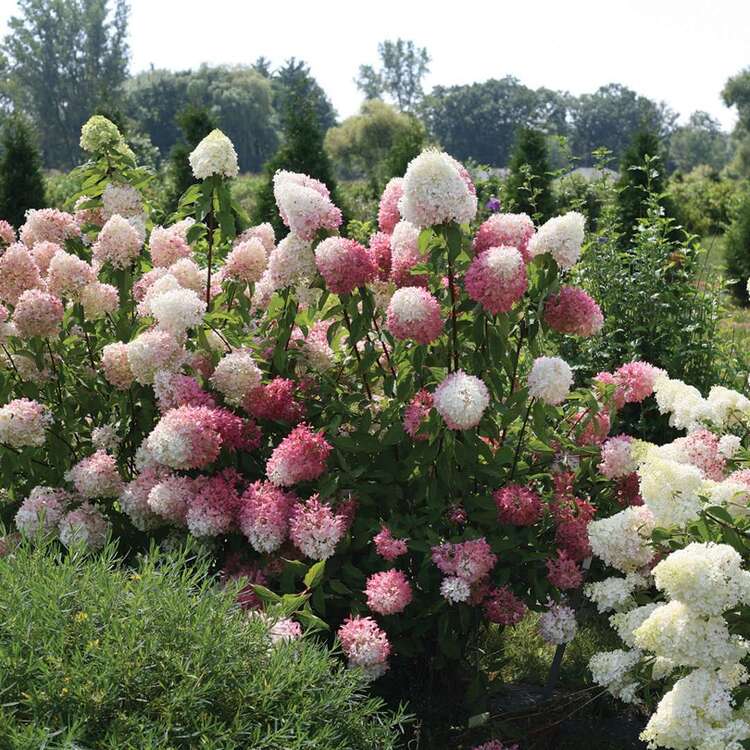 'Zinfin doll' Hydrangea; photo credit: springmeadownursery.com Panicle Hydrangeas (Hydrangea paniculata) are woody shrubs that can take six or more hours of sun, and have large, cone-shaped flowers ranging from white to shades of pink and red. 'Quick Fire' is the earliest blooming variety, but by August they all are spectacular! Need something compact? Look for 'Bobo', 'Little Quickfire', and 'Little Lime'. Other varieties can grow 6-8' tall making a great living screen. 'Zinfin Doll' and 'Pink Diamond' are among the fragrant varieties. Many panicle hydrangeas are now available in tree form making them the perfect focal point in a small space garden. CARE TIP: Prune back by one third in early spring. 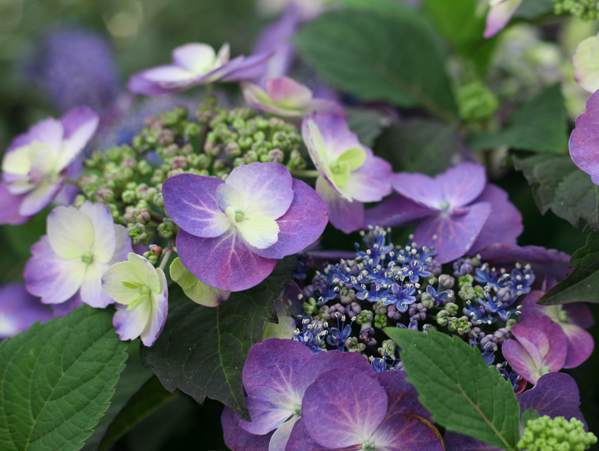 'Tough Stuff' Hydrangea; photo credit: www.lostintheflowers.com Mountain (Hydrangea serrata) is a smaller group of hydrangeas originating from the mountains of eastern Asia and are hardy to zone 5. The lace-cap flowers are purple or pink depending on the soil pH. Mountain hydrangeas like morning sun for best flowering which bloom on old and new wood ensuring new flowers all season long. Leaves from the 3'x3' shrubs are used in tea. A variety to look for is 'Tuff Stuff' from Proven Winners. 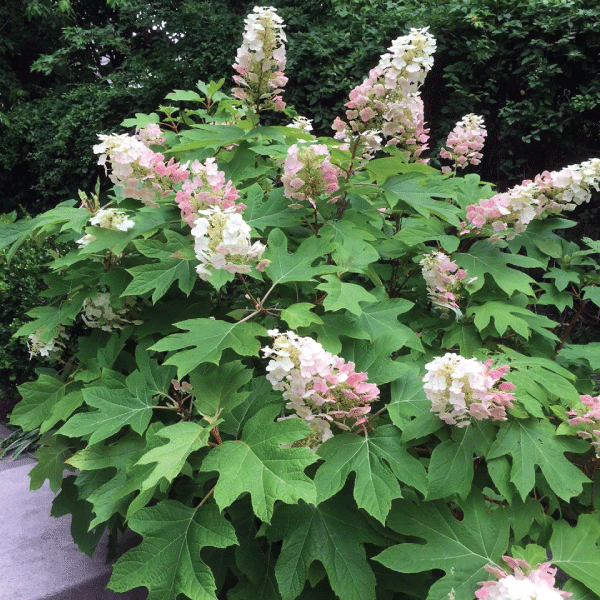 'Jetstream' Hydrangea The final group of hydrangeas is Oakleaf (Hydrangea quercifoia). The leaves resemble oak leaves, and the panicles of flowers are lovely lace-like florets in whites maturing to mauves. Leaves turn a deep burgundy in fall adding another element of interest. When grown in full sun to part shade, they can mature 4-6 feet in height. A variety to look for is 'Jetstream'.
Hydrangeas not only add grace to the late summer garden, but cut stems of most varieties can be enjoyed indoors fresh or dried. |
Search by typing & pressing enter